
Well, hopefully it is a short down and things progress well over the next several build days.
Stupid wastegates.
Build thread
-
speedjunkie

- Senior Member
- Posts: 5368
- Joined: Wed Jan 02, 2008 9:14
- Location: Colorado Springs
- Contact:
Thanks! I hope it's not down too much longer either.
I picked up some rubber hose at lunch, some that should work with my AN fittings. Maybe I'll build the vacuum and coolant lines for the wastegates tonight.
I'm checking on the drain flanges for the turbo but ATP wouldn't guarantee they'll fit lol. I'll probably pick them up anyway (I think they'll work) but I'm going to keep looking just in case. It just sucks cause those drain flanges are $30 each. And if they don't end up working...YIKES.
I also ordered some larger fire sleeve this morning too. So maybe sometime NEXT week I can get it back on the road lol.
I picked up some rubber hose at lunch, some that should work with my AN fittings. Maybe I'll build the vacuum and coolant lines for the wastegates tonight.
I'm checking on the drain flanges for the turbo but ATP wouldn't guarantee they'll fit lol. I'll probably pick them up anyway (I think they'll work) but I'm going to keep looking just in case. It just sucks cause those drain flanges are $30 each. And if they don't end up working...YIKES.
I also ordered some larger fire sleeve this morning too. So maybe sometime NEXT week I can get it back on the road lol.

-
speedjunkie
- Senior Member
- Posts: 5368
- Joined: Wed Jan 02, 2008 9:14
- Location: Colorado Springs
- Contact:
Alright here are some photos from the past several days because I didn't feel like staying up to post them before lol.
The box of fittings that was $330...

Wrapped the LIM...

Put the heat shield on the firewall...
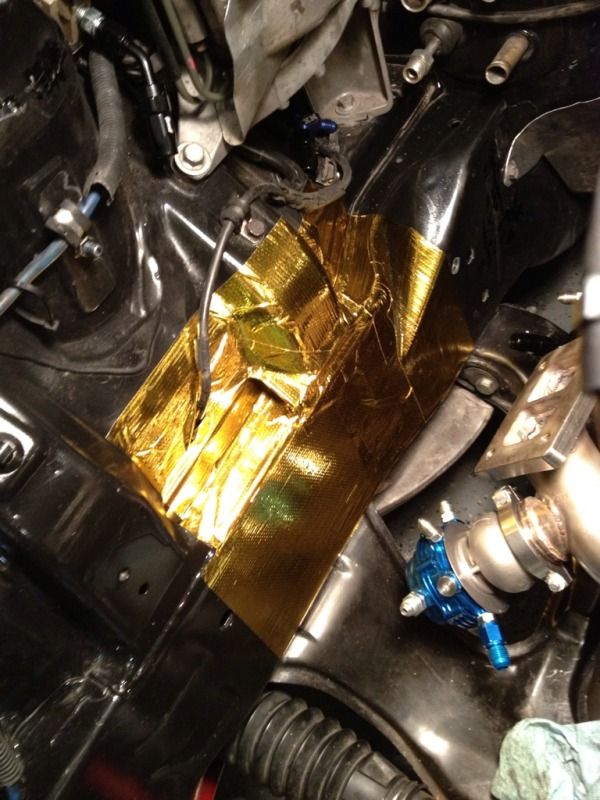
Made the first line, the coolant line from the rear wastegate to the front one...
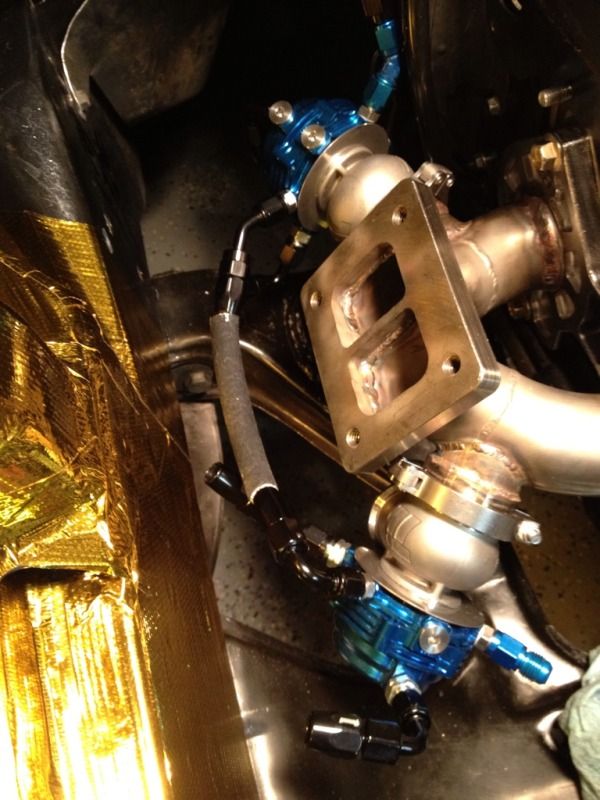
Made two more lines, from the wastegate vent to the COM port on the boost control solenoid...
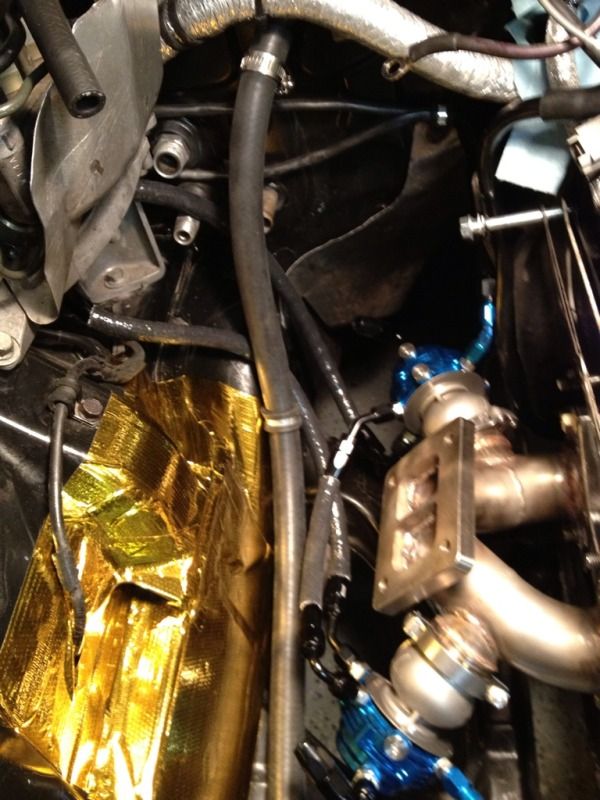
And how it sits right now...
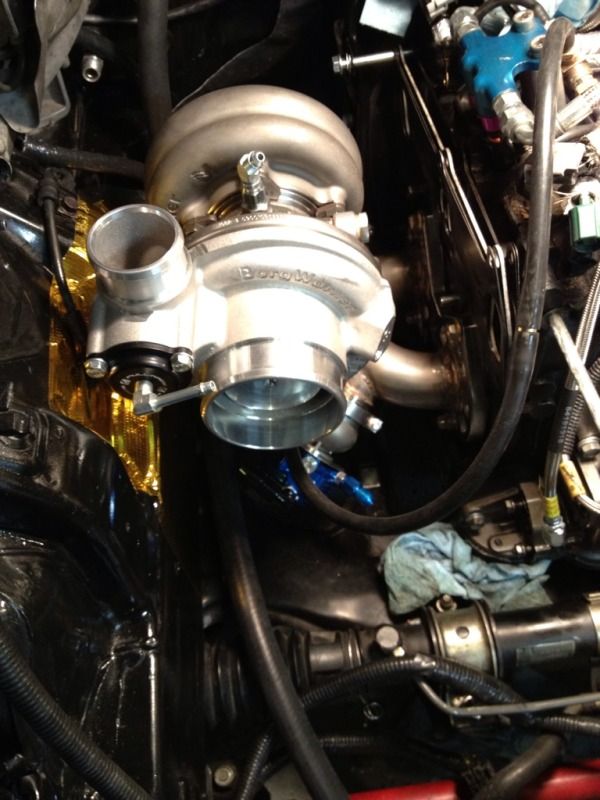
The box of fittings that was $330...
Wrapped the LIM...
Put the heat shield on the firewall...
Made the first line, the coolant line from the rear wastegate to the front one...
Made two more lines, from the wastegate vent to the COM port on the boost control solenoid...
And how it sits right now...

-
chickenwafer
- Posts: 2515
- Joined: Wed Mar 11, 2009 9:14
- Location: Greeley

-
speedjunkie
- Senior Member
- Posts: 5368
- Joined: Wed Jan 02, 2008 9:14
- Location: Colorado Springs
- Contact:
JTurton7 wrote:
I love that episode LOL.
I totally forgot to pick up that oring again yesterday LOL!
chickenwafer wrote:Looks good man. You have a ton more room than I do for routing the w/g coolant lines.
Yeah there's quite a bit of room. Now if I could just get all the parts I need like yesterday, I can get this damn thing done.
I can have a good night one of these nights, right? ANOTHER shitty night tonight. Well, kinda.
I picked up the IC and dump tubes today. The dump tubes fit great. The IC still won't work the way it is now, but I'll post pics on that in a minute.
I spent the first couple hours mocking up the radiator where I want it so I can get someone to weld on the new mounts. I don't have any pics of this process. Well, I do have one pic...

Sliced my thumb open on the metal ruler I have, trying to wipe off sharpie marking LOL! It's not too bad, but it did cut pretty deep and at an angle. ARGH!
Anyway, even after someone welds the new front mounts on, I still have to make the rear mounts. Oh well, I'll just heat up and twist some steel strips. I'll probably do this for the front of the IC too.
Now on to the IC. Here is the driver's side of it, modified so it clears the 2-cycle tank...

And here's why it won't work...

The power steering pulley isn't exactly where it will be, but it won't be pushed back any, which is the problem. I actually asked him to route it out further up onto the tank so it would clear, but I forgot about that when I picked it up.
He hadn't turned the other side yet when I picked it up, but he did it right then and there...
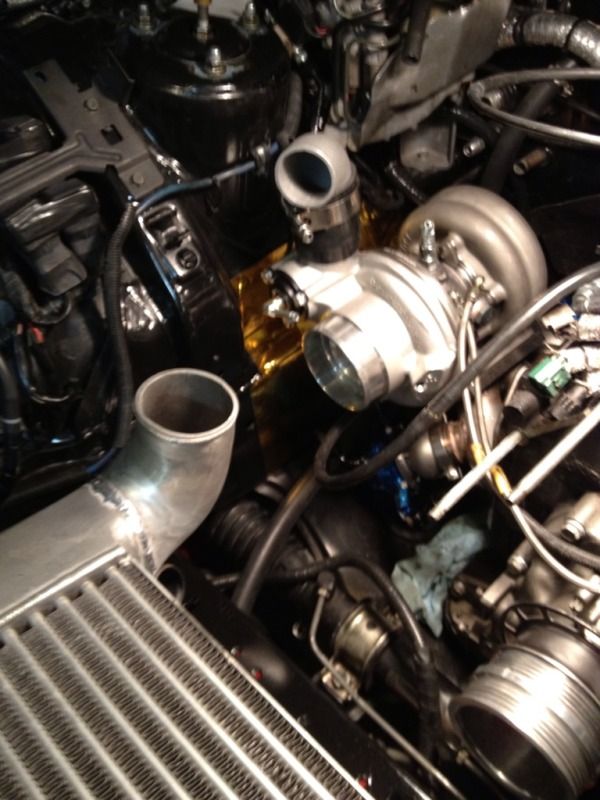
I wanted it to angle a bit more to the turbo, but it'll be alright I guess.
And here is the IC somewhat where it will be...

After I got this about where I wanted it, I started cutting up the intake pipe and mocked that up. I didn't get any pics of that though either.
Here's the rear dump tube...
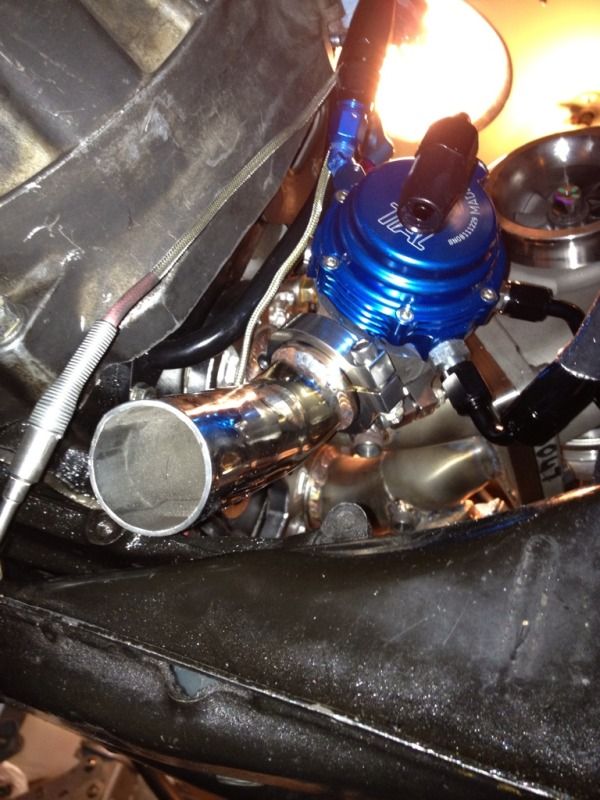
And the front dump tube...
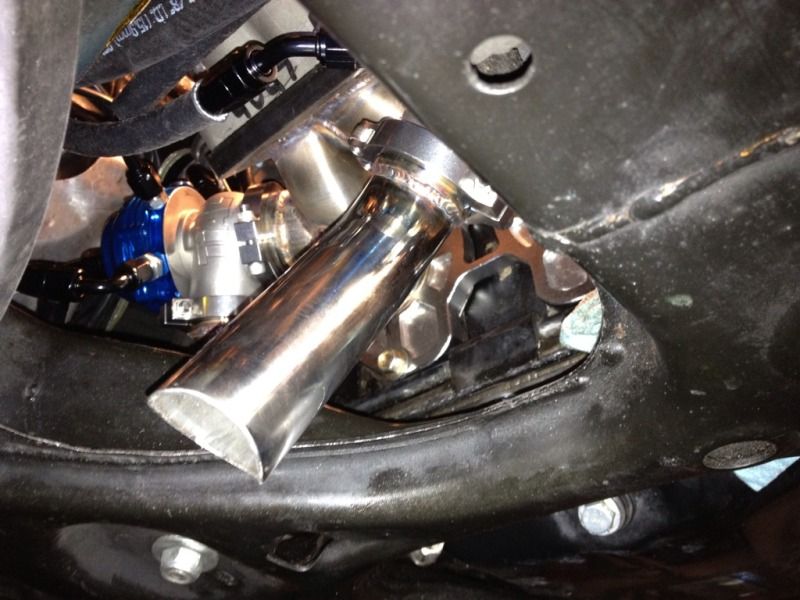
It's kinda low, so I turned it up as much as I could while still not having a problem taking out the manifold without removing the dump tube (hopefully) and have room to get my hands around it to put in the EGT sensors too.
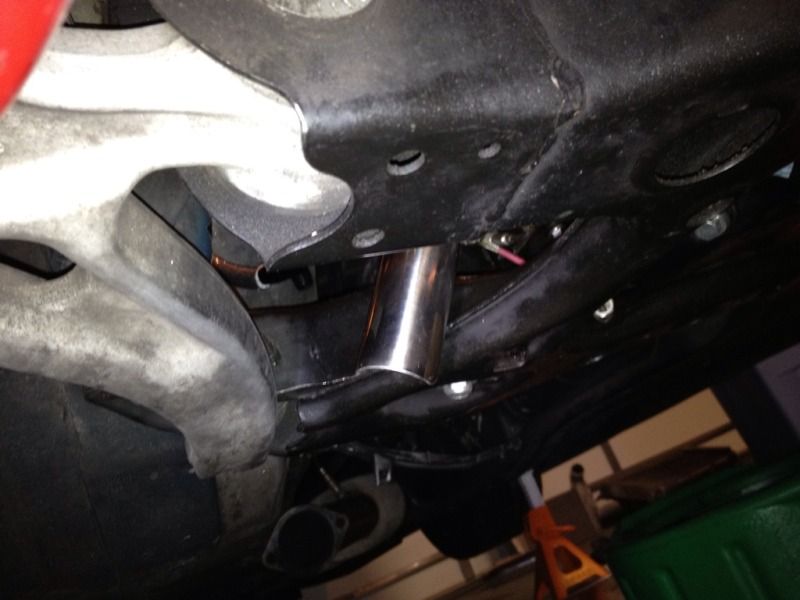
After that I decided to take the EGT sensor compression fittings out of the old manifold and put them in the new one. Well, guess how my night's going...

I already ordered two new ones haha.
Then I tried to bend my banjo fitting for the coolant line, to clear the coolant plug below it...like I said, guess how my night's going...

I was going to do it in the vise, but I decided to just use the turbo. I had it in there and heating it up with a torch, but realized I could burn up the whole car, so I took the torch out of the equation and just bent it. It was going well at first. I'm going to see if the welder can weld it back together maybe with an angle and maybe a bit longer. I wanted to use the old fitting I had already used before, but I couldn't find it. Then guess what...

FOUND IT! Too late. I already ordered two new ones a couple days ago, so I have plenty, as long as I don't wreck any more lol.
Ugh, I'm going to bed.
-
RX-7 Chris
- Posts: 7800
- Joined: Tue Oct 02, 2007 9:14
- Location: Colorado Springs
- Contact:
I like my simple cars.
1984 RX-7 GSL-SE [size=84]My restomod project[/SIZE]
1964 Ford Galaxie 500XL flat black w/ white interior, 2 dr fastback, 390 thunderbird, C6 auto, 2500 rpm high stall converter, shift kit, AC, Holley 750 cfm
[size=100]RIP 1983 RX-7[/SIZE]
My Car Blog
-
speedjunkie
- Senior Member
- Posts: 5368
- Joined: Wed Jan 02, 2008 9:14
- Location: Colorado Springs
- Contact:
-
chickenwafer
- Posts: 2515
- Joined: Wed Mar 11, 2009 9:14
- Location: Greeley
-
speedjunkie
- Senior Member
- Posts: 5368
- Joined: Wed Jan 02, 2008 9:14
- Location: Colorado Springs
- Contact:
I don't remember the name of the company but I'm looking for it. It's great when you look through all your email and can't find any info lol.
EDIT: AHA! Found it...
http://www.extremepsi.com/store/product.php?productid=22353&cat=1626&page=1
EDIT: AHA! Found it...
http://www.extremepsi.com/store/product.php?productid=22353&cat=1626&page=1
-
speedjunkie
- Senior Member
- Posts: 5368
- Joined: Wed Jan 02, 2008 9:14
- Location: Colorado Springs
- Contact:
Saturday I took my coolant fitting that I broke down to Tom's and he drilled out the broken portion, then he took some tubing he had and bent it and welded it into the banjo fitting, and even flared the end of the tube to hold the hose on. Came out GREAT! I'll take a picture of it and post it up tonight.
I got my radiator, IC and intake pipe back from IAT Welding too, he works FAST. And it was $80 for all that. So tonight I'm going to mock up my radiator with the new mounting tabs and drill the holes so I can mount it, and then make new mounts for the rear of it. Then I'm going to work on mounting my IC and making mounting brackets for the front of it. Then I'll modify some pipes (or buy new ones if I have to) and after all that is done I'll get the water injection bung welded onto the driver's side piping and possibly a vacuum nipple if needed welded onto the turbo side piping, then get all that and the IC powercoated black again...or I'll just wrap it in some kind of heat shielding. But I'll probably have it coated again. And once all that is finished getting coated I should be finished with all the other stuff and be able to install the IC, fill it with coolant and fire it up. WOOHOO!!
Oh, I ordered a filter today too...K&N part# RU-1785...has a 3.5" inlet, it's 5" diameter and 8.5" long, and according to K&N it flows 754 CFM, so if it doesn't flow enough for the turbo, it should be pretty darn close. Regardless, it's all I'll be able to fit into the area next to the IC, so it'll have to work lol.
And I just remembered, I still need to modify my power steering cooling line, but that'll be after I install the radiator and possibly the IC too. I was planning on mounting it into the ducting on the VMIC but it might be a while before I do the ducting, so for now I'll probably mount it on the crossmember I'm putting back in and it'll get air from between the radiator and IC. At some point I plan on blocking off the gap between them with some sheet metal, but we'll see when that happens lol.
I got my radiator, IC and intake pipe back from IAT Welding too, he works FAST. And it was $80 for all that. So tonight I'm going to mock up my radiator with the new mounting tabs and drill the holes so I can mount it, and then make new mounts for the rear of it. Then I'm going to work on mounting my IC and making mounting brackets for the front of it. Then I'll modify some pipes (or buy new ones if I have to) and after all that is done I'll get the water injection bung welded onto the driver's side piping and possibly a vacuum nipple if needed welded onto the turbo side piping, then get all that and the IC powercoated black again...or I'll just wrap it in some kind of heat shielding. But I'll probably have it coated again. And once all that is finished getting coated I should be finished with all the other stuff and be able to install the IC, fill it with coolant and fire it up. WOOHOO!!
Oh, I ordered a filter today too...K&N part# RU-1785...has a 3.5" inlet, it's 5" diameter and 8.5" long, and according to K&N it flows 754 CFM, so if it doesn't flow enough for the turbo, it should be pretty darn close. Regardless, it's all I'll be able to fit into the area next to the IC, so it'll have to work lol.
And I just remembered, I still need to modify my power steering cooling line, but that'll be after I install the radiator and possibly the IC too. I was planning on mounting it into the ducting on the VMIC but it might be a while before I do the ducting, so for now I'll probably mount it on the crossmember I'm putting back in and it'll get air from between the radiator and IC. At some point I plan on blocking off the gap between them with some sheet metal, but we'll see when that happens lol.

-
speedjunkie
- Senior Member
- Posts: 5368
- Joined: Wed Jan 02, 2008 9:14
- Location: Colorado Springs
- Contact:
-
speedjunkie
- Senior Member
- Posts: 5368
- Joined: Wed Jan 02, 2008 9:14
- Location: Colorado Springs
- Contact:
Tonight was so-so I guess. Actually it was good with a little bit of bad lol.
First I mocked up the radiator and drilled the holes, mounted it with the new tabs and put some grommets between the tabs and the frame to dampen vibrations. Later I worked on making the other mounting tabs, after I worked on some other stuff. This thing is mounted pretty solid.


To make the rear mount pieces, I just cut up some steel strips, twisted them 90 degrees, drilled some holes and put them on, again with some grommets to dampen vibrations.


Then I took off the turbo and put the LIM and UIM on to see how off the oil catch can bracket was, and surprisingly enough it doesn't even contact the UIM. So I won't have to cut off the top or anything, I'll just leave it probably.


Before I forget, here is the coolant banjo fitting that Tom modified for me.
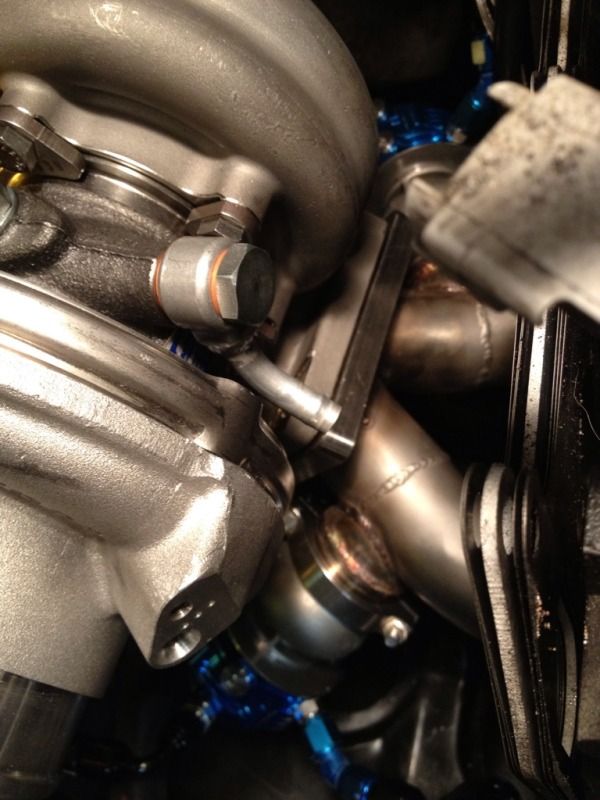
I replaced the heater hose (because the end ripped off the old one and it wasn't long enough to reuse...(DO NOT let someone powder coat where you will put a hose and clamp it down LOL). You can see it hanging down the passenger side of the engine bay here, next to the turbo manifold wrapped in heat shielding...

Then I made the front mounts for the IC, the same way as the rear radiator mounts.


I still need to make the rear mounts, but I'm looking into the routing of the piping first to make sure it clears the PS pulley. I'm going to make those with the same steel strips but I'll just bend them into 'L's and mount them to the crossmember. This looks like it should be a 90 degree pipe, but I might be able to use the 45 degree I already have. The other side might be kinda interesting from the turbo to IC lol.

I mounted up the intake pipe and decided I'm going to drill a hole in it and mount a small nipple to use for the OMP injectors, then I'll use the port on the turbo for the boost controller solenoid like they had it set up originally. And for that I'm getting another 4AN 10mm x 1.0 fitting and using an AN fitting. I'll order those tonight.
And now for the crappy part...looks like I'm with Dave, and I'll be waiting to run water to my wastegates. I'm just not meant to yet I guess.

No matter what I get or do, it just won't clear the OMP. So for now, I think I'm gonna just get some 4AN caps and cap off the water ports and just run a rubber hose from the rear of the engine to the water pump housing like it was before. At least this way I can go ahead and start putting this stuff back together since most of the parts I'm waiting on deal with that. So tomorrow night I'll probably make some good progress on this, getting it back together. I'm still thinking about powder coating the IC and piping too though.
First I mocked up the radiator and drilled the holes, mounted it with the new tabs and put some grommets between the tabs and the frame to dampen vibrations. Later I worked on making the other mounting tabs, after I worked on some other stuff. This thing is mounted pretty solid.
To make the rear mount pieces, I just cut up some steel strips, twisted them 90 degrees, drilled some holes and put them on, again with some grommets to dampen vibrations.
Then I took off the turbo and put the LIM and UIM on to see how off the oil catch can bracket was, and surprisingly enough it doesn't even contact the UIM. So I won't have to cut off the top or anything, I'll just leave it probably.
Before I forget, here is the coolant banjo fitting that Tom modified for me.
I replaced the heater hose (because the end ripped off the old one and it wasn't long enough to reuse...(DO NOT let someone powder coat where you will put a hose and clamp it down LOL). You can see it hanging down the passenger side of the engine bay here, next to the turbo manifold wrapped in heat shielding...
Then I made the front mounts for the IC, the same way as the rear radiator mounts.
I still need to make the rear mounts, but I'm looking into the routing of the piping first to make sure it clears the PS pulley. I'm going to make those with the same steel strips but I'll just bend them into 'L's and mount them to the crossmember. This looks like it should be a 90 degree pipe, but I might be able to use the 45 degree I already have. The other side might be kinda interesting from the turbo to IC lol.
I mounted up the intake pipe and decided I'm going to drill a hole in it and mount a small nipple to use for the OMP injectors, then I'll use the port on the turbo for the boost controller solenoid like they had it set up originally. And for that I'm getting another 4AN 10mm x 1.0 fitting and using an AN fitting. I'll order those tonight.
And now for the crappy part...looks like I'm with Dave, and I'll be waiting to run water to my wastegates. I'm just not meant to yet I guess.
No matter what I get or do, it just won't clear the OMP. So for now, I think I'm gonna just get some 4AN caps and cap off the water ports and just run a rubber hose from the rear of the engine to the water pump housing like it was before. At least this way I can go ahead and start putting this stuff back together since most of the parts I'm waiting on deal with that. So tomorrow night I'll probably make some good progress on this, getting it back together. I'm still thinking about powder coating the IC and piping too though.
Who is online
Users browsing this forum: No registered users and 69 guests