Yeah that might work lol. I just hope people know their dances and don't accidentally do the broken apex seal dance.
Well I'd need a mock engine on my work bench to make one for you lol.
Build thread
-
speedjunkie

- Senior Member
- Posts: 5292
- Joined: Wed Jan 02, 2008 9:14
- Location: Colorado Springs
- Contact:
Re: Build thread
I think you guys are on the right track.
If you could....and by no means am I an electrical guy. I would first wire battery to starter directly.
if good, you know its something between the starter and battery.
If bad.....starter or battery issue right?
Just wondering, could this be a bad alternator?
Symptoms of a Bad Alternator, alternator problems
Symptoms of a bad alternator include hard or slow cranking when you try to start your vehicle, lights that seem too dim, and of course the red BATT, ALT, or GEN light glowing on the dash. (A friend of mine once remarked that she'd never seen an alternator warning light on a car, just a "Battery" light. I told her the battery light was really an alternator trouble light. It means the battery is not being charged.)
NOTE: You can have an alternator problem WITHOUT the "alt", "bat", or "gen" light coming on. The alternator itself is responsible for turning this light on and off (voltage regulator, actually, inside the alternator on most cars), so it can go bad and not turn the light on. If you think you have a bad alternator, diagnose your problems with the alternator testing procedures below.
A Properly functioning Alternator
If your car starts and runs, or if the engine turns over normally when you try to start it but it won't actually run, there is probably nothing wrong with your alternator, starter , or battery.
Your alternator is probably functioning properly.
-
speedjunkie
- Senior Member
- Posts: 5292
- Joined: Wed Jan 02, 2008 9:14
- Location: Colorado Springs
- Contact:
Re: Build thread
The battery is wired directly to the starter aside from the circuit breaker and the bulkhead I made. I plan on checking to make sure the power cable isn't grounding to chassis somehow, but I'd think the slow cranking would happen every time if that were the case.
I meant to check the alternator before but I always forgot. Maybe I'll swap that tomorrow and see. I believe I still have an extra one in the shed. Brad told me to put the multimeter leads on the ignition switch and starter and I'll see how much power is dropping but I need to find extensions or longer leads.
I realized today that I shouldn't be starting the car yet anyway. I don't have an OMP tank yet, and that would be ok since I'm premixing except that I don't want to cavitate the pump, and I REALLY don't feel like pulling the UIM up so I can disconnect the harness. Hopefully Mitch will be over Saturday to make the tank and fab all the piping. And David said the brake calipers and ducting plates are finished but the suspension arms are still leaking grease so he figures they'll be ready by Friday. Maybe another week I'm down? Lol
-
$crillaTor

- Senior Member
- Posts: 153
- Joined: Sat Jun 15, 2013 9:14
- Location: Colorado Springs
Re: Build thread
Let me know if you don't have a spare alternator. I have one you can borrow.
-
speedjunkie
- Senior Member
- Posts: 5292
- Joined: Wed Jan 02, 2008 9:14
- Location: Colorado Springs
- Contact:
Re: Build thread
Ok thanks! I'm pretty sure I saw one in my shed but I'll let you know tomorrow.
-
RX-7 Chris
- Posts: 7800
- Joined: Tue Oct 02, 2007 9:14
- Location: Colorado Springs
- Contact:
Re: Build thread
Do you need me to stop by tomorrow?
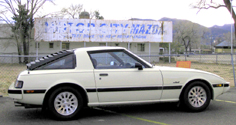
1984 RX-7 GSL-SE [size=84]My restomod project[/SIZE]
1964 Ford Galaxie 500XL flat black w/ white interior, 2 dr fastback, 390 thunderbird, C6 auto, 2500 rpm high stall converter, shift kit, AC, Holley 750 cfm
[size=100]RIP 1983 RX-7[/SIZE]
My Car Blog
-
speedjunkie
- Senior Member
- Posts: 5292
- Joined: Wed Jan 02, 2008 9:14
- Location: Colorado Springs
- Contact:
Re: Build thread
No, but thank you. I'll be busy tomorrow afternoon with the job hunt, and Mitch is coming by in the morning to mock up the piping and all that. I'm going to swap the alternator here in a bit and see if that fixes anything, although to see if it's really fixed will take more than just a few cranks.
-
speedjunkie
- Senior Member
- Posts: 5292
- Joined: Wed Jan 02, 2008 9:14
- Location: Colorado Springs
- Contact:
Re: Build thread
I swapped the alternator in today and it didn't make a difference. Still clicks and cranks slowly occasionally. While I was swapping the alternator I noticed a lot more fluid coming out of the gauge on the FPR. I've noticed residue before, but this looks like it was dripping. So I guess I'll be swapping that, or deleting it altogether. Not having it there would make it much easier to swap the alternator, but I like having that gauge there.
I got the USB charging port today and I think I'm going to cut a hole under where the airbag used to sit so it's flush. I'm not crazy about the idea of making a mess in the interior though lol.
I'm thinking about getting either a used B&M shifter, which is discontinued, or a knockoff. Supposedly they're pretty notchy and I like that. I really like the Mazdaspeed and Mazdatrix short shifters because they have a replaceable groove bushing similar to the stock shifter, but those are both discontinued as well and very hard to find. I like my C's shifter but that groove is all beat up and so sloppy. But a couple thoughts...apparently the bottom of the stock shifter is removeable, maybe I could add some material in there and use it the same as the C's and the others that used an extra ring. OR, maybe I could have the groove machined out so a bushing can be added there.
-
chickenwafer
- Posts: 2515
- Joined: Wed Mar 11, 2009 9:14
- Location: Greeley
Re: Build thread
Just rewire the entire car. You've had so many electrical issues LOL.
I know your car is running a lot more electrical system than I plan to on the REPU, but this is the kit I'm looking at for mine: http://www.racedigitaldelay.com/switch-megapanel.php
I know your car is running a lot more electrical system than I plan to on the REPU, but this is the kit I'm looking at for mine: http://www.racedigitaldelay.com/switch-megapanel.php
-
speedjunkie
- Senior Member
- Posts: 5292
- Joined: Wed Jan 02, 2008 9:14
- Location: Colorado Springs
- Contact:
Re: Build thread
I might as well, it's the only way to know for sure that it's good lol.
That's pretty sweet, but I'd hate to actually rewire the whole car. If it had a simple system like the old cars that would be one thing.
I picked up the rest of the powder coat parts from David today, then I saw the new Capt America movie tonight. I'm hoping to get a lot done tomorrow but I might be doing lunch with the out of town friend and I need to revamp my resume and upload it to the AT&T website before Monday. Mitch is going to have the intake pipe welded by Monday and then we're going to do the turbo to IC pipe and I'll give him what he needs to build the OMP tank.
-
RX-7 Chris
- Posts: 7800
- Joined: Tue Oct 02, 2007 9:14
- Location: Colorado Springs
- Contact:
Re: Build thread
Let me know if you need help with the ignition wiring we talked about.
1984 RX-7 GSL-SE [size=84]My restomod project[/SIZE]
1964 Ford Galaxie 500XL flat black w/ white interior, 2 dr fastback, 390 thunderbird, C6 auto, 2500 rpm high stall converter, shift kit, AC, Holley 750 cfm
[size=100]RIP 1983 RX-7[/SIZE]
My Car Blog
-
speedjunkie
- Senior Member
- Posts: 5292
- Joined: Wed Jan 02, 2008 9:14
- Location: Colorado Springs
- Contact:
Re: Build thread
RX-7 Chris wrote:Let me know if you need help with the ignition wiring we talked about.
Thanks! I might do that this week sometime. I had to order some more parts that I'll be waiting on until late this week or early next week. I ordered a filler neck and lid for the OMP tank, and I discovered yesterday that the speed bleeders I've had for so long now won't fit the front calipers, so I ordered the correct ones from Summit. It really irks me because now I can't even bleed the brakes and put the wheels on and the car on the ground until I get those bleeders.
It's been a few days since I posted so I'll see if I can remember everything.
Mitch came over Friday morning with his band saw and we cut the pieces for the intake piping and the new inlet on the IC end tank. This is what the pipe came out to be, before and after welding.


I made a bracket for the USB port and was able to incorporate the ethernet coupler (for the tuning cable) into the bracket. It's probably the jankiest bracket I've ever fabbed lol, but it'll get the job done for now. I might go back and make a new one later, something sturdier. I had some issues with the charger itself. There were some reviews saying it was very fragile but it seemed pretty sturdy, at least until I made the bracket really tight and pulled the front of it off trying to get it out lol. Luckily it snapped back in but it's not as good as it was because I had problems with it again during installation. Anyway, moving on, I also rerouted the other cables and stuffed most of them back to clean up the opening so I can actually fit some stuff in there. I might try to make a fiberglass piece to cover most of this stuff and make an actual pocket for things.

After that I turned my attention to finishing the brakes and front suspension installation. This shim piece for the rear caliper brackets had to be modified, basically the two tabs sticking up had a bend that I broke off because these brackets are a bit different, no biggie.

I figured out why this brake ducting plate had cracked, and that we tacked it back into place a little too close. The ducting flange is pressing against part of the knuckle.

I had sand blasted the insides of the pistons because some of them were rusty. I imagine they'll rust again, but at least they're starting off clean.

I reinstalled all the seals and pistons in the front calipers.


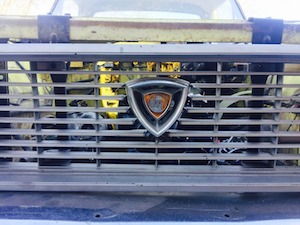
I told David I wanted the Mazda lettering raw so he ground off the coating and then I buffed them with an abrasive Dremel bit. They came out alright, not quite as shiny as I'd like but they'll do. I had also sandblasted all the bolts and I like how they go with the Mazda lettering.


These brackets were brand new, but they have this gunk in them. I'm pretty sure it's the grease from the front upper suspension arms and it leaked into here. It was a bit of a pain cleaning these out because it had hardened, but it's clean enough now.

I replaced the boots and grease on the ball joints on the front suspension arms. The first one was a huge PITA. After putting grease on the joint and working it back and forth to get grease down into the sides, I put some additional grease on the joint and packed the boot. I slid it over the end of the joint and down, trying to get the bottom of the boot around the edge of the joint. Grease came out everywhere, as soon as I got one side of the boot in place, the other side would suck in and if I got it out and in place, the other side would suck in. Then I had a brilliant idea. Turn the boot inside out, slide it over the joint, then pull it back rightside out. Worked like a charm. I think I spent about 15 minutes on the first arm, and about MAYBE 5 minutes on each of the following arms. I washed them all with hot soapy water before installing them. It was a bit of a pain installing them, but not terrible.


Then I discovered a problem. The ducting hose would hit the brake line bracket that routes the line around the strut. I tried moving the bracket high and low, and I think the highest point possible is the only place it might work. I also angled the bracket back and pulled the line through a bit. At full turn the brake line just barely clears the duct flange. I might either use a ziptie to pull the line up a bit more, or cut off some of the flange (I don't see why it needs to be that long anyway).


Yesterday I put the rear calipers back together and realized I was missing one of the brake pad shims that go on the caliper brackets to keep the pads from rattling. So I ordered a brake hardware kit from Autozone and surprisingly enough it was ready this morning. I picked those up and tried using them and the pads are too big to fit into them lol, so I ended up not using them anyway. So I finished the rear brakes today. I ended up using two springs on each caliper because the hardware kit came with three springs (weird, not enough to use two on each, and too many for just using one lol). So I used one spring from the kit and the original spring on each caliper. Normally you only use one spring but the holes were there for two, so we'll see what happens lol.


I took some brackets to Tom's today to sandblast them because it was bugging me lol.

I half installed one of the front brakes because Smokey was apparently opposed to me working on the car anymore today. Every time I tried to work on it tonight he got between me and the car and laid down in my lap lol. Tomorrow I'm hoping to finish the front brakes and also torque down the axle nuts. And maybe I'll remember to get all the metal shavings out of the IC, YAY! That should be fun. I guess I'll just spray a lot of brake cleaner in there and then run water through it from the other side. I might see if I can take it somewhere to get sonic cleaned too. I just want to make absolutely sure it's clean before using it, so I'm all ears if anyone has suggestions on how to do that.
-
chickenwafer
- Posts: 2515
- Joined: Wed Mar 11, 2009 9:14
- Location: Greeley
Re: Build thread
Brakes are looking mint man.
Cleaning out the intercooler...you could blow compressed air through it?
Cleaning out the intercooler...you could blow compressed air through it?
Who is online
Users browsing this forum: No registered users and 63 guests