Build thread

Talk about your Rotaries!
User avatar
speedjunkie
Senior Member
Posts: 5287
Joined: Wed Jan 02, 2008 9:14
Location: Colorado Springs
Contact:

Re: Build thread

Postby speedjunkie » Tue Mar 08, 2022 9:14

A few new developments.

I picked up the seats from A.I.R. Upholstery in Black Forest. He's a super nice guy that does great work for a great price, can't beat it! He said he couldn't get vinyl to look good on the high wear parts (the tops of the leg bolsters) so I'm going to mold some kydex over those parts. Now I need to find a way to stiffen the seat.
Image2022-03-06_11-43-19 by Eric Jausel, on Flickr

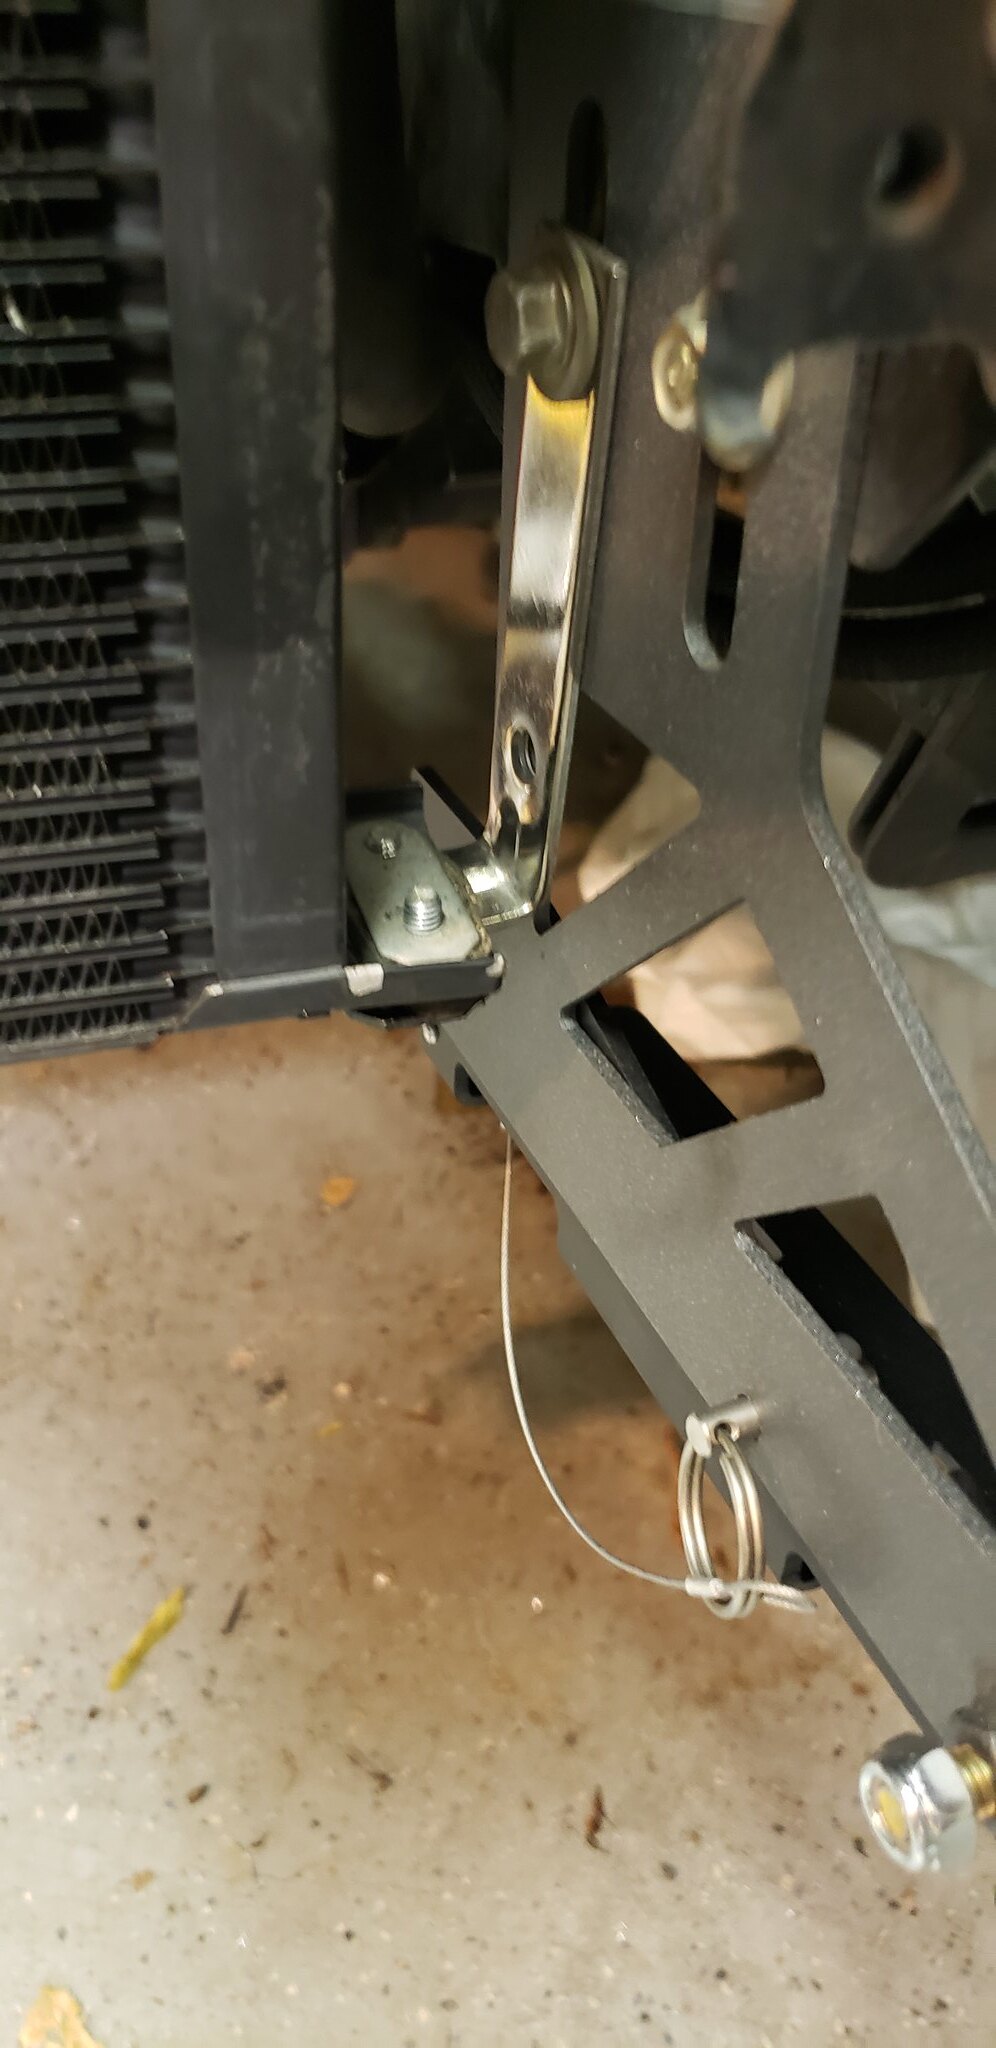
On the way back from picking up the seats I picked up the alternator casing and radiator mounts/tow hooks from getting powder coated by Nick (not sure what his last name is but Xavier pointed me in his direction, he's a 240 guy, and another great person that does good work for a great price). I love the texture on the radiator mounts/tow hooks, and the little plastic plug matches pretty well.
Image20220305_230224 by Eric Jausel, on Flickr

You can't really see it well but I put some RTV on the edge here to seal up a gap that the powder coat didn't fill. I don't want water getting in there and rusting over time.
Image20220305_225630 by Eric Jausel, on Flickr

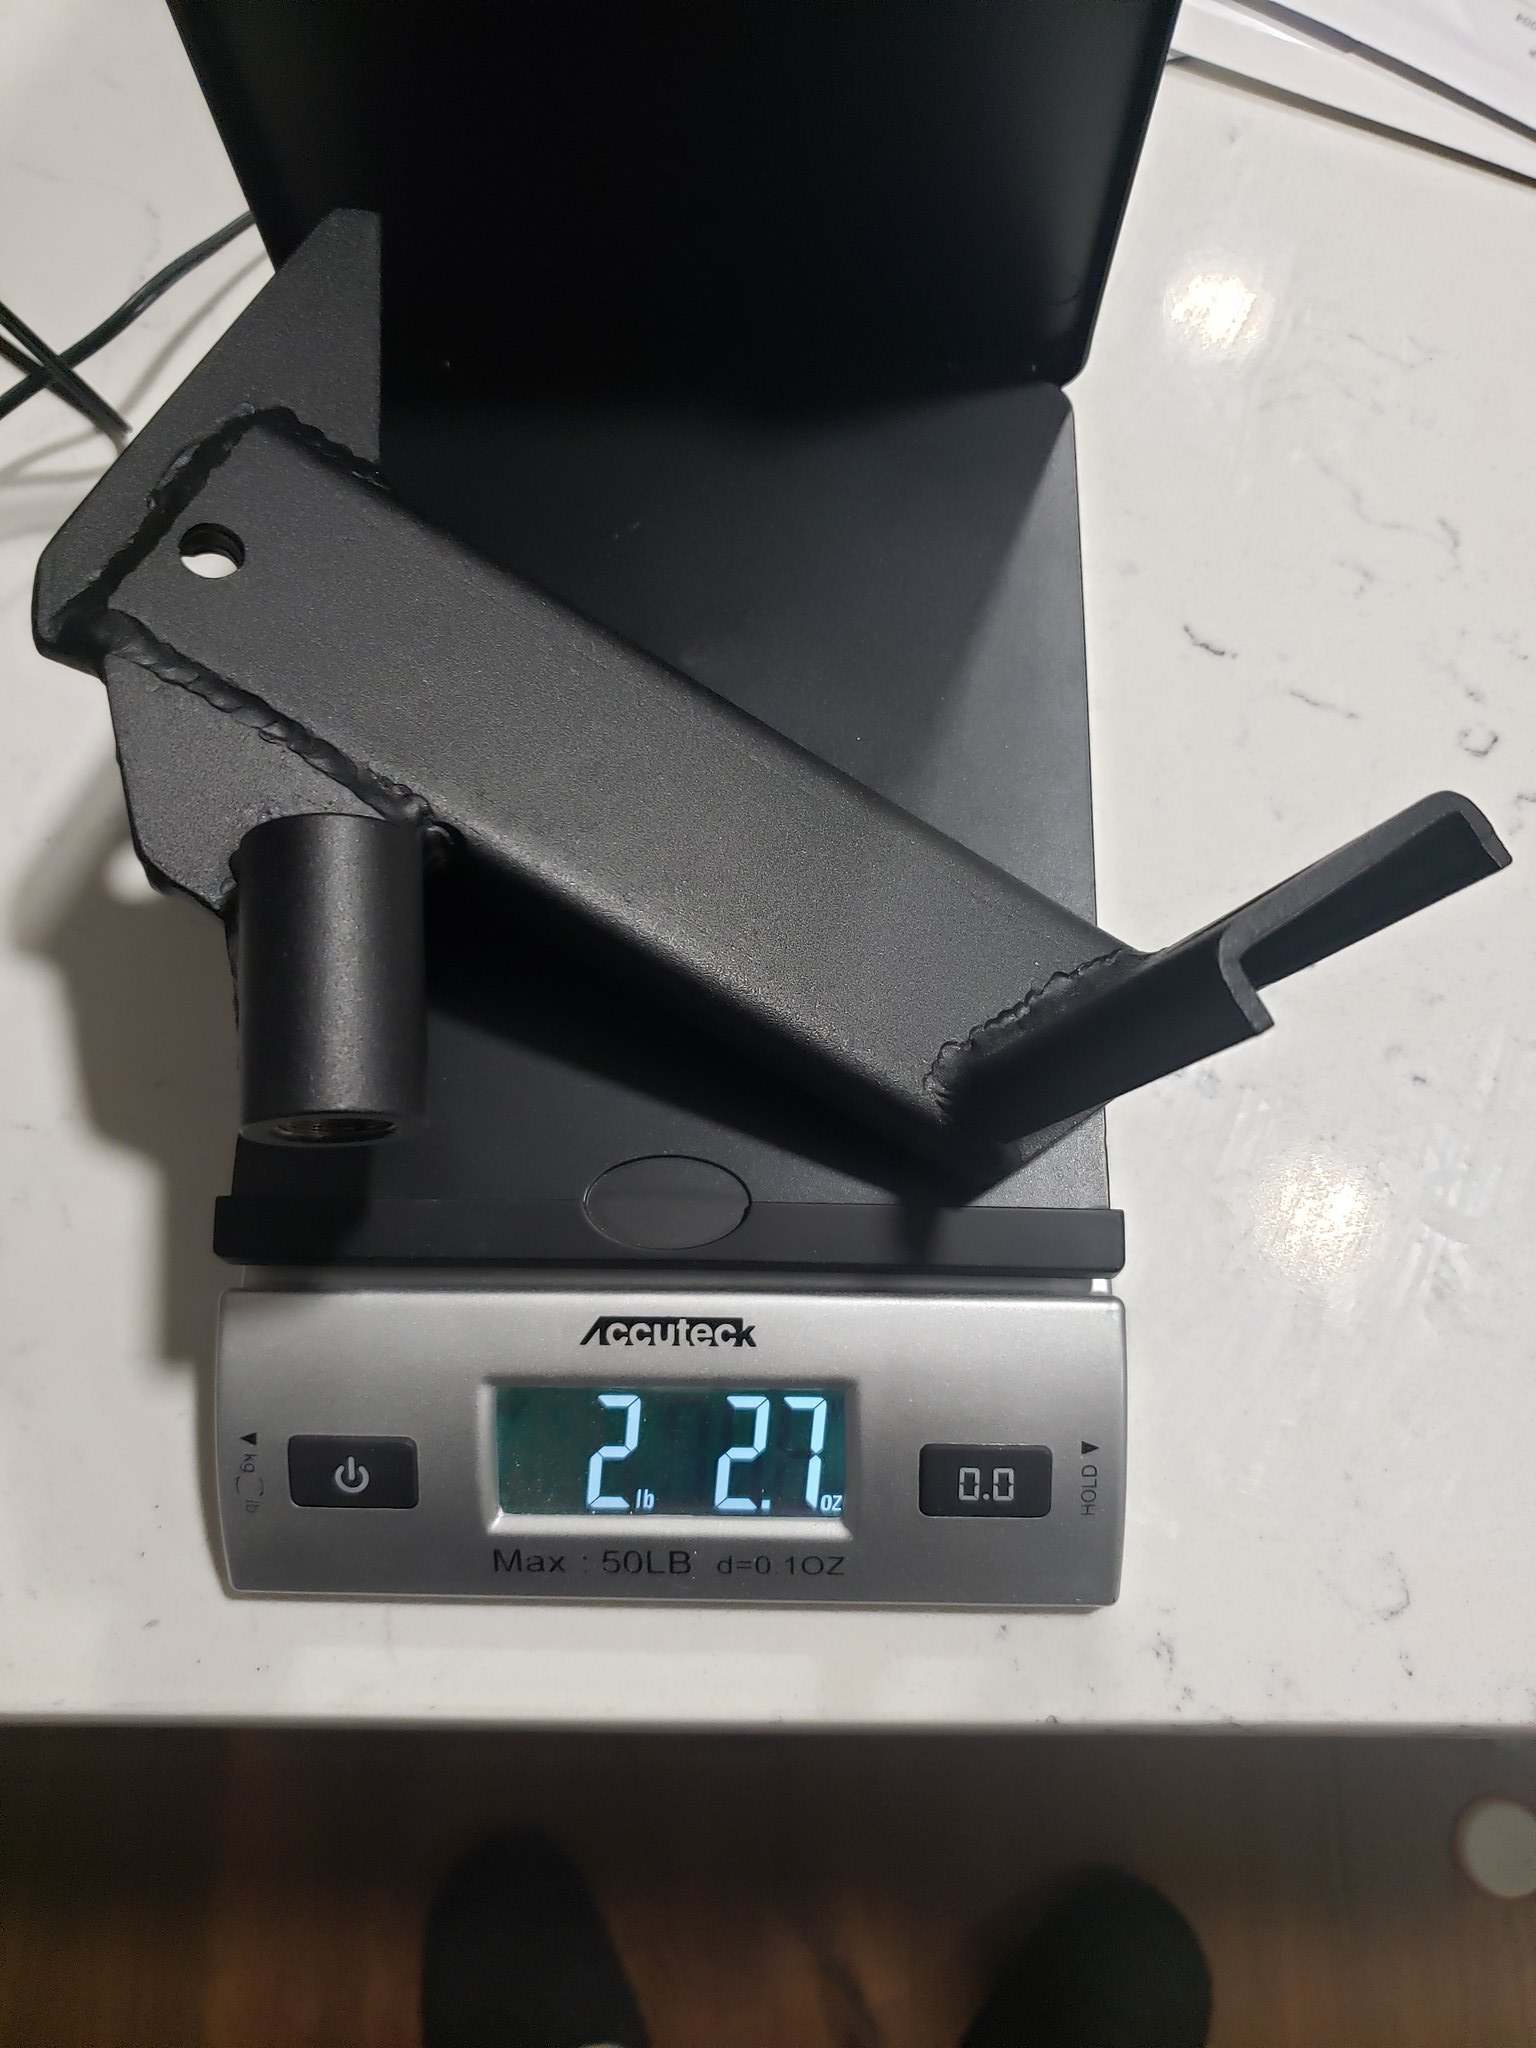
I weighed them also. They're still a bit heavier than I'd like, but I didn't really have a choice since they're tow hooks as well, and they're still much lighter than they would have been if I'd used 1/4" steel.
Image20220305_224705 by Eric Jausel, on Flickr
Image20220305_224718 by Eric Jausel, on Flickr
Image20220305_224729 by Eric Jausel, on Flickr

As for the alternator casing, it looks really good but it's a bit sparkly for me, which is weird because I just had him sand blast them and then clear coat them. I was planning to do like Brad Hopkins did on his manifolds and stuff, they look stock but they're ceramic coated which will help with heat, but I wanted something that's super easy to clean (I'm hoping to get all the pieces done this way). The clear will make them easy to clean, which I know because my suspension arms are cleared. But I'm not sure if I want the manifolds this sparkly lol. Oddly enough, the clear also made them a little darker. Maybe the sparkle won't be very easy to see from a distance. I'll also have to go in and get the clear off some of the inside where grounding takes place.
Image20220305_224945 by Eric Jausel, on Flickr
Image20220305_224950 by Eric Jausel, on Flickr

User avatar
speedjunkie
Senior Member
Posts: 5287
Joined: Wed Jan 02, 2008 9:14
Location: Colorado Springs
Contact:

Re: Build thread

Postby speedjunkie » Wed Mar 16, 2022 9:14

I've done some work over the last few days, but I don't even remember everything.

I got all stainless hardware to install the tow hooks and radiator mounts, and put anti-seize on them all. I had to get ARP bolts for the passenger side mount because no one local and even most places I looked online didn't have M10x1.25 in stainless. Ridiculous. lol Here is how the rear tow hook turned out.
Image20220313_141232 by Eric Jausel, on Flickr
Image20220313_141240 by Eric Jausel, on Flickr

I straightened all the bent fins on the new radiator and condenser and mounted the condenser to the radiator with stainless hardware, and got the radiator hoses sorted out. I was going to use either hard lines with couplers at each end, or do AN lines or hardlines with Wiggins clamps, but the hard lines with couplers adds another four hose clamps, and the AN lines and hardlines with Wiggins both require welding on fittings and a lot more money. So I decided to stick with hoses for the time being. I was able to reuse the upper hose, but the lower hose I had to replace because it was a completely different angle. The good thing is I started with the same exact hose for both top and bottom, Gates 21660. I was planning on using the stock rubber boots at the bottom of the radiator, but I cut the holes in the mounts too big so I picked up some high heat rated grommets that fit perfectly. There is a little bit of play between the grommet and the radiator posts, but I wanted that, and it fits the mounts perfectly. The only problem is they're red, but I can live with that, especially after I make ducting and you won't even be able to see them. I also got some seagull shaped mesh screen to protect the VMIC and oil coolers. I wasn't crazy about the idea of using mesh, but I'm tired of the radiator and stuff being gunked with bugs and getting bent by rocks. I like this design better than regular mesh too, and it won't keep everything out but hopefully it will help and not kill too much airflow.
https://www.amazon.com/gp/product/B08T8 ... UTF8&psc=1

I pulled the ECU and sent it off to Chris to bench test. I was a little concerned about bricking the other guy's ECU if I had issues with my wiring. Chris said he wasn't concerned about that but that he could bench test mine. I added studs to the ECU mount to make it a lot easier installing, but I forgot that the end of the stud comes so close to the bottom of the HVAC blower and I'm not sure if I can get the ECU onto a stud, which is why I didn't put studs in last time. But this pic indicates why I wanted to add the studs lol.
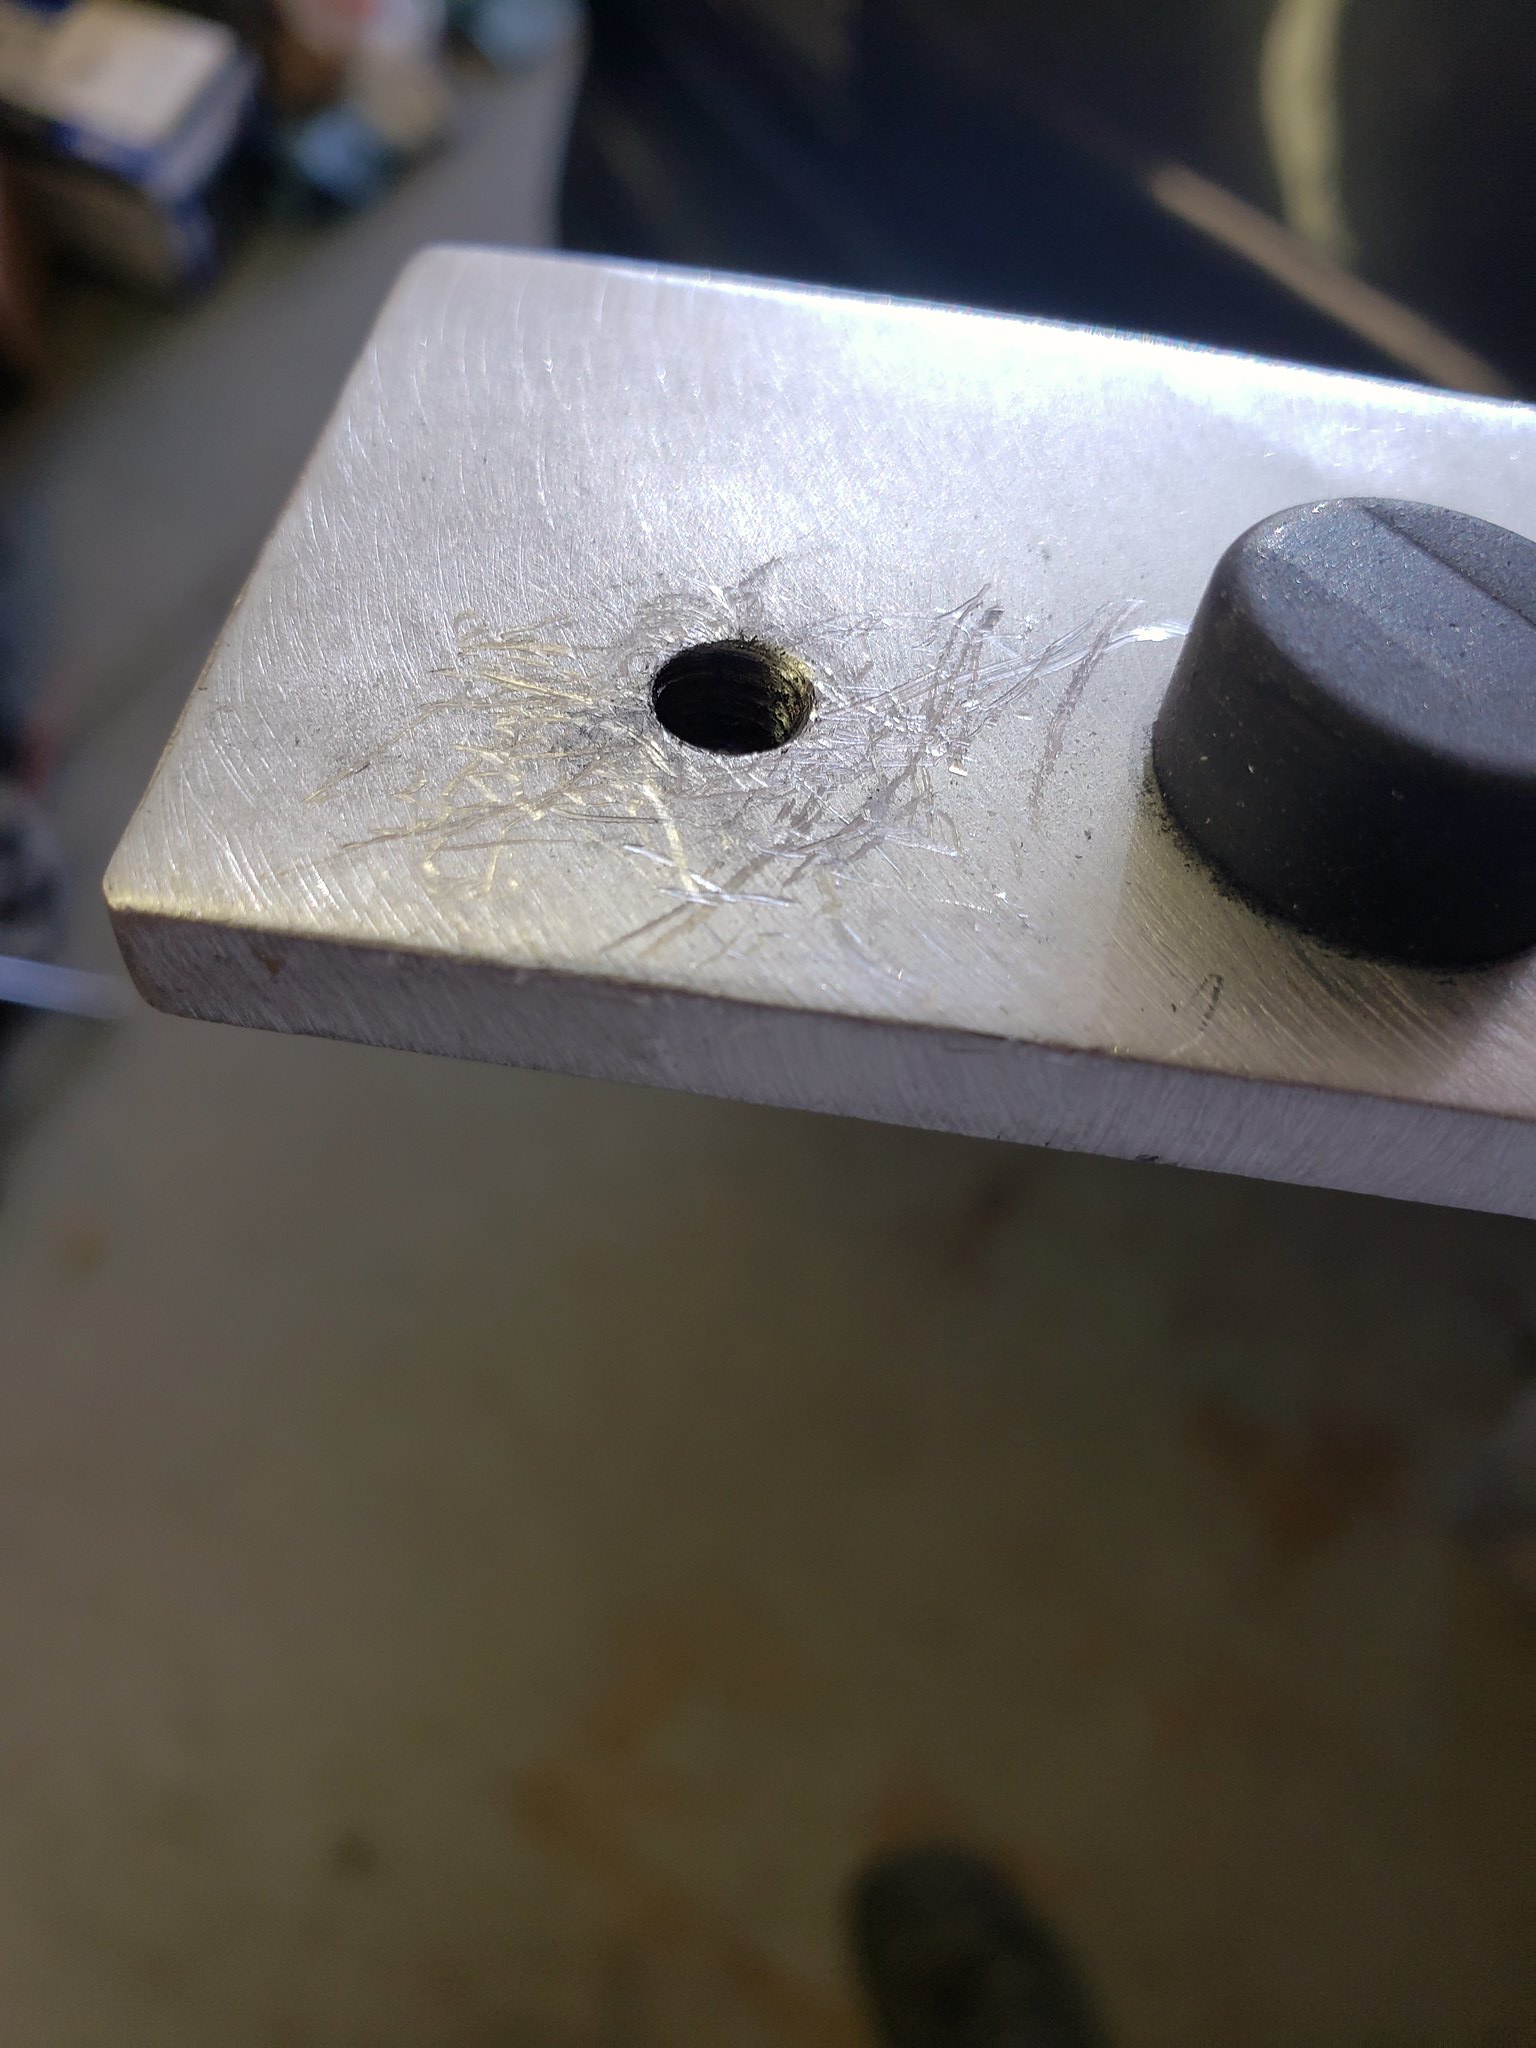
Image2022-03-16_10-24-37 by Eric Jausel, on Flickr
Image20220313_150203 by Eric Jausel, on Flickr

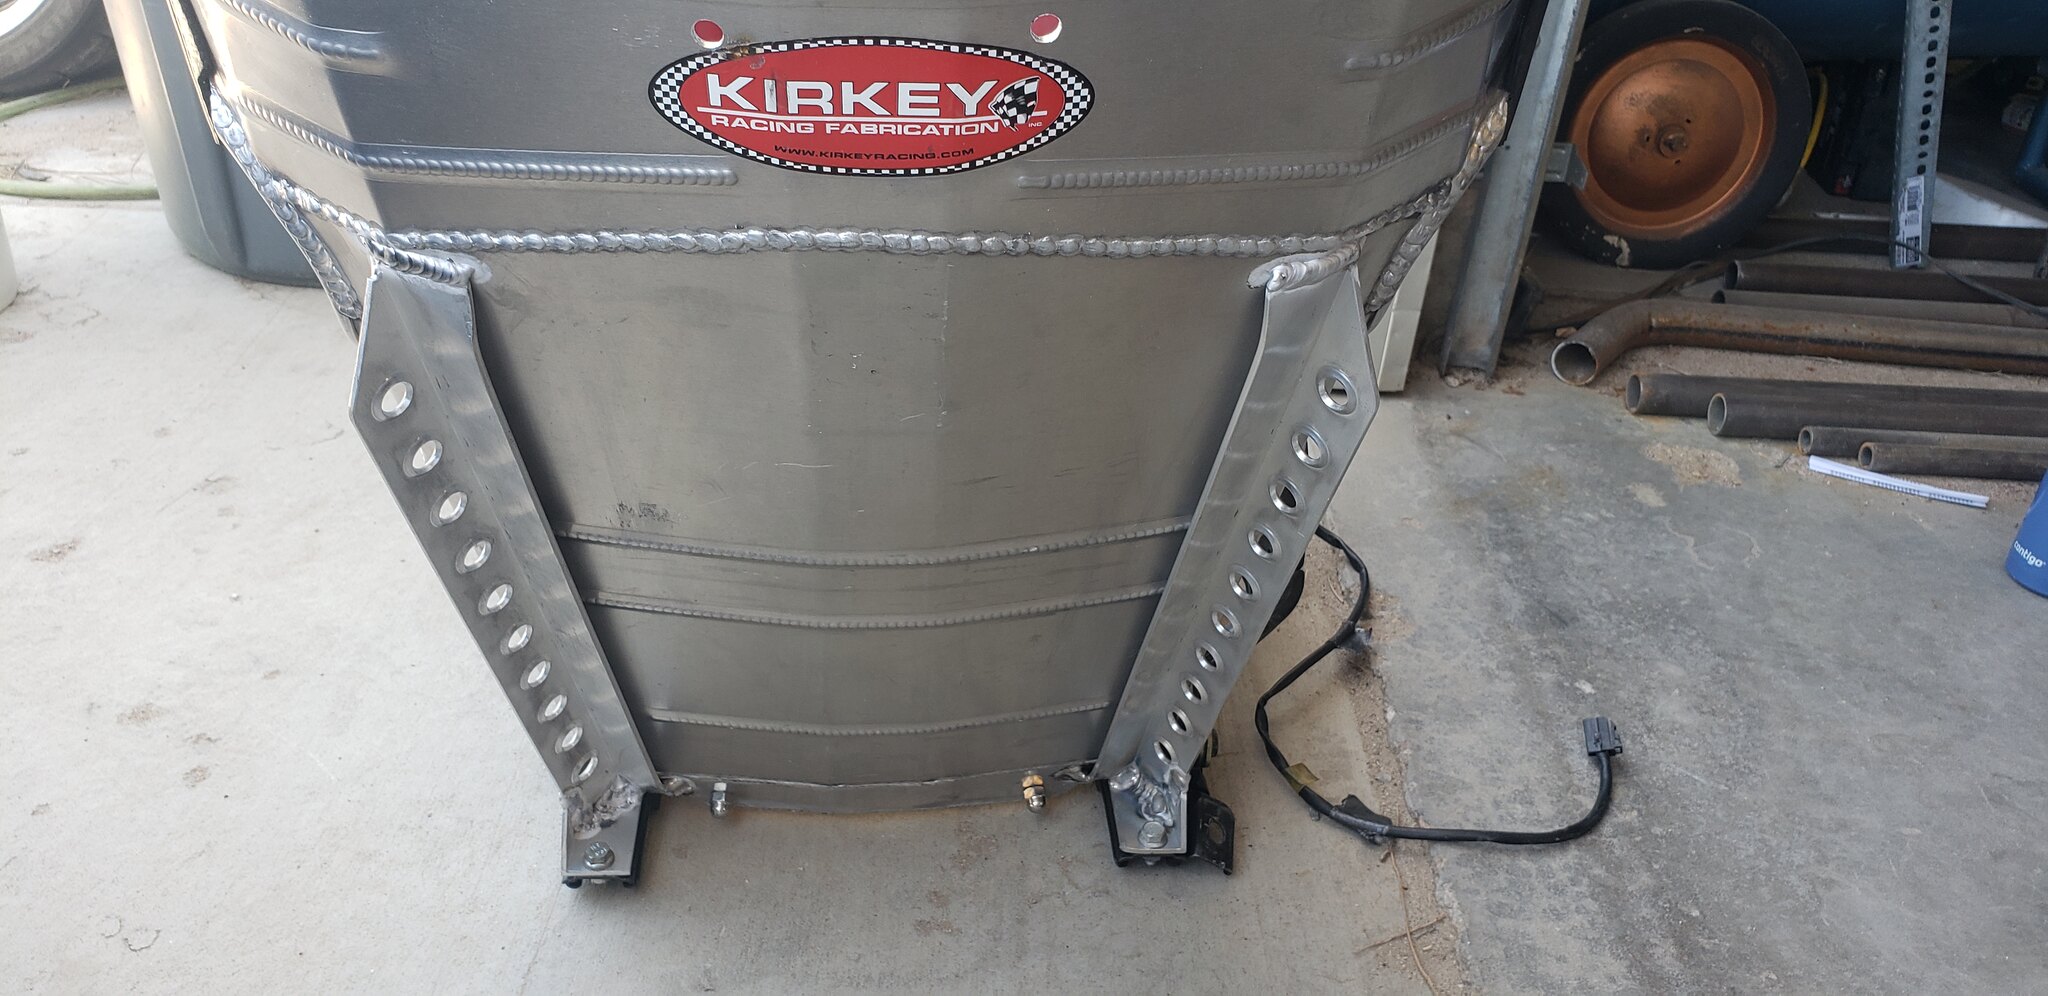
I put the swages on the seat rails to lock the wire for the linkage and started to cut the supports I'm going to have welded onto the back. They'll run down each side of the seat and turn under (a piece welded on) to lay on top of and bolt to the rear bolt hole on the rail. This should sufficiently stiffen the seat so it doesn't lean in turns, at least not more than the rails do themselves. After that, all I need to do is heat up the Kydex to form over the leg bolsters to protect the seat cover and install the seats one last time. I don't even want to think about how much money I've spent on these seats to make them work for me, and wonder if I could have gotten away with getting some Recaro SPGs that may have worked for me for cheaper. Ugh. I'm also going to use eye bolts to connect the braces to the rails, that way I can hook the 5th and 6th harness straps to them. Probably not the most solid idea, but I figure with as low as I'm sitting in the seat and with the angle of the seat already, there shouldn't be enough pressure from my body to faze these keeping me from submarining in an accident.

I was thinking about getting the valving changed on my coilovers since I'm using springs outside the acceptable range for the current valving. Granted it's only 1kg out of range on the rear, but I figured it could help. I talked to SakeBomb Garage today about it and they said I'd need a whole different set of shock bodies if I want to use anything less than 10kg, and that kit is almost $4k. So yeah, I'll just add some preload to the springs and stick with what I have lol. Maybe I'll step up in several years when these are worn out, but I'm certainly not dropping that kind of money right now. And if I'm going to spend that much, I want individual adjustment with external reservoirs, the works.

The RE Amemiya power steering tank SHOULD be getting shipped tomorrow, but I won't hold my breath. They don't have any other updates though, so I'm hoping it's legit. I'm going to clean the replacement AC compressor and reinstall it in the mean time, and I'll just take the car to my buddy's shop and have them charge it and check for leaks and all that. I'm done trying the home brew lol.

I was able to get a replacement fuse box since I broke the mount on mine. Well, it was paid for a shipped today, hopefully it wasn't a scam, but I didn't have any funny feelings about it. Ran me $80 shipped from California, which I think is a decent deal since it's just about impossible to find those boxes separate from the harness. But this time I'm going to make sure this thing is mounted really solid, with more than one point of contact. Not sure if I'm going to 3D print the bracket or make one out of steel.

I saw a post last night about installing an ABS system from a BMW into the FD and it looks intriguing. I might actually do this someday if I can do it cleanly lol.
https://www.rx7club.com/3rd-generation- ... d-1156049/

User avatar
speedjunkie
Senior Member
Posts: 5287
Joined: Wed Jan 02, 2008 9:14
Location: Colorado Springs
Contact:

Re: Build thread

Postby speedjunkie » Sun Mar 20, 2022 9:14

Today was a mess. No order whatsoever, just jumping between tasks before finishing one. I didn't a little work yesterday, pulling the starter harness out, started cleaning the AC compressor, I don't recall what else.

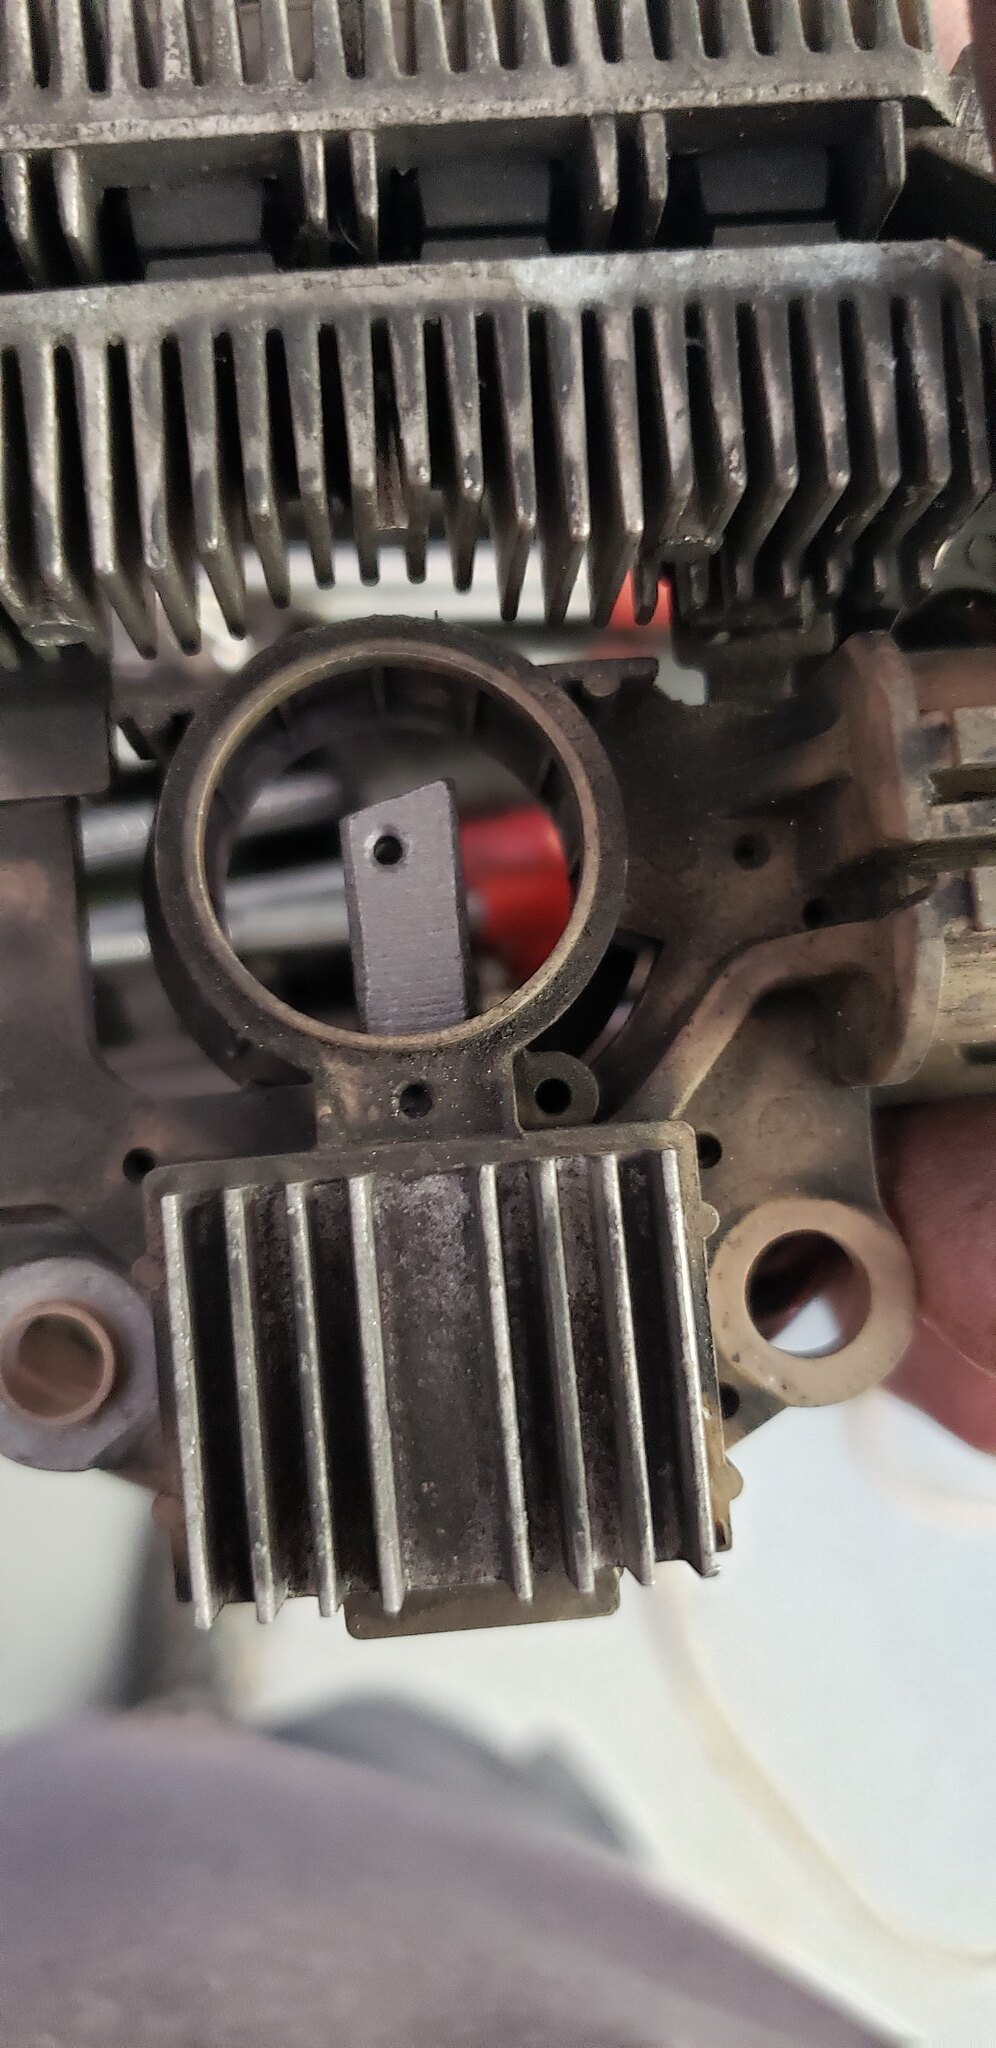
I bought a fuse box from a guy in California, something I never thought I'd be able to do considering people don't usually part out a harness. I got it for $80 and it's in really good shape. I started pulling the wires/terminals out of it (he had cut it out of the harness), but I didn't get far before I remembered I wanted to add preload to my coilover springs while it was daylight, so I started looking for the spanner wrenches but couldn't find them. Then I started building the alternator. I had to remove some of the clear coat from the inside for the alternator to function, then ran to ACE to get some stainless hardware to reassemble it. I replaced the brushes in it because one was a little worn and neither of them had the little hole in which you insert a wire to hold them down to reassemble the alternator. It's doable without those holes, but it's not as easy and I wanted them to be fresh. My soldering looks like shit lol, but it should work.
Image20220320_164742 by Eric Jausel, on Flickr
Image20220320_164748 by Eric Jausel, on Flickr

Anyway, I started putting it all together and realized the rear bearings are worn too, so I ordered that. I have two other alternators that I'm using for parts so I was going to use a whole other rotor but it had the front bearing stuck on the shaft, so it's soaking in PB Blaster just in case. I pressed the new bearing into the front shell so it's ready to go.

I decided to start looking for the spanner wrenches again and finally found them so I adjusted the preload on all the coilovers. From 7" to 6.75" on the rears and from 8.25" to 8" on the fronts.

Since I had the front wheels off I decided to try on the new bumper again to verify if the radiator brackets are crooked. They look like it on the old bumper, but with the new bumper they look straight, and they should be since I cut the pieces on both sides exactly the same length, same angles, everything. The only thing with the new bumper is it still looks like it's off center to the passenger side, but it isn't. The whole leading edge of the radiator looks like it's sitting higher than on the old bumper.
Image20220320_201837 by Eric Jausel, on Flickr

User avatar
speedjunkie
Senior Member
Posts: 5287
Joined: Wed Jan 02, 2008 9:14
Location: Colorado Springs
Contact:

Re: Build thread

Postby speedjunkie » Tue Mar 22, 2022 9:14

I ordered a couple rebuild kits for the AC compressor last night. I figure I'll rebuild both of them just to be safe and have a spare.

It took a while to find a bearing puller to get the rear bearing off the alternator rotor, but one of the pieces from a Harbor Freight kit worked pretty well. I haven't removed the one I need to yet, mainly because I wanted to make sure that method would work without damaging anything and also because I want to make sure I have the correct bearing in hand before I pull the old one off, just in case.

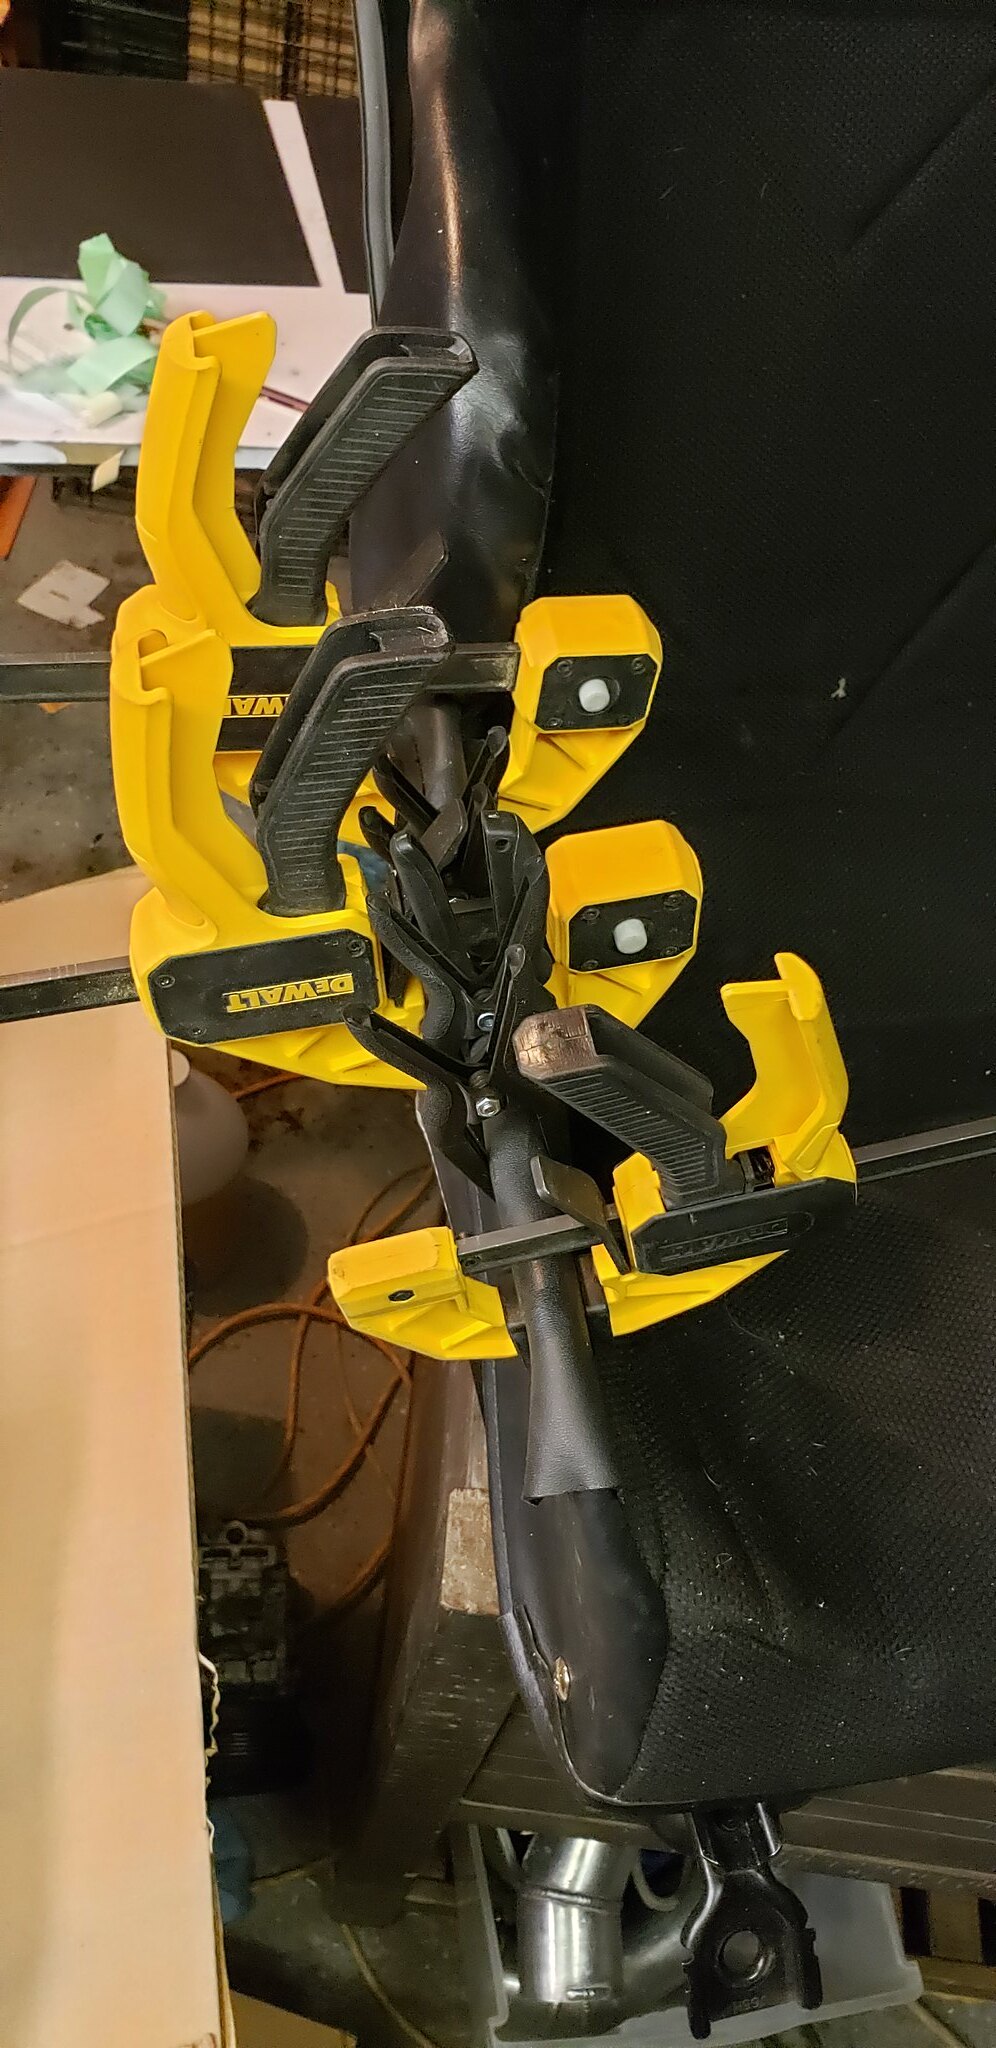
I cut up some Kydex tonight and heated it up to shape it to the seat. I used the old seat cover in case it was too hot, but I think I'm just going to have to use the new seat covers because they're thicker and this one is a bit too tight on the new covers. It definitely holds strong though and wouldn't be coming off lol. And I think I'm going to heat up the pieces in the oven instead of using a heat gun so it's more uniform and I can shape it with both hands all at once. I need to trim it a bit shorter so it forms to the seat the whole way through. I tried to mash down the front part but it was too much.
Image20220322_211026 by Eric Jausel, on Flickr
Image20220322_210907 by Eric Jausel, on Flickr
Image20220322_211510 by Eric Jausel, on Flickr
Image20220322_211516 by Eric Jausel, on Flickr

I stripped the starter harness and figured out which wires to pull out, but I have to figure out how to disassemble the connector first. I'm not sure if the orange part has to come out first. I think it does.
Image20220322_233915 by Eric Jausel, on Flickr
Image20220322_233906 by Eric Jausel, on Flickr

User avatar
speedjunkie
Senior Member
Posts: 5287
Joined: Wed Jan 02, 2008 9:14
Location: Colorado Springs
Contact:

Re: Build thread

Postby speedjunkie » Thu Mar 24, 2022 9:14

I got a few parts today. The rear bearing for the alternator, one of the AC compressor rebuild kits, and the expansion valve for the evaporator (hopefully it fits). I pulled the old bearing and pressed on the new bearing onto the rotor and built the alternator, but I battled with it all night because I used the press to push the rotor into the back housing and thought I pressed it in too far because I when you spin the rotor you can hear a rubbing sound. I gave up for a couple hours and eventually did some checking with parts from the other alternators and realized there's not a way to push it back too far and the rubbing sound is from the rotor against the stator because the fitment is so tight. Another reason I thought it was back to far was because when I put the pulley on with the little spacer under it, there were only a couple threads left for the nut. I realized later that the pulley was making contact with the bearing without that little spacer, and even though the pulley looked like it was rubbing the front housing, it actually turned freely. I had been using a rigged up tool on a slide hammer to try to get the rotor out of the rear housing and it wouldn't budge. I was giving it the beans and no luck, so that thing won't be coming out again unless maybe I heat up the back to expand it. Oh well, hopefully it works lol. It's pretty much the only thing I got done tonight.

User avatar
speedjunkie
Senior Member
Posts: 5287
Joined: Wed Jan 02, 2008 9:14
Location: Colorado Springs
Contact:

Re: Build thread

Postby speedjunkie » Sun Apr 03, 2022 9:14

Yesterday I cut down the supports for the seats a little more and some other minor adjustments. Matt Heimerl is going to weld them on for me, after I use his dimple die set to put some fancy holes into the supports. Should be pretty sweet when it's finished. After that I just need to mold the Kydex over the leg bolsters and they'll finally be finished. Well, until there's something else I think of doing to them haha.
Image20220402_122501 by Eric Jausel, on Flickr

I took the alternator to O'Reilly to get tested and it passed, so I guess I did something right. And fingers crossed there are no funny sounds from it either. I was getting really tired of the squeaking sound coming from the engine bay.

I was finally able to get the orange plastic pieces out of the connectors, they just took a little more convincing. So I removed the unneeded wires and ordered shrink wrap from McMaster Carr. I was going to order Raychem DR-25 since that's what Chris used on my engine harness, but I figured this isn't a new harness anyway and I used wrap that should be similar in spec, and it was much cheaper.

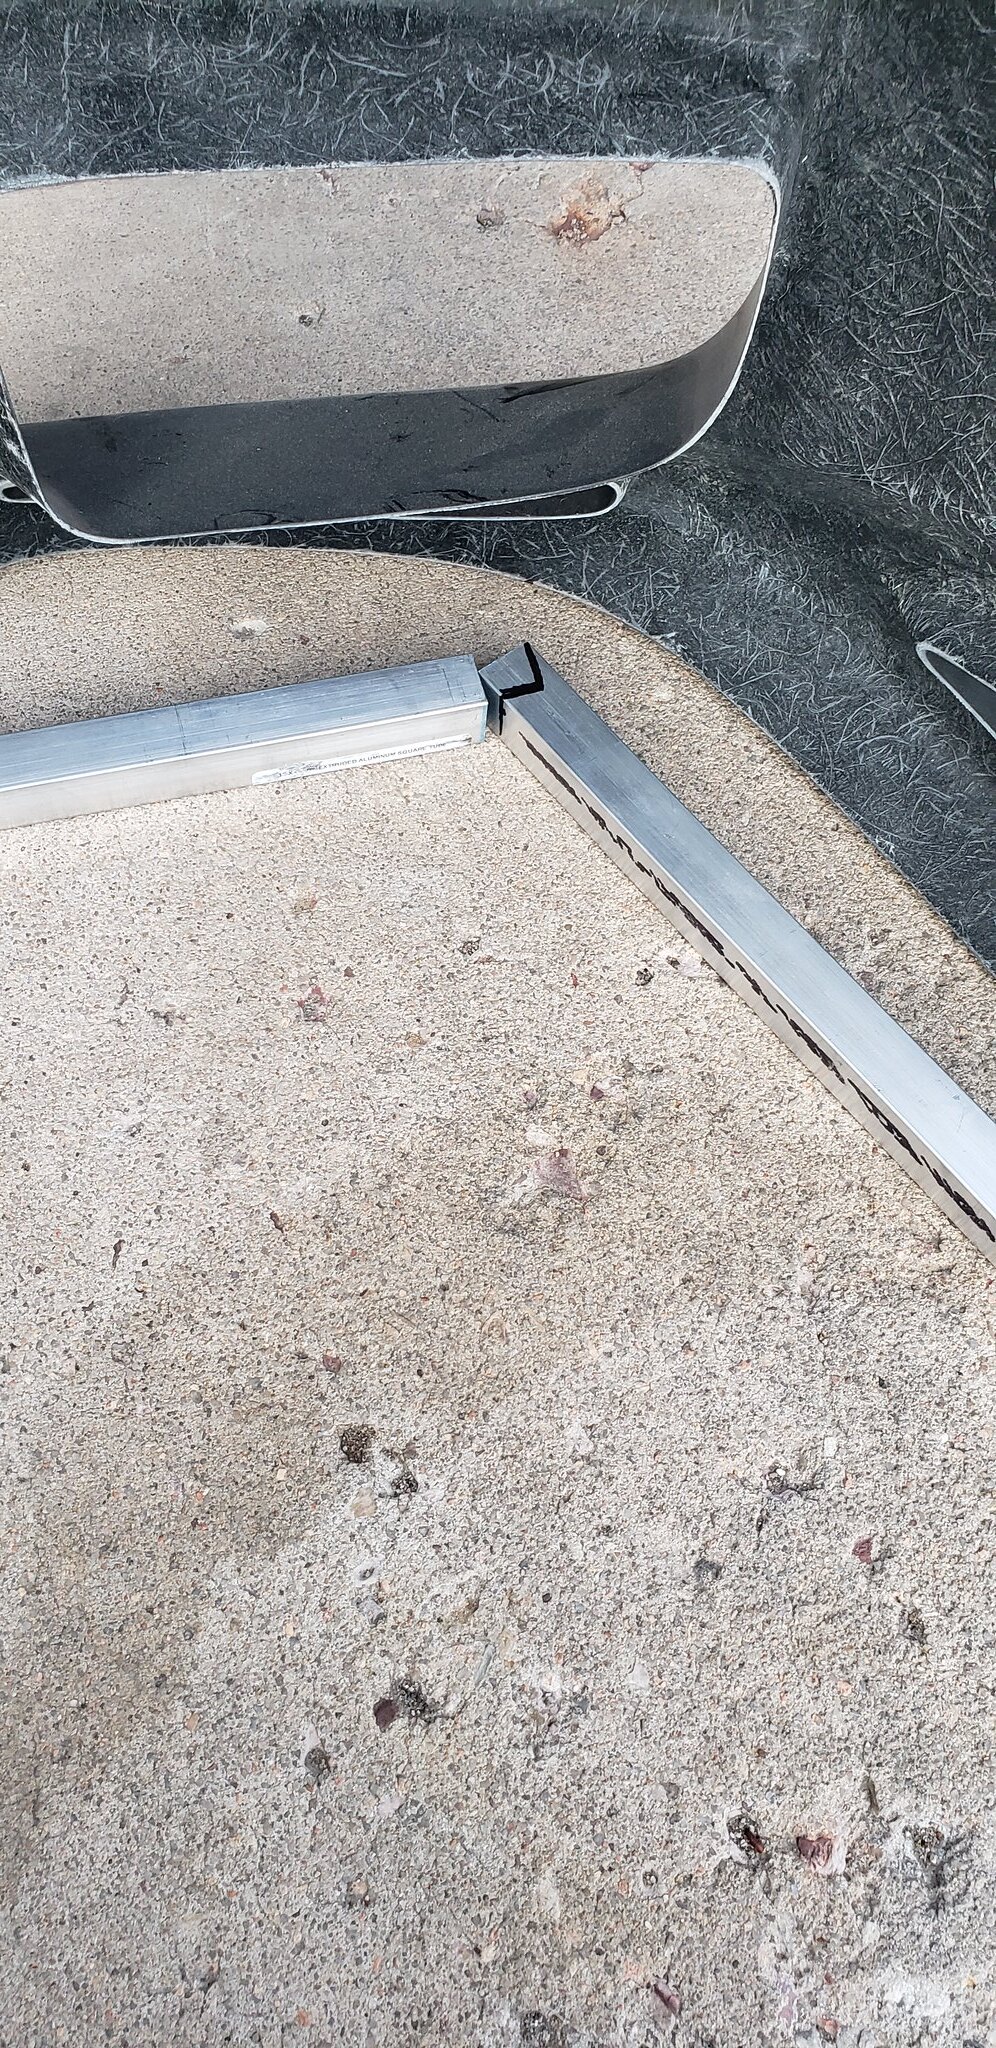
I installed the new splitter brackets from Racebred. These things are really cool. I ordered all the aluminum tubing to make them and Matt is going to weld those for me too. The quick release pins on the brackets are going to be a bit difficult to get to.
Image20220402_133813 by Eric Jausel, on Flickr

I sent my ECU back to Chris so he could inspect and test it. He said it looks like there is some damage inside, and some tests he ran failed, so he's going to send it back to England to get repaired after he figures out the cost and lead time.

The 3D scanner I bought is under an intellectual property dispute, but they said they're still going to ship out the ones that have been sold.

User avatar
speedjunkie
Senior Member
Posts: 5287
Joined: Wed Jan 02, 2008 9:14
Location: Colorado Springs
Contact:

Re: Build thread

Postby speedjunkie » Fri Apr 08, 2022 9:14

I've received all the materials for the splitter brace and to bolt the alumalite to the brace, but I haven't ordered the alumalite yet. I'm not certain where to get it. I've seen it online, but it's way more expensive than before and I'd like to get it locally on the front range if possible. I'm hoping to get more than one sheet so I can build the diffuser also.

I also got something else today. It didn't take until May like they were saying this last time, but it took long enough. Because this tank has a relocated filler neck, it had an issue with the stock mounting bracket that bolts the tank to the pump. I had to trim off a piece of the bracket because it was contacting the neck.
Image20220408_175827 by Eric Jausel, on Flickr
Image20220408_175840 by Eric Jausel, on Flickr

It also had some clearance issues with Adam's catch can, but I filed the corner off the catch can and finally got to where I could see light all the way through.
Image2022-04-08_11-28-27 by Eric Jausel, on Flickr
Image20220408_185654 by Eric Jausel, on Flickr
Image20220408_185642 by Eric Jausel, on Flickr

Overall it fits pretty well though. Now I'm trying to decide if I should get it powder coated or sand blasted and clear coated like the alternator. Thinking about doing all the parts that way to make them easy to clean.

User avatar
speedjunkie
Senior Member
Posts: 5287
Joined: Wed Jan 02, 2008 9:14
Location: Colorado Springs
Contact:

Re: Build thread

Postby speedjunkie » Sat Apr 09, 2022 9:14

I rebuilt one of the AC compressors today. It was easier than I thought it would be, and I disassembled it more than I needed to.

This is the reman compressor I bought a couple years ago and immediately overcharged the system and cooked it lol. I’m going to rebuild another one tomorrow that was working when I got it from Dave Lowry.

I ended up with a couple extra o-rings and one extra gasket (seen in one of the pics), and this kit has soft gaskets instead of the metal ones that came out of the compressor. I prefer metal but whatever. I guess I could reuse the original metal ones too.
Image20220409_121716 by Eric Jausel, on Flickr

The rear gaskets are a little different, but I don’t think it’ll be a problem.
Image20220409_170445 by Eric Jausel, on Flickr
Image20220409_170531 by Eric Jausel, on Flickr

This is my only concern with this compressor. This is the front section.
Image20220409_160053 by Eric Jausel, on Flickr

User avatar
speedjunkie
Senior Member
Posts: 5287
Joined: Wed Jan 02, 2008 9:14
Location: Colorado Springs
Contact:

Re: Build thread

Postby speedjunkie » Tue Apr 19, 2022 9:14

Ok, A LOT of updates.

I rebuilt the other AC compressor, pulled the dash again to facilitate some projects, got the new power steering tank sandblasted and clear coated to match the alternator, dropped off my starter harness with David Mannarino (one of Matt Heimerl's friends) so he can build me a new harness from scratch, cut the metal tubing for the splitter and drilled holes in the seat braces (to dimple die them) so Matt can weld all that for me, replaced the expansion valve and flushed the evaporator and heater core, repaired the dented heater core lines, and made a new bracket for the barometric pressure sensor under the dash (the old one is kinda flimsy). It didn't feel like much, but as George Costanza says, "if you take everything I've done in my life and compile it into a couple weeks, IT LOOKS DECENT".

So the dash. There are a few reasons to pull it. Originally the main reasons were to flush the evaporator and change the expansion valve and also pull the front harness to check it over and make sure there wasn't any damage to the wiring that would fry the ECU again. I'm not sure what did it before, but I want to avoid that at all costs and if that means pulling the harnesses and checking them all over, so be it. I figured I'd also strip down the harness of anything I don't need while it's out and thin it out some. I pulled the fender off to start pulling the harness, and I really didn't feel up to it, so I started putting the HVAC boxes back in and then remembered the next day that I wanted to check over all the wiring. DOH! Luckily I didn't get too far with the HVAC stuff. Another thing I'm doing while the dash is out is replacing the plastic gas pedal with a cast aluminum one from Garage Alpha (purchased from SBG on sale though) that matches the brake and clutch pedals. I'm really getting tired of pulling the dash out though.
Image20220416_190005 by Eric Jausel, on Flickr

Found a new use for the 11mm socket. Works great to round the heater core lines again. I looked for a tool to repair them, then read about this online. GENIUS!
Image20220416_183009 by Eric Jausel, on Flickr

It's kinda hard to tell in this pic but it looks just like the alternator.
Image20220416_182926 by Eric Jausel, on Flickr

We were planning to use 3/4" dimple die, but ran into a snag. So we'll be using 1/2" instead.
Image20220413_212753 by Eric Jausel, on Flickr

I forgot, I also flushed all the AC lines and replaced the o-rings on them. I found this issue on one of them. I'm not sure if this is heat damage from the oil cooler thermostat or what. The high pressure hard line on the other side has some damage too from the boost control braided lines.
Image20220416_112408 by Eric Jausel, on Flickr

I straightened the fins on the evaporator also, and cleaned out dust with a rat tail broom and some brake cleaner. I only got one tar packing for wrapping the sensor and tube, and originally the valve itself was wrapped also, but I looked into it and apparently you only need to wrap the sensor and tube.
Image20220417_121948 by Eric Jausel, on Flickr

This is for the splitter frame.
Image20220419_191303 by Eric Jausel, on Flickr

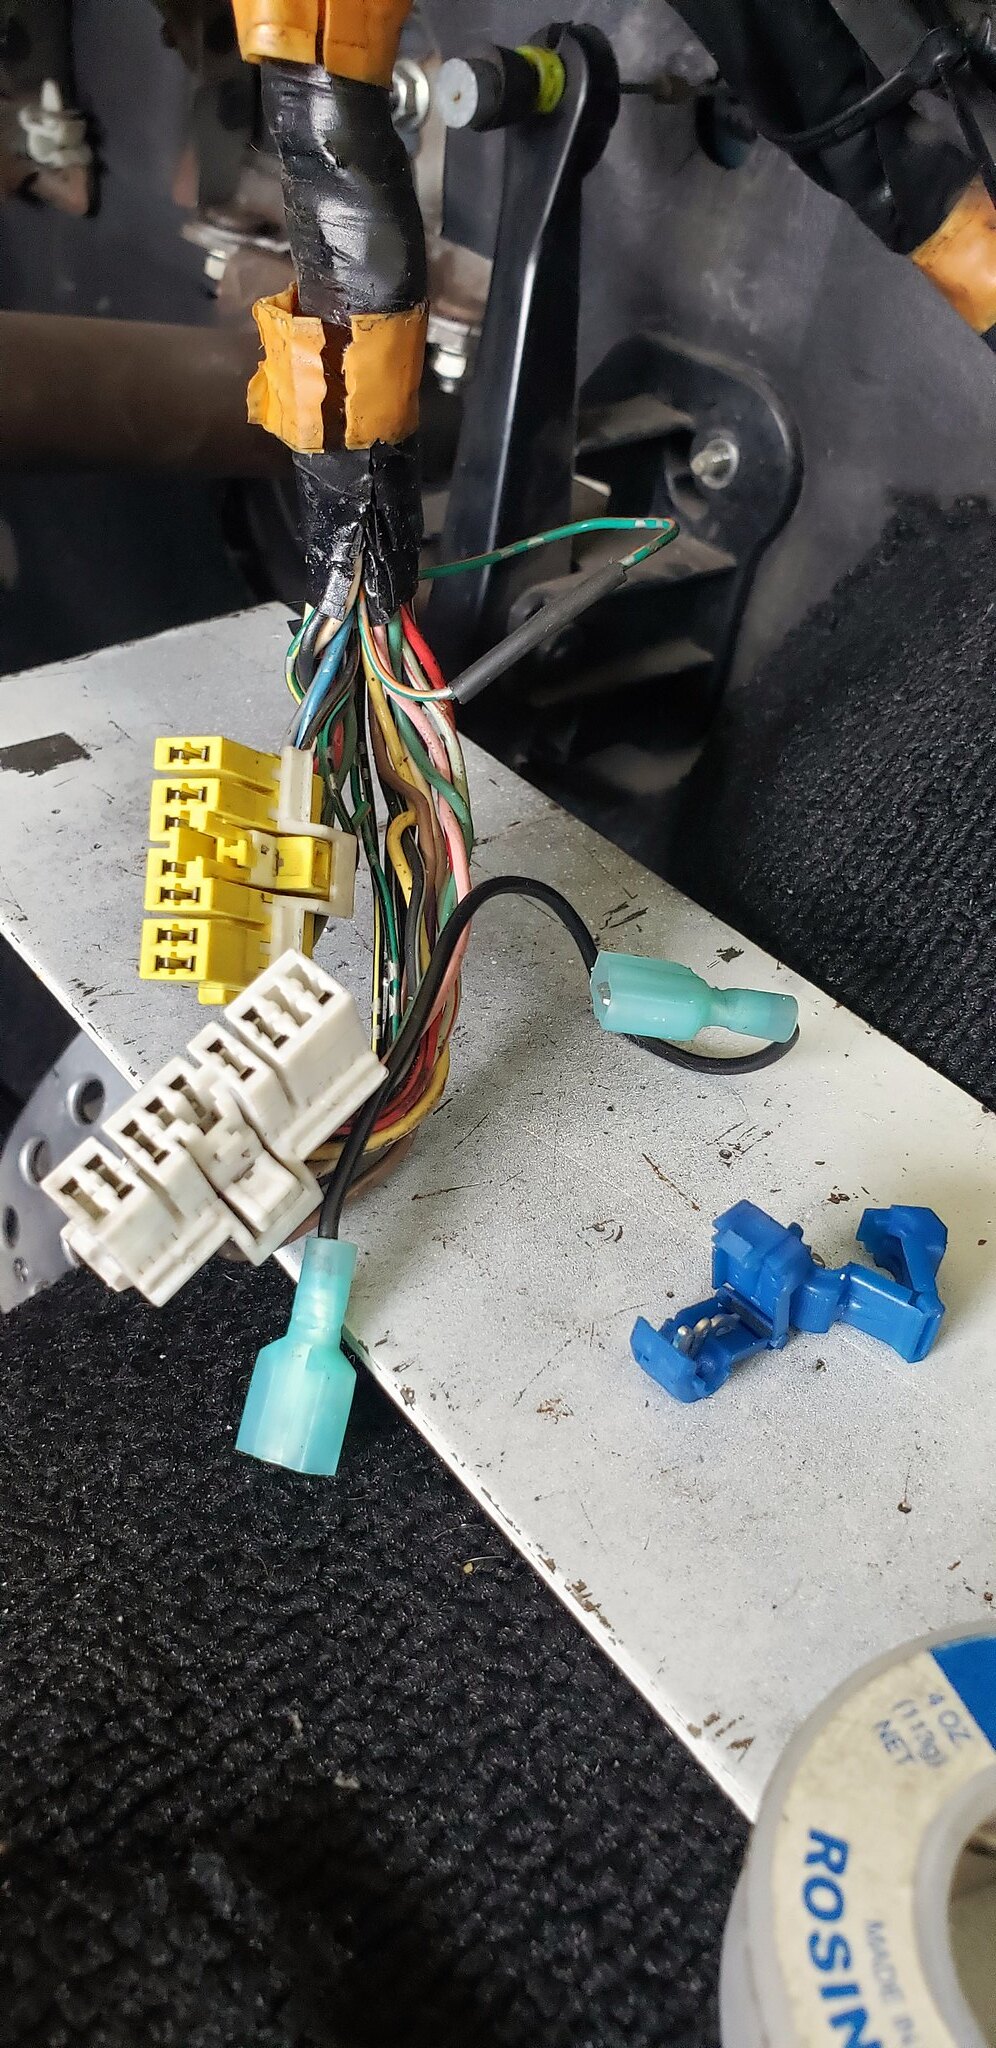
I try to clean up any past horrid wiring choices when I see them. I think this one is for the stereo, but I don't remember for sure. These connectors plug into a box that mounts to the side of one of the HVAC boxes, and I no longer needed it a few years ago and removed it and spliced the wires together with the things in the pic. I had all kinds of issues with the gauges using these, and I was permanently strapping these connectors up along the firewall so they wouldn't be accessible without putting the dash and this had to go, so I soldered it and taped it up. I was going to just use a piece of jumper wire on terminals to plug into each connector, but these wires don't actually go to any of the terminals in the connector. These connectors have a little metal piece that these wires go to and then the metal box they plug into completes the circuit.
Image2022-04-19_11-12-50 by Eric Jausel, on Flickr

User avatar
speedjunkie
Senior Member
Posts: 5287
Joined: Wed Jan 02, 2008 9:14
Location: Colorado Springs
Contact:

Re: Build thread

Postby speedjunkie » Wed Apr 20, 2022 9:14

I picked up the pieces for the fuse box bracket from Precision Water Jet today, and made some modifications to them as needed. It's 14ga steel and it's just a tad too thick to slide into the fuse box tabs, and in some cases they were too wide or whatever. They're very snug though so I think they'll work very well. I had a set made for Xavier too. I'm going to see if there is any interest in them and I might get several more sets made. It was quite a bit more expensive than I remember, but he did have to do some extra work to design these before cutting so getting extras made won't be as expensive.
Image20220420_183114 by Eric Jausel, on Flickr
Image20220420_193207 by Eric Jausel, on Flickr
Image20220420_200931 by Eric Jausel, on Flickr

User avatar
speedjunkie
Senior Member
Posts: 5287
Joined: Wed Jan 02, 2008 9:14
Location: Colorado Springs
Contact:

Re: Build thread

Postby speedjunkie » Sat Apr 23, 2022 9:14

Another busy day today, and pretty much everything was a win.

I started by making these little harnesses for the front speakers. Really unnecessary, I've been using this wiring since about 2012 with no issues, and it's behind the door panel anyway. But it was easy enough to do and I really like making harnesses now haha. I wanted to use heat shrink but I forgot to put it on before I crimped the terminals on, so zip ties will have to do.
Image20220423_102327 by Eric Jausel, on Flickr
Image20220423_105025 by Eric Jausel, on Flickr

Then I finished swapping over the replacement fuse box from the original one that I broke (just the mounting tab, but still). And while I was doing that I decided to do a modification to the fuel wiring using this thread https://www.rx7club.com/3rd-generation- ... e-1124167/. If/when I switch back to one fuel pump, I might switch back to the stock wiring aside from this mod. Since about 2010 both of the pumps have been on relays with power coming directly from the battery. The only problem with this is the pumps running full voltage all the time instead of dropping down at idle like the stock system (IIRC it drops to 9V). Supposedly having it wired this way still gets the pumps the full 12V when needed but it will still drop down. We'll see. The blue wire that's off to the right is the wire that was plugged in, now I have the same wire that was cut that came with this relay box that I crimped a fuse terminal on and added a 20a fuse for this.
Image20220423_122049 by Eric Jausel, on Flickr

I picked up a Garage Alpha aluminum gas pedal since they were on sale, and that came in today so I installed that within a few minutes. I got the wide one so it's easier to heel toe.
Image20220423_141422 by Eric Jausel, on Flickr
One of these things is not like the others lol. They match, but I'm tempted to pull the other two pedals and get them sandblasted. There is a matching aluminum piece to go on the dead pedal too, but it's $155 so I might try to scan the stock dead pedal and get one machined, if it's not too pricey.
Image20220423_143043 by Eric Jausel, on Flickr

I stripped out the excess wires from the dash harness, although the only ones I really stripped out were related to the Bose speaker system. It was a connector for some box I pulled out from under the tranny tunnel a few years ago. The wiring was a bit confusing because four of them were spliced into terminals with other wires and one of them was ground apparently that was spliced into another set of wires, so those I had to just cut off and hope it didn't mess up anything lol. I found a few other bad wires like the one below so I fixed those too.
Image20220423_163932 by Eric Jausel, on Flickr

I wanted to flush the power steering system today but I didn't get around to it, so hopefully I can knock that out tomorrow and maybe put the rebuilt AC compressor and power steering pump back in.

The list is getting a bit shorter. I'm still waiting on the 3D scanner and my ECU, and waiting for my starter harness to get rebuilt and weld the seats and splitter frame. I really just want to get this on the road already though.

User avatar
speedjunkie
Senior Member
Posts: 5287
Joined: Wed Jan 02, 2008 9:14
Location: Colorado Springs
Contact:

Re: Build thread

Postby speedjunkie » Tue Apr 26, 2022 9:14

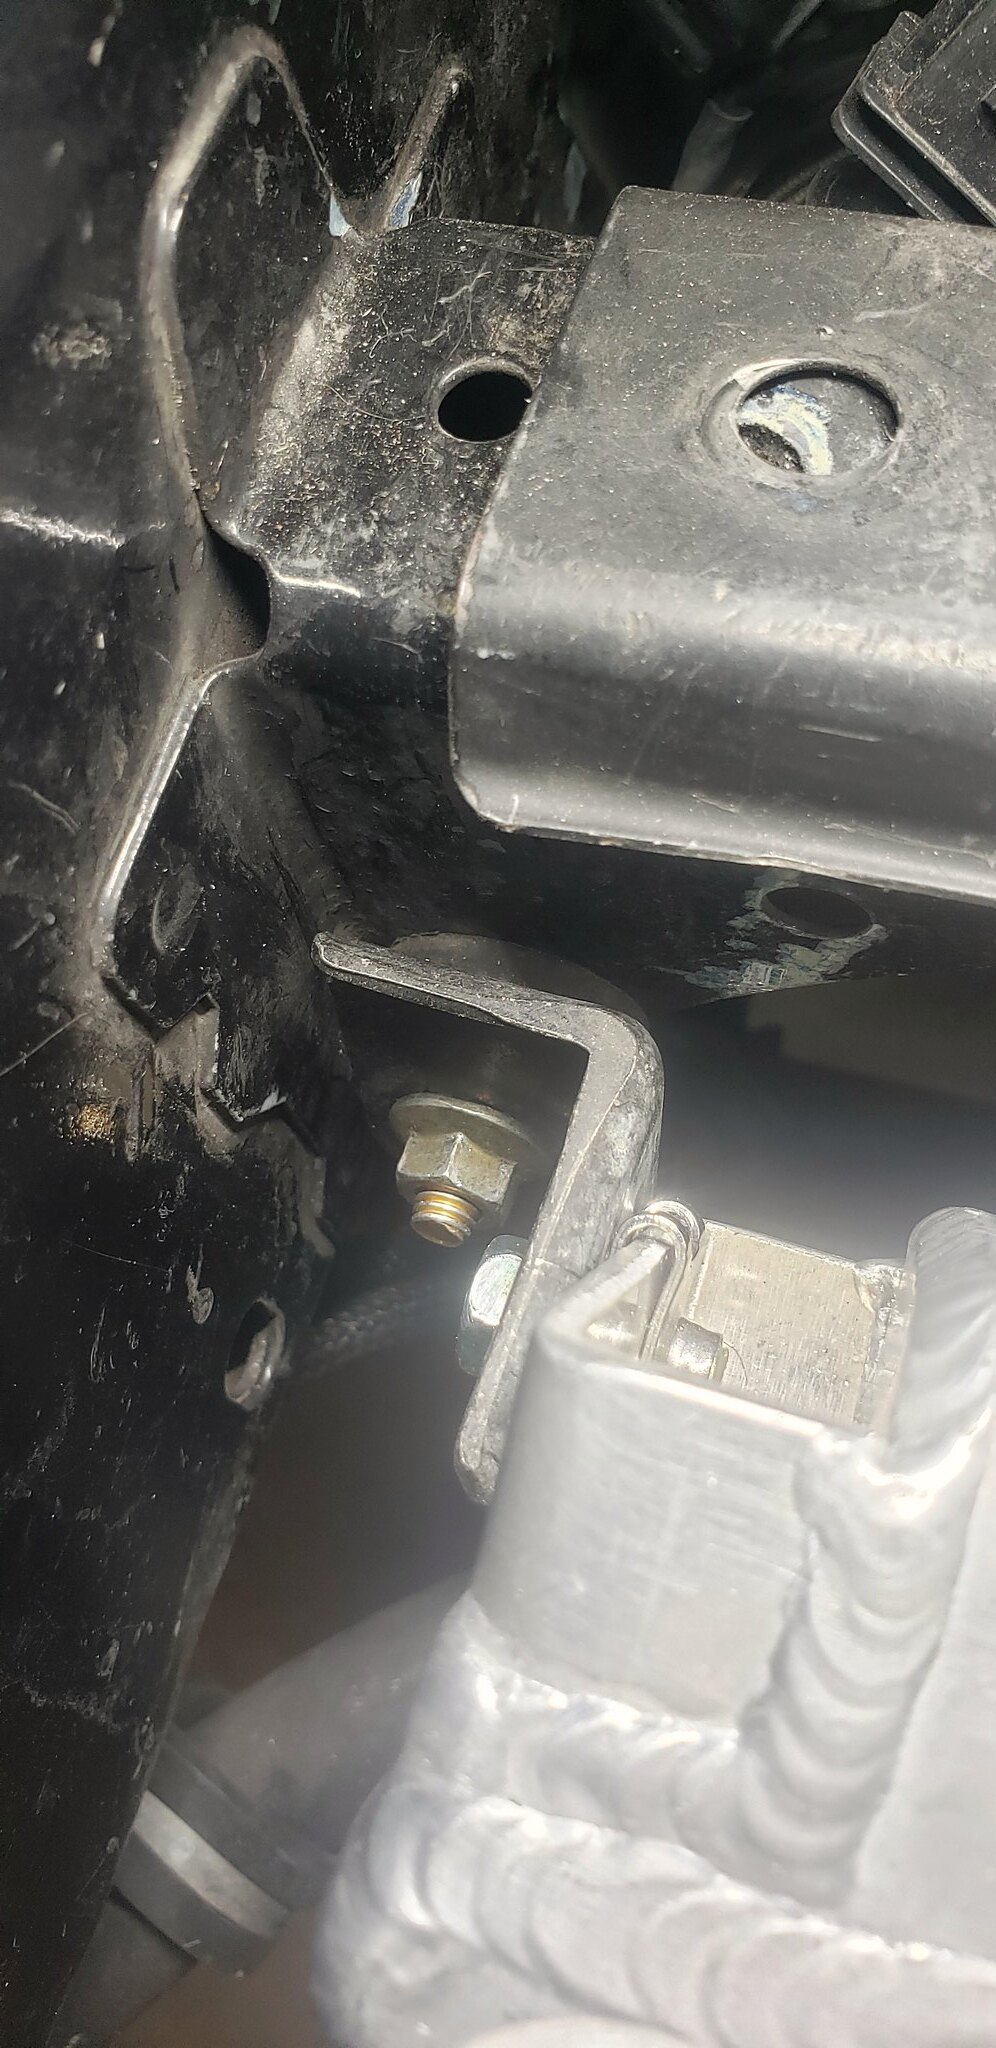
Not much of an update. I flushed the power steering last night and installed the stock radiator upper mounts. It looked like there was only one way to really do it, so I drilled a hole in the cross member supports and installed rubber mounts. It turned out pretty good I think, and now the radiator is completely isolated from touching any metal (just in case I do have stray current), aside from the AC condenser being mounted to it and the hard line going to the evaporator. The evaporator is isolated also, but not if that hard line makes contact with the chassis. I'm going to pull the mounts back off and get them cadmium plated or something when I get the fuse box mount done. I don't remember what plating all the pieces currently have actually. This isn't the ideal mounting solution for rubber mounts like this, considering it should have a vertical load on it instead of horizontal, but we'll see how they do. Considering the hoses will be helping hold up the back end, I don't think they will be stressed too much.
Image2022-04-26_09-50-07 by Eric Jausel, on Flickr

User avatar
speedjunkie
Senior Member
Posts: 5287
Joined: Wed Jan 02, 2008 9:14
Location: Colorado Springs
Contact:

Re: Build thread

Postby speedjunkie » Wed Apr 27, 2022 9:14

I cleaned up and polished the crank pulley tonight since I could access it, and I was going to put 3oz of oil into the AC compressor and install it, but I made it as far as installing one of the lines and noticed the power steering return hose had some serious abrasion. I removed the pressure hose and checked it too. I cleaned up that area of the engine bay a bit since there were shavings from grinding off the corner of the oil catch can. I pulled the oil coolers and dumped the oil out of those also. I'll be taking the seats and splitter frame to Matt's on Sunday. WOOHOO! That's a big step closer, and I can finally finish the seats and the splitter if I can get some Alumalite soon.

I'm seriously thinking about putting the new bumper and sideskirts on, and with that will come the FEED combo lights. These pieces aren't painted, but the hood hasn't been painted either. The perks of having a black car lol.

User avatar
speedjunkie
Senior Member
Posts: 5287
Joined: Wed Jan 02, 2008 9:14
Location: Colorado Springs
Contact:

Re: Build thread

Postby speedjunkie » Fri Apr 29, 2022 9:14

Seriously bad news today. The ECU is toast. It will still run the car, but the circuit that was supposed to run the water injection is fried and can't be repaired. And on top of all that, there is no warranty or discount, it's just done and I have to come out of pocket to replace it. Chris did say he'll help me with it if it's due to how he wired the water injection harness.

There is a used ECU that's my same model for sale in England for about $1700, and there are two options of new models, one for $2100 and one for $2500. All of these have the same connectors as mine so it would be plug and play pretty much. However, the one thing I've regretted about this ECU is limited support, so I was thinking about maybe switching to a Haltech Elite 2500. It looks like it uses the same connectors/terminals, but doesn't look like it has as many inputs and outputs.

This is a huge kick in the nuts.

User avatar
speedjunkie
Senior Member
Posts: 5287
Joined: Wed Jan 02, 2008 9:14
Location: Colorado Springs
Contact:

Re: Build thread

Postby speedjunkie » Wed May 04, 2022 9:14

Plenty of updates, some of which I won't remember since I haven't posted in several days. I've been working on it pretty much every day with any spare time I've had.

I got the FEED combo lights and Shine covers in the bumper, although I'm contemplating having the bumper painted first.
Image20220430_170808 by Eric Jausel, on Flickr

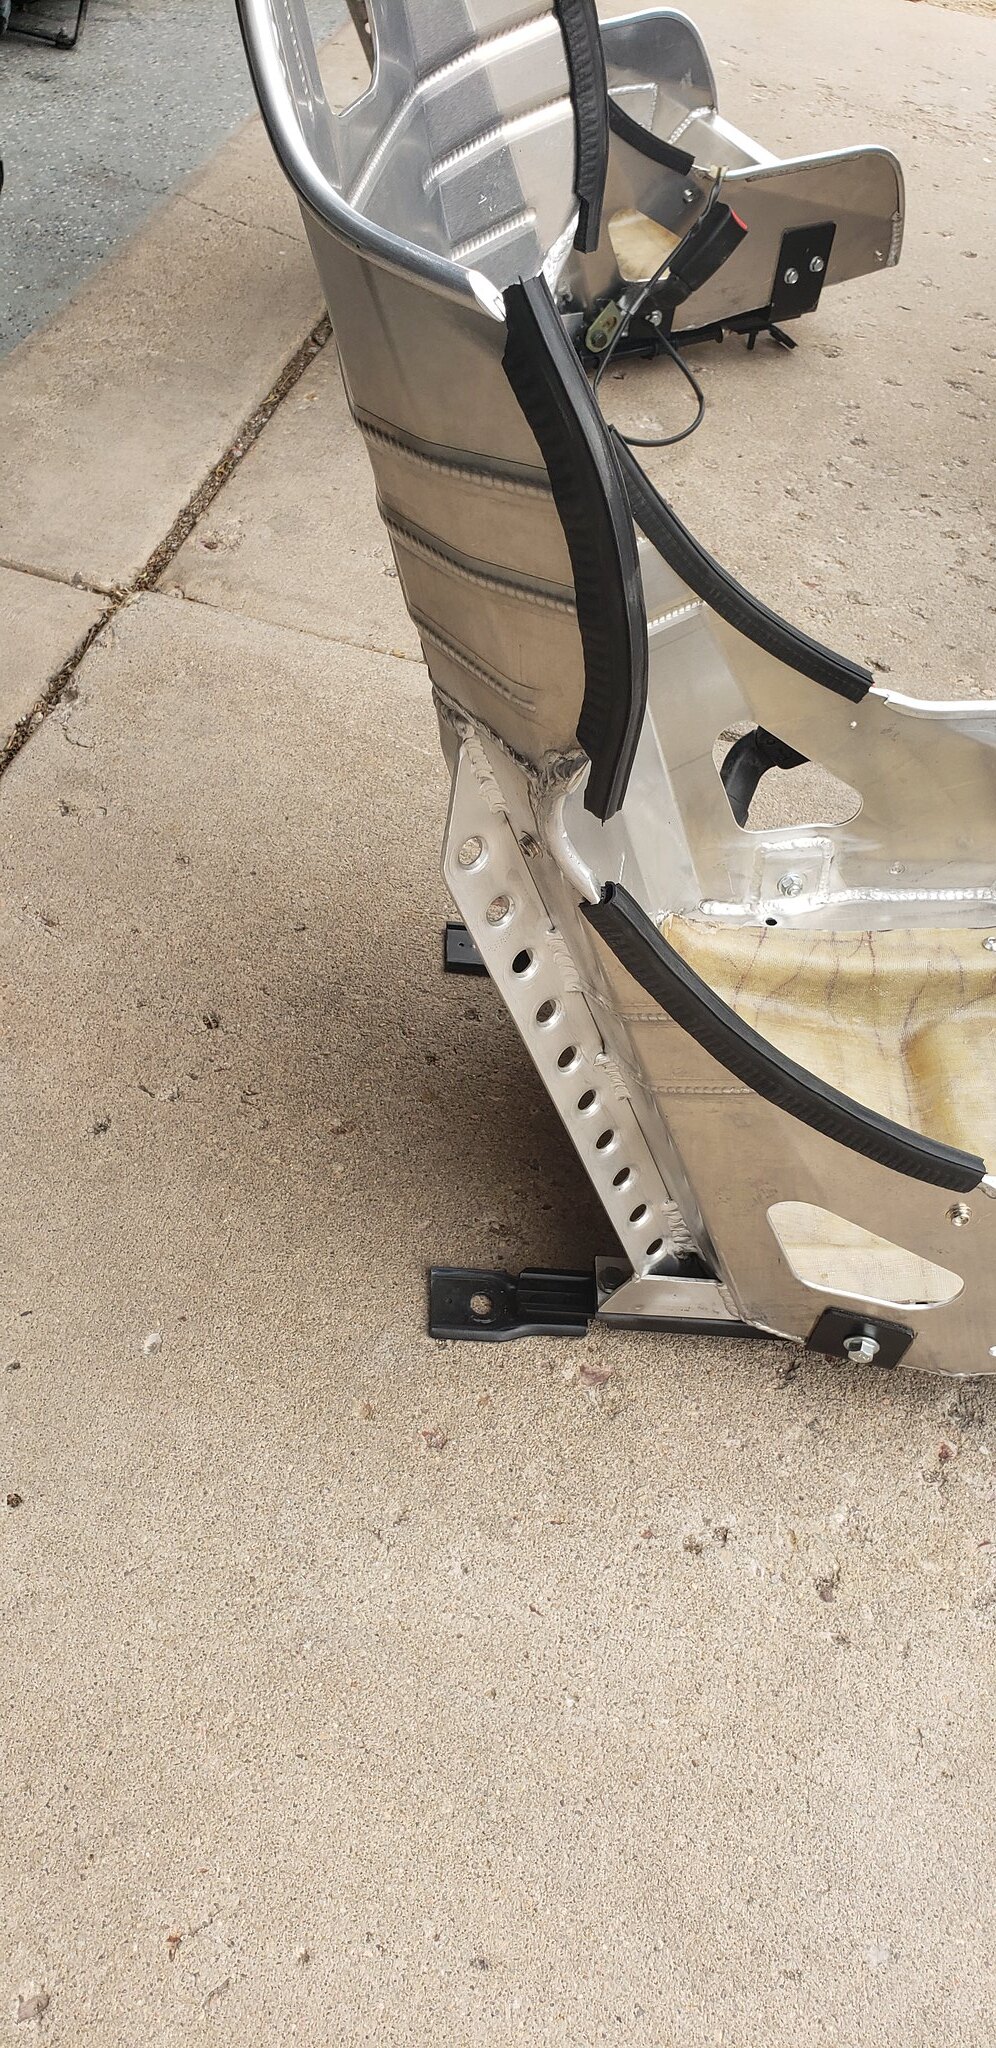
Sunday I went to Matt's and used the dimple die on the seat supports and he welded those on and welded up my splitter frame and filled in a couple spots on one of the high side AC lines for me where the boost control lines had been rubbing. That afternoon I got home and modified the seats a bit more and tonight I heated up the Kydex pieces and put them on. I'm not super happy with how they turned out. I might try to find someone to sew in some thick leather pieces instead.
Image20220501_122946 by Eric Jausel, on Flickr
Image20220501_130855 by Eric Jausel, on Flickr
Image20220501_172307 by Eric Jausel, on Flickr
Image20220504_213838 by Eric Jausel, on Flickr

I reshaped the ducting in the dash back to normal a little to try to improve fitment and reduce air leaks, and replaced some weather stripping on the dash and HVAC boxes again to try to improve the sealing to help air flow. For years I've been looking for ways to increase the output of the blower and someone on 7club mentioned he thought the RX-8 squirrel cage would fit, so I bought an RX-8 blower motor (with cage) and a replacement FD motor (without cage) from Rock Auto. The blower motor and cage can be replaced with the dash in the car, so I believe I'll go ahead and put the dash and seats back in and finish out the interior.

I got all the connectors on order so David can rebuild my starter harness, but it might be a while since he's trying to finish his project at the moment too.

I cleaned the oil coolers and have them somewhat reinstalled again, only waiting to tighten some of the bolts down once I get the splitter in place where it needs to be, and I still have to order some kind of splitter material. I swapped out one of the oil cooler brackets because it wasn't long enough to work with the splitter mounts.
Image20220504_213902 by Eric Jausel, on Flickr

I'm going to take the ECU to Matt Schultz at some point and see if he can repair the board.

I ordered some parts from Mazda that should be in tomorrow and I can start getting the engine bay back together more.


Return to “Rotary Vehicle”

Who is online

Users browsing this forum: No registered users and 55 guests