FDEEZ's Build Thread

Talk about your Rotaries!
FDEEZ
Senior Member
Posts: 235
Joined: Sun Aug 11, 2013 9:14
Location: Colorado Springs

Postby FDEEZ » Mon Jun 02, 2014 9:14

(...continued from previous page)

Steps to remove/replace steering rack & pinion:

*Before beginning, I recommend measuring the distance from the rack to the end of each tie rod. Makes centering the rack easier when putting everything back together.

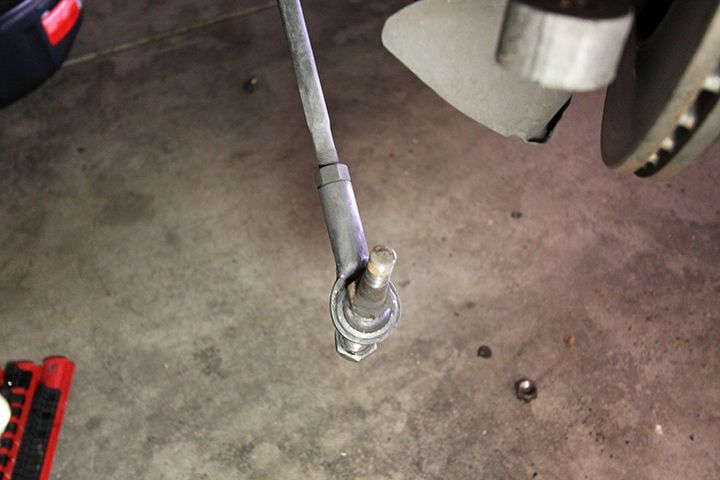
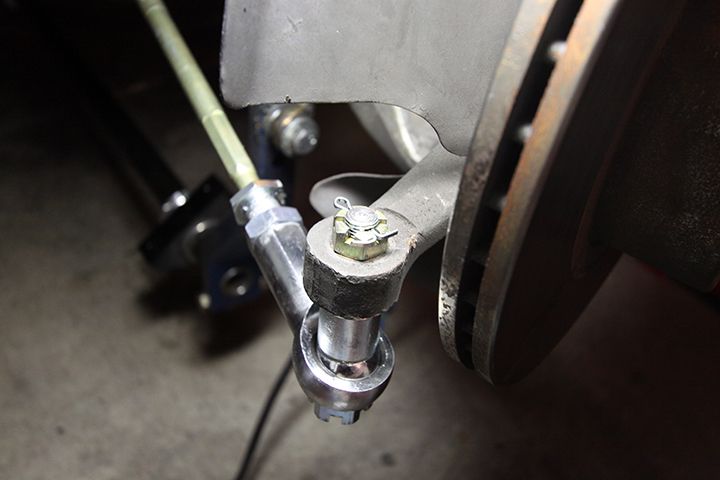
Step 1: Remove cotter pin & tie rod nut (in my case top & bottom nuts). Then I placed a 3/8" drive extension bar atop the bump steer stud and gave it a good whack with a hammer.
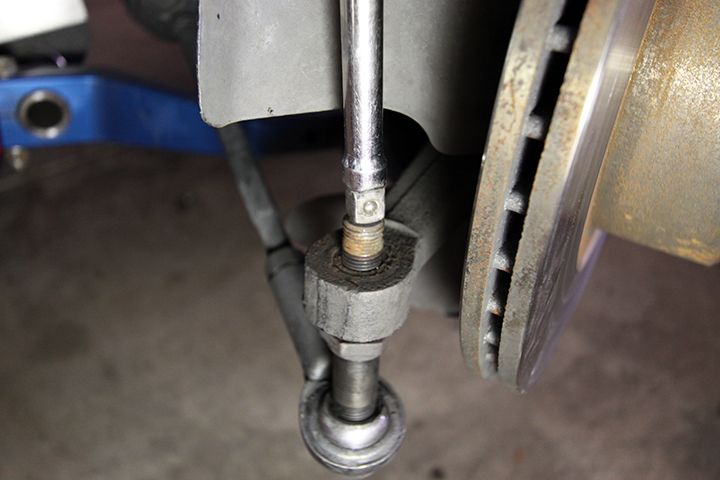
Image

And out it popped:
Image

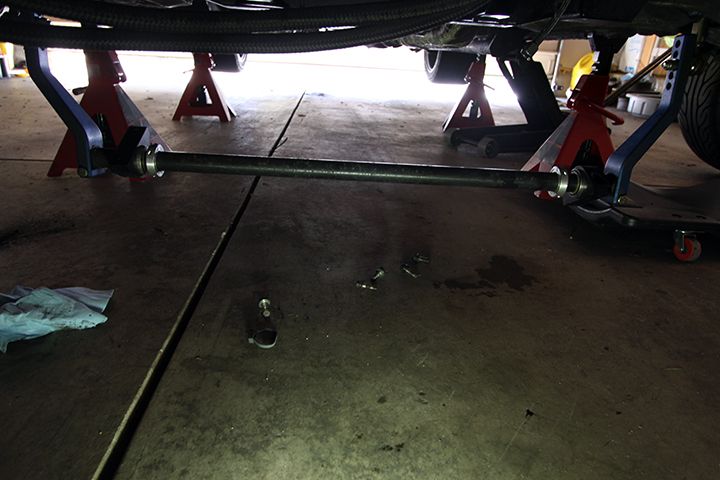
Step 2: Disconnect front sway bar mount. Definitely a must for more clearance in pulling out the rack & pinion.
Image

I just let the bar hang freely:
Image

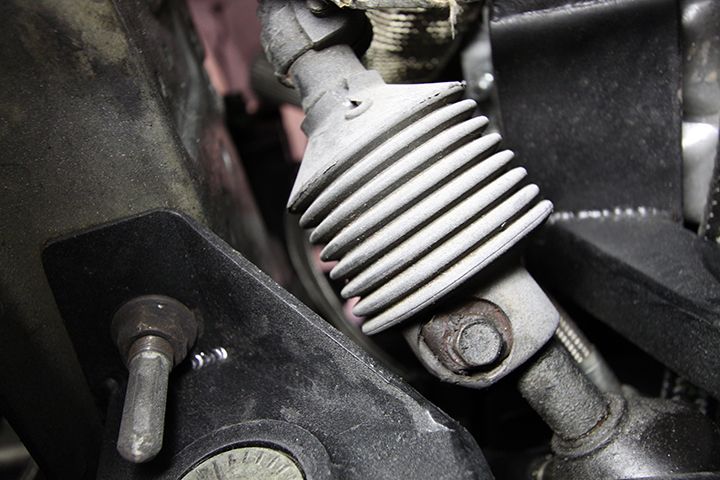
Step 3: Unbolt the stabilizer brackets:
Image

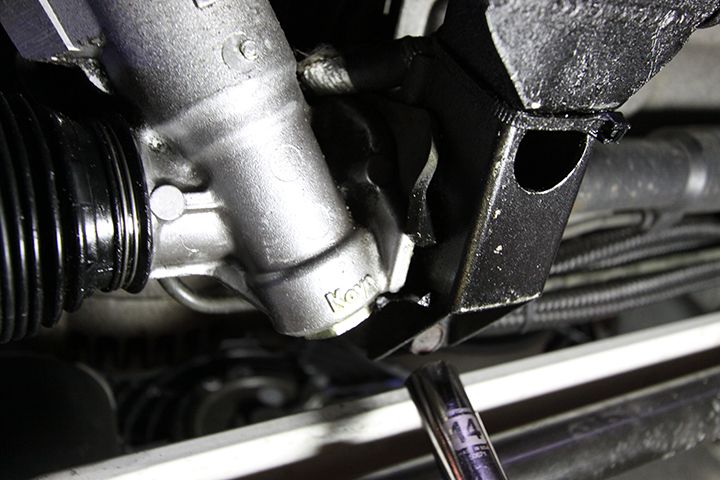
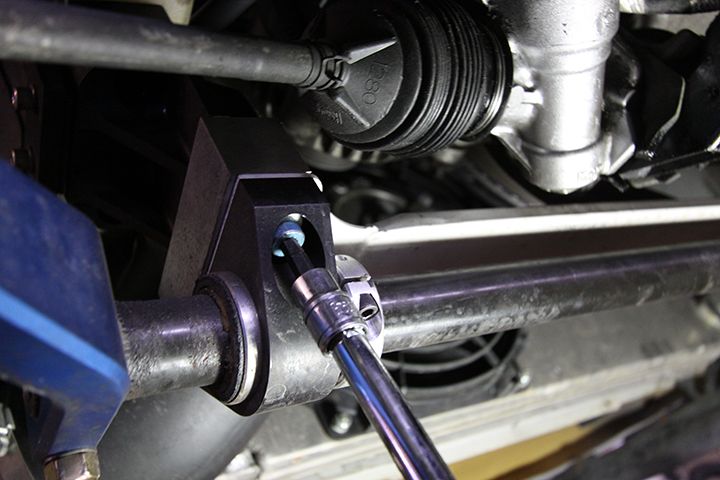
Step 4: Finally unbolt the steering joint/pinion shaft (the bottom bolt):
Image

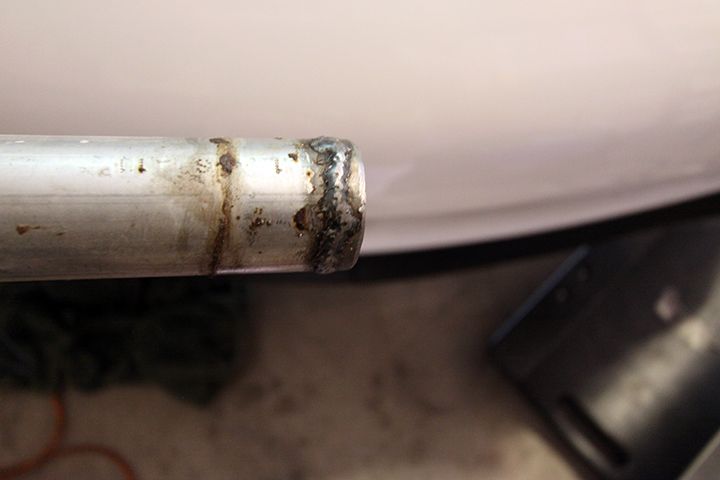
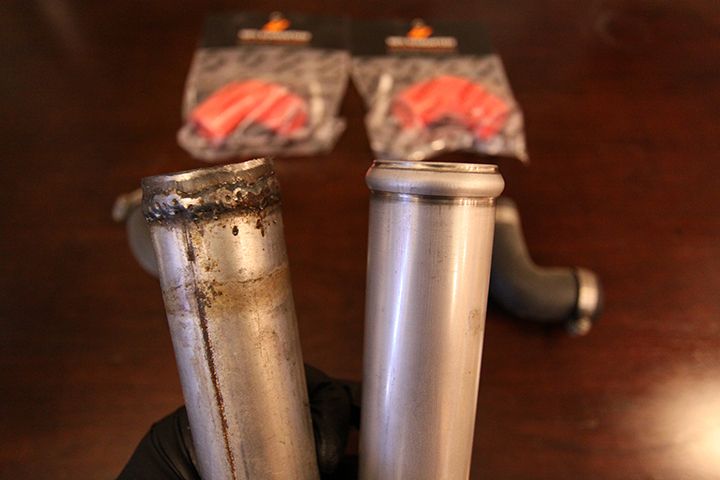
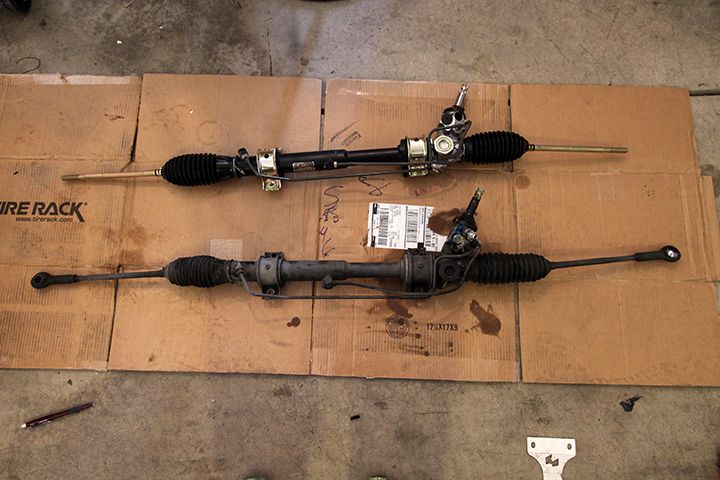
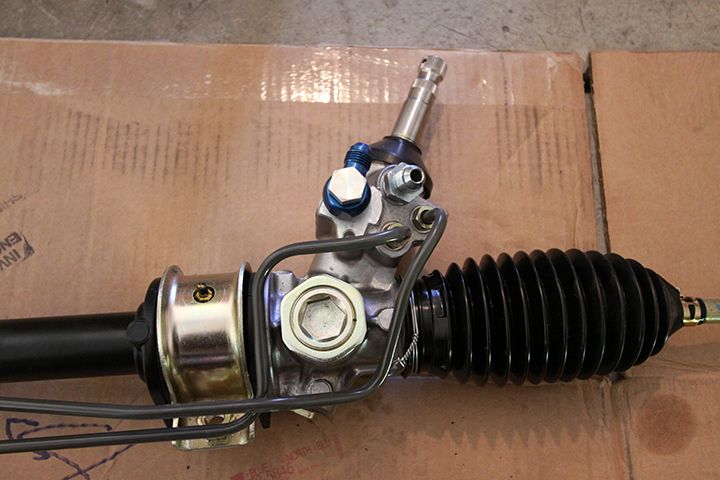
Here's the leaky rack next to the brand new one:
Image

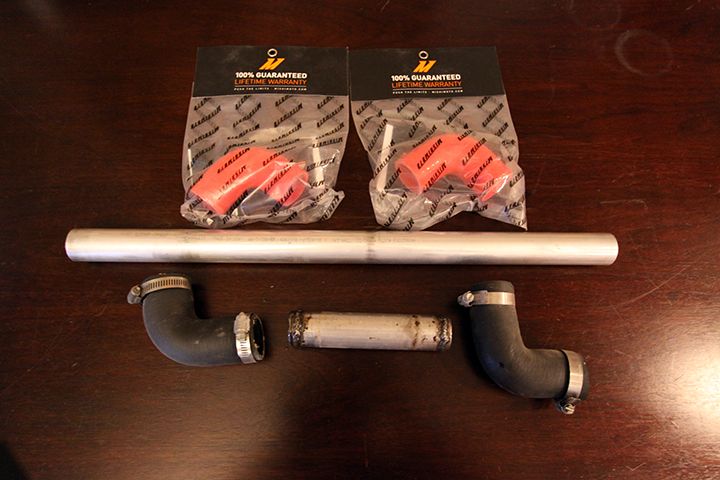
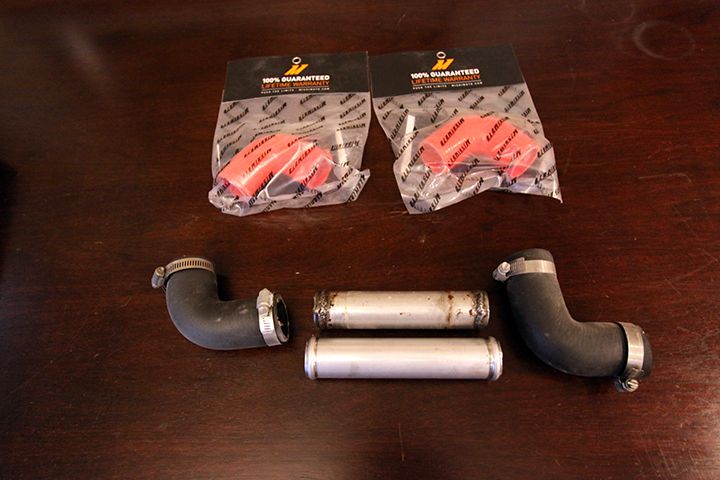
Here's a different brand bump steer kit that I'll be trying out (next to the old one):
Image

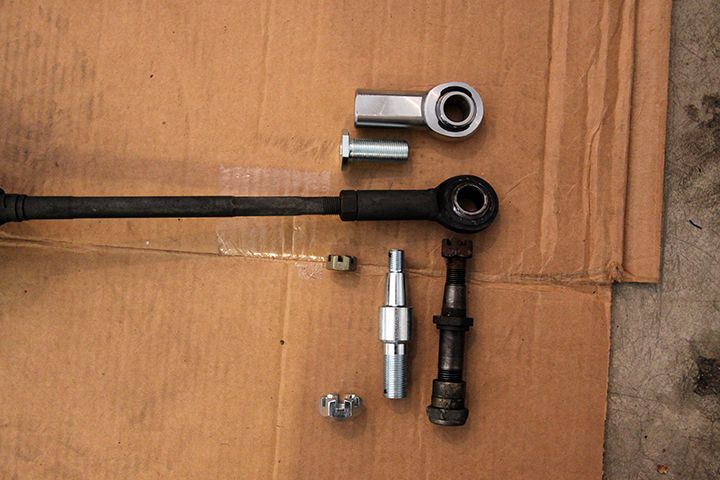
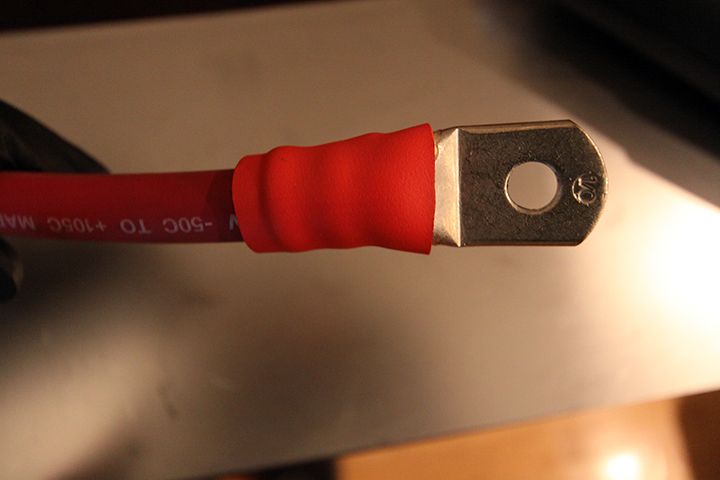
Step 5: Install tie rod ends (or bump steer kit) & transfer any applicable fittings.
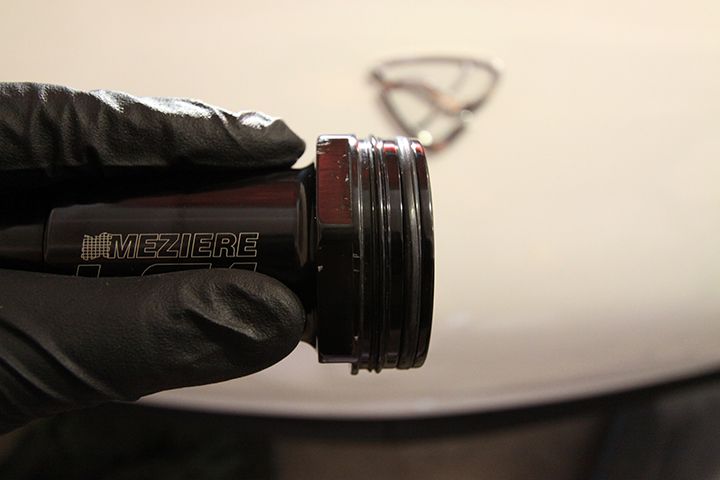
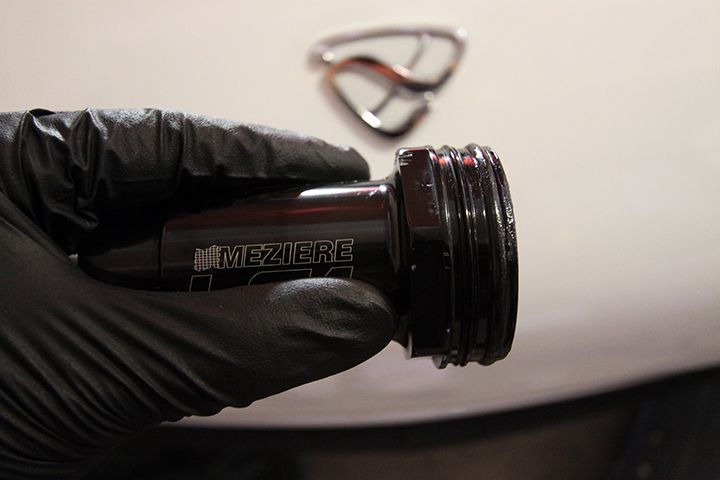
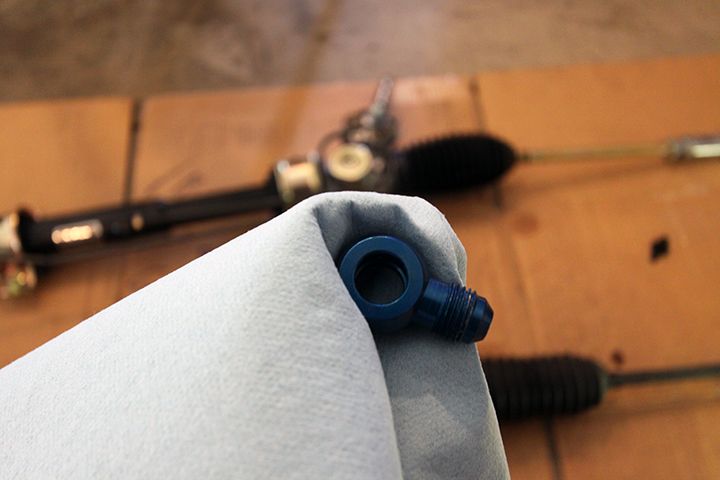
Here's the low pressure fitting (converts to -6AN)
Image

Here's the high pressure banjo fitting (also converts to -6AN)
Image

And here's the fittings transferred over to the new rack:
Image

Step 6: Re-install rack back onto the car in the reverse order.
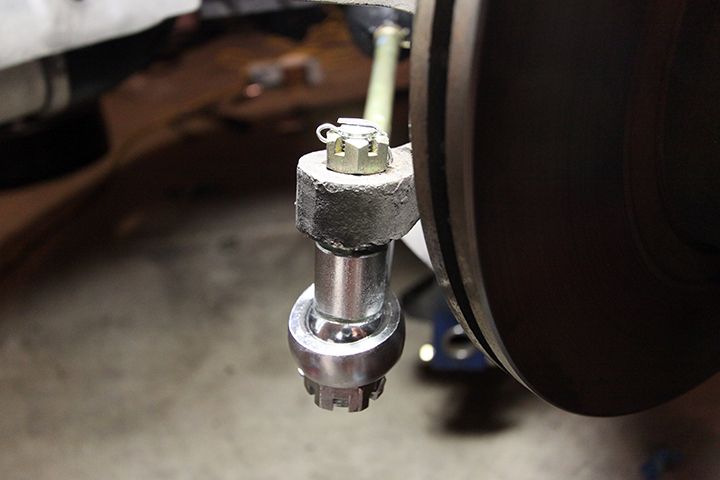
Regarding the cotter pin:
Image

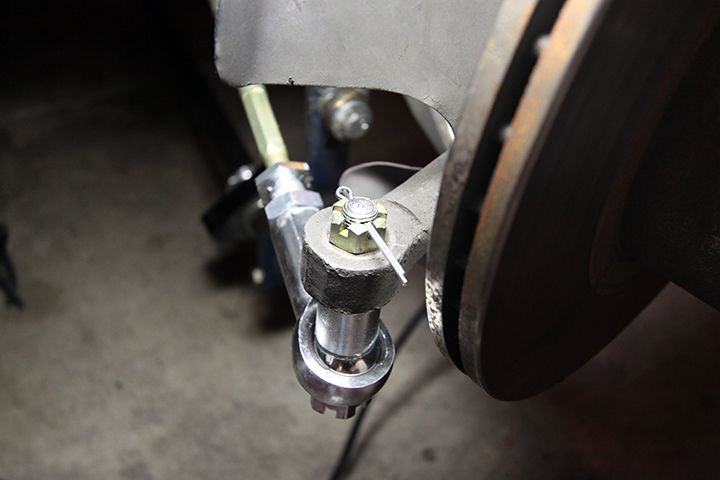
I tried this method first:
Image

But felt bending the pin over the stud & towards the nut was the most secure method for both the upper and lower castle nuts:
Image

ALL DONE!!! Time to get an alignment.

FDEEZ
Senior Member
Posts: 235
Joined: Sun Aug 11, 2013 9:14
Location: Colorado Springs

Postby FDEEZ » Mon Jun 02, 2014 9:14

The good news is that virtually all the free play from my front end is now gone. The bad news is that I discovered a leak in my coolant system while replacing the rack.

Stay tuned while I tackle that project.

The car is definitely starting to show its age :(

FDEEZ
Senior Member
Posts: 235
Joined: Sun Aug 11, 2013 9:14
Location: Colorado Springs

Postby FDEEZ » Sun Jun 22, 2014 9:14

Haven't worked on the car much. Been focused on other hobbies & priorities. I did, however, get a spare rear subframe to play around with. I guess you can tell where this is going.

Image

Other than the 4.10 gearing & having to shift into 5th during the quarter, my Kaaz rear & upgraded axle bars are holding up. Therefore, I'm in no rush to swap out the rear carrier...it'll probably be a long-term project.

Besides, I still need to fix my coolant leaks...and I now have a severe power and/or grounding issue I need to resolve. I'm probably going to redo all my power & grounding cables to be sure...it's up in the air.

User avatar
VRx8
Senior Member
Posts: 755
Joined: Sat Jul 04, 2009 9:14
Location: San Antonio, TX

Postby VRx8 » Sun Jun 22, 2014 9:14

The pumpking itself is the weak point. I have the Ronin 8.8 rear end on mine.

FDEEZ
Senior Member
Posts: 235
Joined: Sun Aug 11, 2013 9:14
Location: Colorado Springs

Postby FDEEZ » Sun Jun 22, 2014 9:14

The Ronin kit is well engineered. That's the cradle that was just welded onto my spare subframe.

What gear ratio and limited slip did you go with? I may go with a 3.55...not sure on limited slip though.

User avatar
VRx8
Senior Member
Posts: 755
Joined: Sat Jul 04, 2009 9:14
Location: San Antonio, TX

Postby VRx8 » Mon Jun 23, 2014 9:14

Since im rotary i need a little help on the low end so I went with a 4.30 gear ratio with a Ford Racing LSD with Carbon Clutches. Same as Cobra's

FDEEZ
Senior Member
Posts: 235
Joined: Sun Aug 11, 2013 9:14
Location: Colorado Springs

Postby FDEEZ » Mon Jun 23, 2014 9:14

Those are some short gears you got. Hope it works out.

1st, 2nd, and parts of 3rd are completely useless for me (on street tires). Chirping the tires on normal shifts while cruising was fun at first...but got old quick. Hopefully the 3.55's will improve driveability as well as track performance. 12" wide wheels or 28" tall tires would probably solve my problem as well...but that's plan B & C. But like I said, it'll probably be some time before I swap out the carrier & test out the longer gears.

FDEEZ
Senior Member
Posts: 235
Joined: Sun Aug 11, 2013 9:14
Location: Colorado Springs

Postby FDEEZ » Tue Jul 29, 2014 9:14

FINALLY done with school! Whoop, whoop! Haven't worked on the car for over a month because I was finishing that up...but hopefully I can get the car back on the road this weekend. Got plenty of discretionary time now :-)

Saul_Good...watch out, I'll be joining you on the track soon (fingers crossed).

User avatar
Saul_Good
Senior Member
Posts: 480
Joined: Sun Jul 22, 2012 9:14
Location: Cerritos, CA (DW says i can't play here anymore...)
Contact:

Postby Saul_Good » Tue Jul 29, 2014 9:14

FDEEZ wrote:FINALLY done with school! Whoop, whoop! Haven't worked on the car for over a month because I was finishing that up...but hopefully I can get the car back on the road this weekend. Got plenty of discretionary time now :-)

Saul_Good...watch out, I'll be joining you on the track soon (fingers crossed).


Wewt wewt! Done done with school? I'm crossing fingers too, i need to see this beast.
Image

FDEEZ
Senior Member
Posts: 235
Joined: Sun Aug 11, 2013 9:14
Location: Colorado Springs

Postby FDEEZ » Wed Jul 30, 2014 9:14

Saul_Good wrote:Done done with school?

Yup! Well...I've been "done done" with my bachelors & masters a while back. This was military PME. An absolute PITA one to say the least. My boss has been giving me daily sh#t about not finishing it up ever since I pinned on my new rank several months ago. Although I have like 2 yrs to finish it, I decided to commit an entire month on knocking it out so my boss will leave me alone.

Saul_Good wrote:I'm crossing fingers too, i need to see this beast.

You may not see it in person yet, but here's a few teaser pics:
Image

It's amazing how much stuff you can cram into the FD. I was able to fit 4 wheels, an air tank, a floor jack, beach chair, extra 5 gallon tank, and some camera gear.

Image

Image

User avatar
millertime
Senior Member
Posts: 137
Joined: Mon Sep 09, 2013 9:14
Location: Denver Metro

Postby millertime » Wed Jul 30, 2014 9:14

God damn I do love white w/red interior FDs...

User avatar
Saul_Good
Senior Member
Posts: 480
Joined: Sun Jul 22, 2012 9:14
Location: Cerritos, CA (DW says i can't play here anymore...)
Contact:

Postby Saul_Good » Wed Jul 30, 2014 9:14

That's some serious packing skills.
Image

FDEEZ
Senior Member
Posts: 235
Joined: Sun Aug 11, 2013 9:14
Location: Colorado Springs

Postby FDEEZ » Thu Jul 31, 2014 9:14

millertime wrote:God damn I do love white w/red interior FDs...

Thanks! I like white vehicles in general. All my vehicles are white, lol.

Saul_Good wrote:That's some serious packing skills.

It was like playing Tetris. Almost forgot my helmet while packing.

FDEEZ
Senior Member
Posts: 235
Joined: Sun Aug 11, 2013 9:14
Location: Colorado Springs

Postby FDEEZ » Sun Aug 03, 2014 9:14

I didn't get as much done on the car this weekend as I wanted to, but I did manage to fix all the coolant leaks.

First leak was coming from the water pump outlet fitting:
Image

Turns out the o-ring flattened out and was no longer providing a good seal. Therefore, after a quick trip to Ace, replacement o-ring acquired. Unfortunately, squeezing this now fat thing into the hole was a b#tch. Applied some lube & rammed it in there:
Image

Second leak was from the water inlet hose:
Image

Image

I ghetto-fabbed a welded bead (whatever works...right, lol) on some 1.5"steel tubing when I first performed the motor swap. It seemed to work, and I'm surprised it lasted this long.
Image

Here's the replacement parts. Decided to switch from steel to aluminum...as well as switching from rubber hoses to silicone:
Image

All cut down & beaded:
Image

The MIL spec bead looks wayyy better:
Image

After bringing the car up to operating temps, it looks like everything is all sealed up now...no visible leaks. Hopefully it'll stay sealed up when I actually load test it on the street. But that won't happen until I get all my electrical issues squared away.

FDEEZ
Senior Member
Posts: 235
Joined: Sun Aug 11, 2013 9:14
Location: Colorado Springs

Postby FDEEZ » Sun Aug 10, 2014 9:14

Tackled my electrical system a bit over the weekend. Since the original work I did on all the power/grounds on the car was shady at most...my mission was to replace them all.

Though I'm straying from my original power/ground configuration, I'll most likely go with this layout (for now). Please excuse my chicken scratch:
Image

I've decided to ditch all the speaker wire & copper lugs that I originally installed, and am going to try something different. For this go-around, I'm going to experiment with "Quick Cable" "QuickFlex" 1/0 welding cable, MagnaLug lugs, MagnaLug battery terminals, 3M MIL Spec heat shrink (w/ adhesive), and a Quick Cable hex crimper. Hopefully the "cold-weld" created by the hex crimp will ensure all the juice I need from the battery makes it to whatever I need it (e.g. starter)...as well as ensuring I have good grounding.
Image

Image

As you can see, I'm going to "cold-weld" the cable at the positive and negative terminals...and the "cold-welded" negative cable will route directly to the engine block.
Image

Look what I found underneath my shifter console. Although my car is always on jack stands, something still managed to creep into my car and make a nest. All my wires "seem" to be visually okay. But like I said, I'm having some electrical issues, so this could very well be the culprit:
Image

Here's part of the old configuration:
Image

Image

Made a few cables already. Here's the double hex crimp:
Image

All heat-shrink'ed up. You can kinda see the adhesive:
Image

Quick comparo of the old lug and new lug:
Image

In addition to other things I had to take care of over the weekend, a good portion was spent removing my nitrous system (since I never use it...and needed extra room for that 1/0 negative cable coming through the firewall) and figuring out how I'm going to route the power/grounds. In other words, still have plenty of work to do before all the lines are made and installed. Just ran out of time.


Return to “Rotary Vehicle”

Who is online

Users browsing this forum: No registered users and 44 guests