My 1974 REPU Project
-
RX-7 Chris
- Posts: 7800
- Joined: Tue Oct 02, 2007 9:14
- Location: Colorado Springs
- Contact:
Re: My 1974 REPU Project
Let me know what you think of the POR15 kit, I've heard mixed reviews.
1984 RX-7 GSL-SE [size=84]My restomod project[/SIZE]
1964 Ford Galaxie 500XL flat black w/ white interior, 2 dr fastback, 390 thunderbird, C6 auto, 2500 rpm high stall converter, shift kit, AC, Holley 750 cfm
[size=100]RIP 1983 RX-7[/SIZE]
My Car Blog
-
chickenwafer
- Posts: 2515
- Joined: Wed Mar 11, 2009 9:14
- Location: Greeley
Re: My 1974 REPU Project
RX-7 Chris wrote:Let me know what you think of the POR15 kit, I've heard mixed reviews.
Will do. I'd say I've heard mostly good things. I imagine people who've had issues didn't do good enough prep work removing loose rust scale and varnish, so the sealer WILL peel up, just like paint would, if it's attached to loose rust or dirt. I'm hoping by following Aaron Cake's prep video, which achieved great results, I can get the tank clean enough to ensure a proper seal.
If I can't get it clean enough, I'll have to look into taking it to a radiator shop that can hot tank it. I have no idea how much that will cost, but right now between 3 gallons of super clean, brushes, and the POR15 kit I'm about $80 into restoring the tank. And the hot tanking process doesn't seal it like the POR15 process, so hopefully it works out.
-
RX-7 Chris
- Posts: 7800
- Joined: Tue Oct 02, 2007 9:14
- Location: Colorado Springs
- Contact:
Re: My 1974 REPU Project
I believe the hot tank cost me about $50.
1984 RX-7 GSL-SE [size=84]My restomod project[/SIZE]
1964 Ford Galaxie 500XL flat black w/ white interior, 2 dr fastback, 390 thunderbird, C6 auto, 2500 rpm high stall converter, shift kit, AC, Holley 750 cfm
[size=100]RIP 1983 RX-7[/SIZE]
My Car Blog
-
chickenwafer
- Posts: 2515
- Joined: Wed Mar 11, 2009 9:14
- Location: Greeley
Re: My 1974 REPU Project
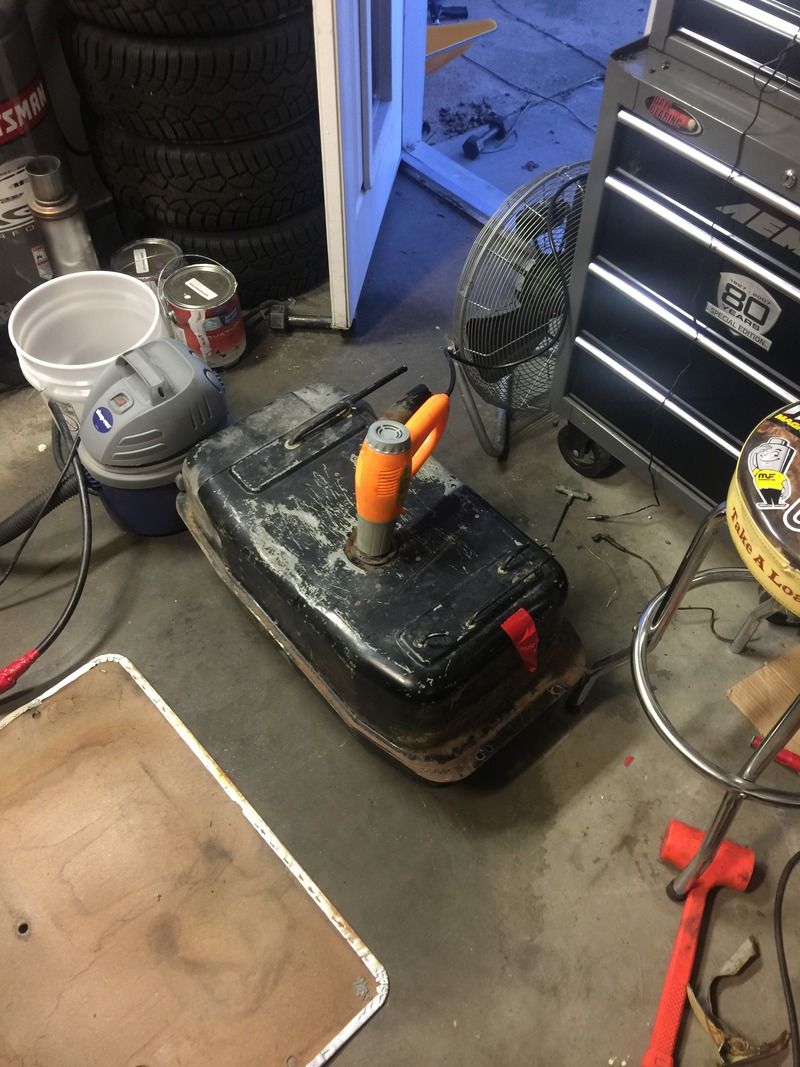
Well, I'm beginning to think nothing I can do at home will get this fuel tank clean. I've tried every trick and just more and more rust comes out. At this point it would be more cost effective to get someone to hot tank it.
I emptied another gallon of Super Clean in it and added about 2 gallons of water. I shook the tank vigorously for 15 minutes or so and then let it sit overnight. Holy crap a shit ton of more rusty water dumped out the next morning. Success, right? Not really; peering into the tank with a flashlight revealed still plenty of rusty surfaces and big chunks floating around that don't easily drain.
So I put another couple gallons of straight water in it and picked up some 99cent toilet brushes and got to work scrubbing, as best I could through the fuel sender hole, the inside of tank. This dumped a crap ton of even more rusty water, and the brushes were super rusty/dirty, but again, still rusty inside the tank.
I didn't have any chains to shake around inside the tank, so instead I dug into my spare nut n bolt drawer and found a good handful of 20 large bolts and dropped them into the tank. I spent the next 20 minutes- all I could do as my arms were on fire- shaking the huge fuel tank with the large bolts in it. I then filled the tank with more water and dumped it and again, the water was PURE orange. I also spent what felt like the next hour shaking the tank trying to get the bolts out...these fuckers wouldn't shake out easily! Took forever but finally got em. Not doing that again, a chain would be much easier.
But again, after looking into the tank with a flashlight, STILL lots of rust on surfaces. The bottom of the tank is looking pretty good, but the sides, not so much. My last attempt here is I filled the tank with the last gallon of Super Clean I have and filled the tank entirely with water and I've been letting it sit since yesterday and will empty it in another day. I'm not holding out much hope and may have to get it hot tanked anyways.
Moving on, I got some additional parts in today so I got to work mocking them up.
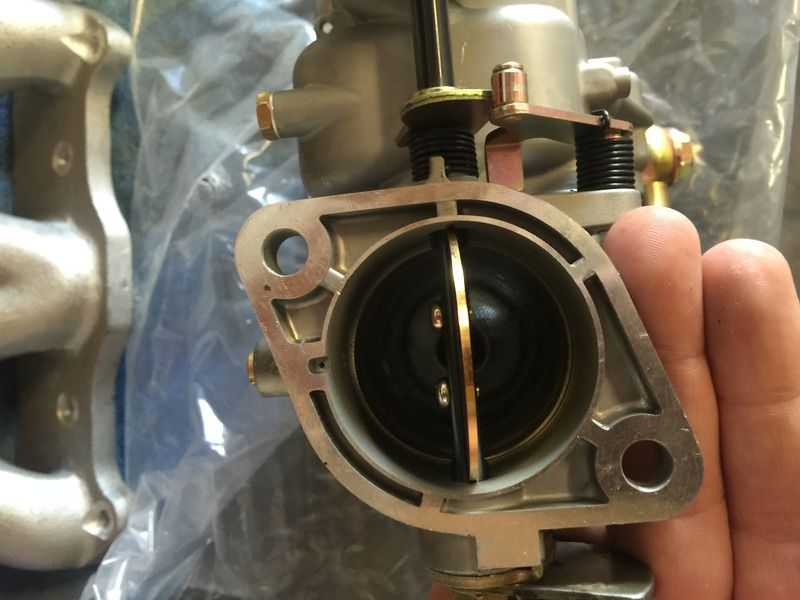
Here's the EMPI (Weber knock off) IDA 51.2mm carb, modified with 3rd progression hole and enlarged float bowl:
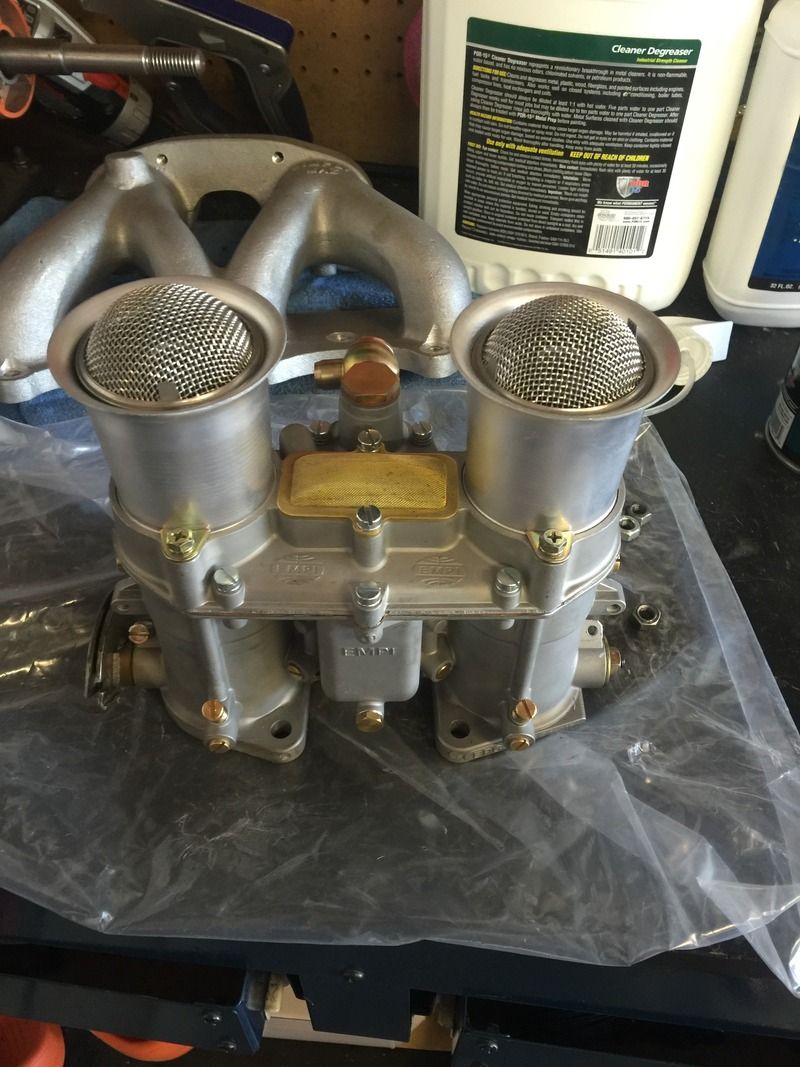
I added some mesh screens to the trumpets in favor of air filters. This isn't a daily so I think it will be fine. Under that gold screen in the center is the jets; SUPER easy to change out everything, you don't have to get into the fuel bowl:
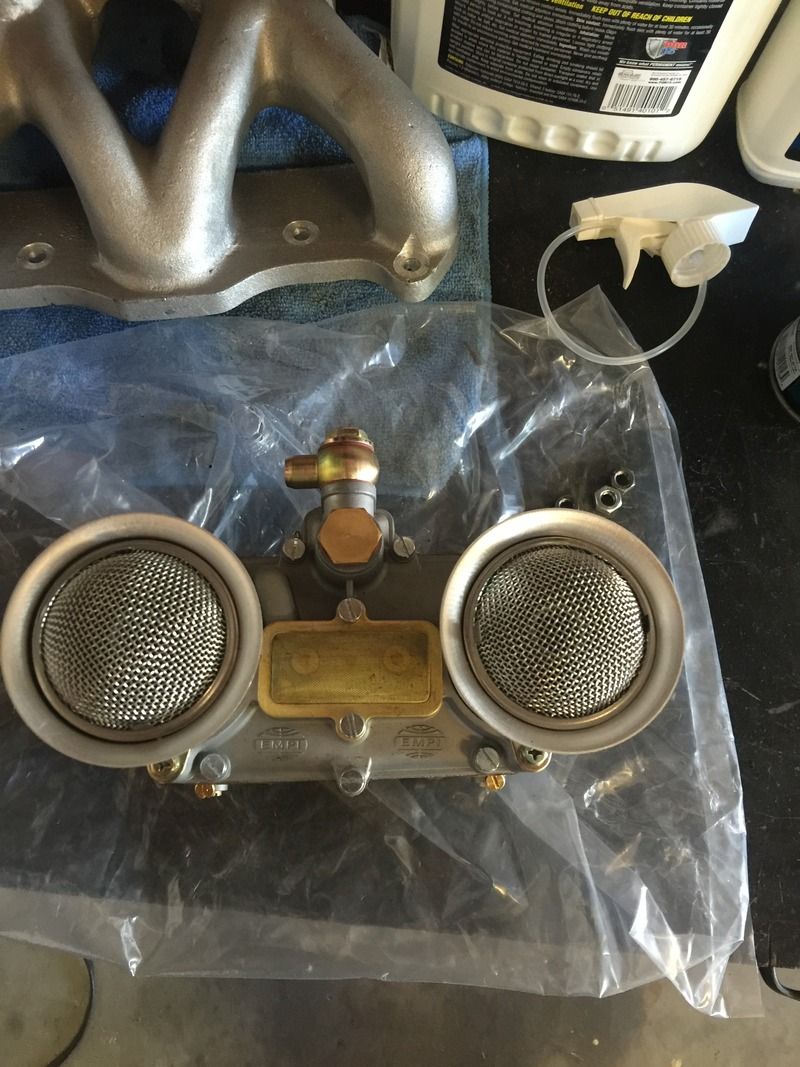
Look at all that airflow!
In this I tried to best show how I modified the stock carb throttle linkage bellcrank to the IDA carb. The throttle stop on the stock linkage was facing the wrong direction, so I kept the stock linkage on the carb and put the old linkage overtop. I have to use my hacksaw to cut off part of the stock linkage to allow the throttle cable to slip in and also cut off part of the stock linkage that was hitting the throttle stop screw. Saved me $30 bucks from having to order a new linkage:

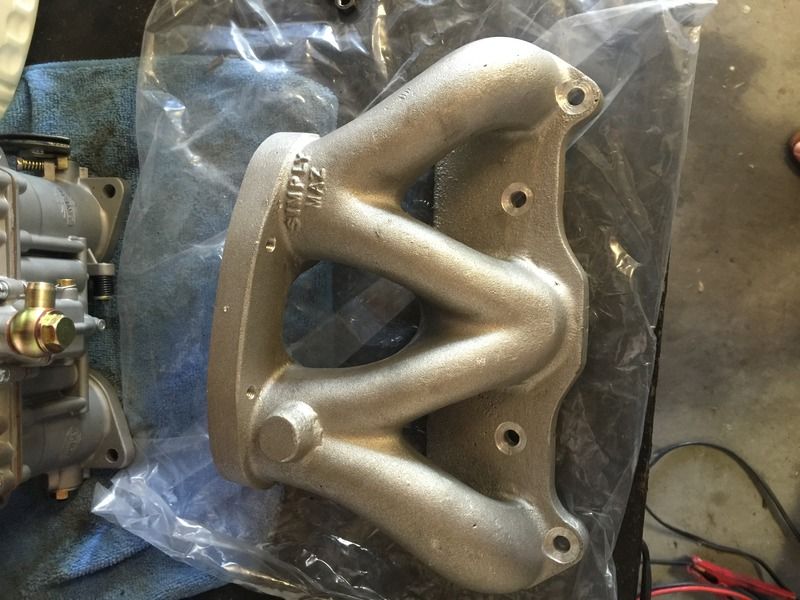
The Australian-made Weber IDA intake manifold:
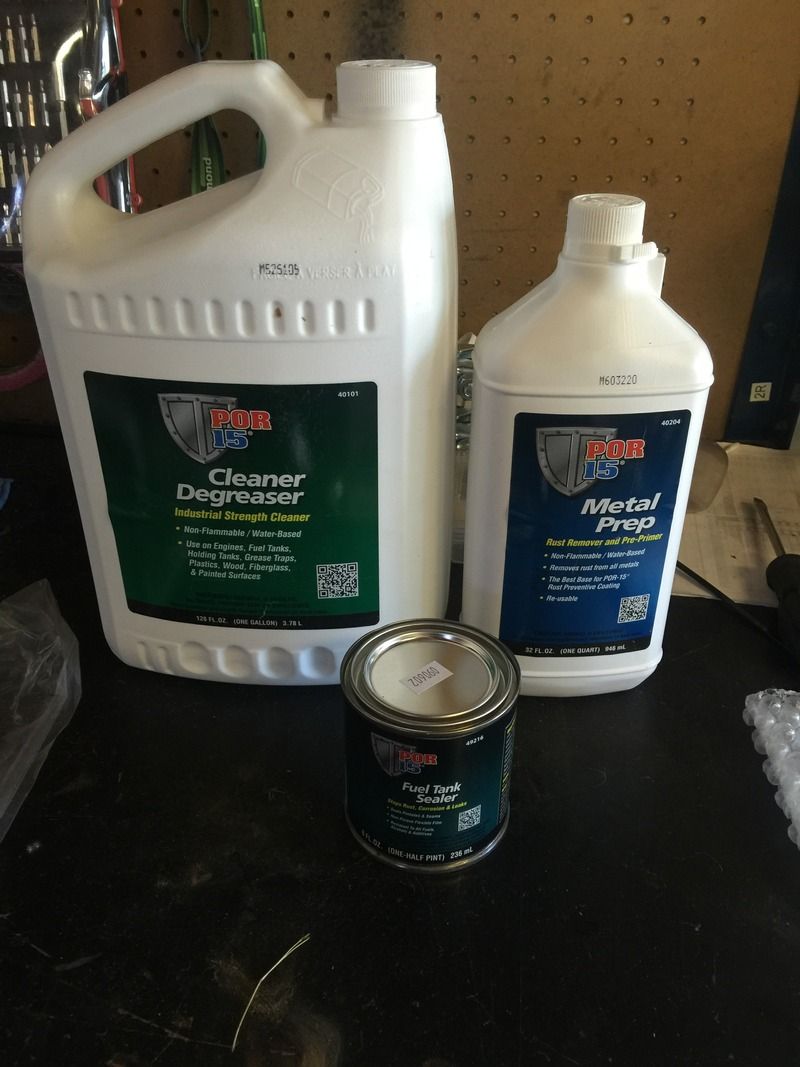
The POR15 fuel restore kit:
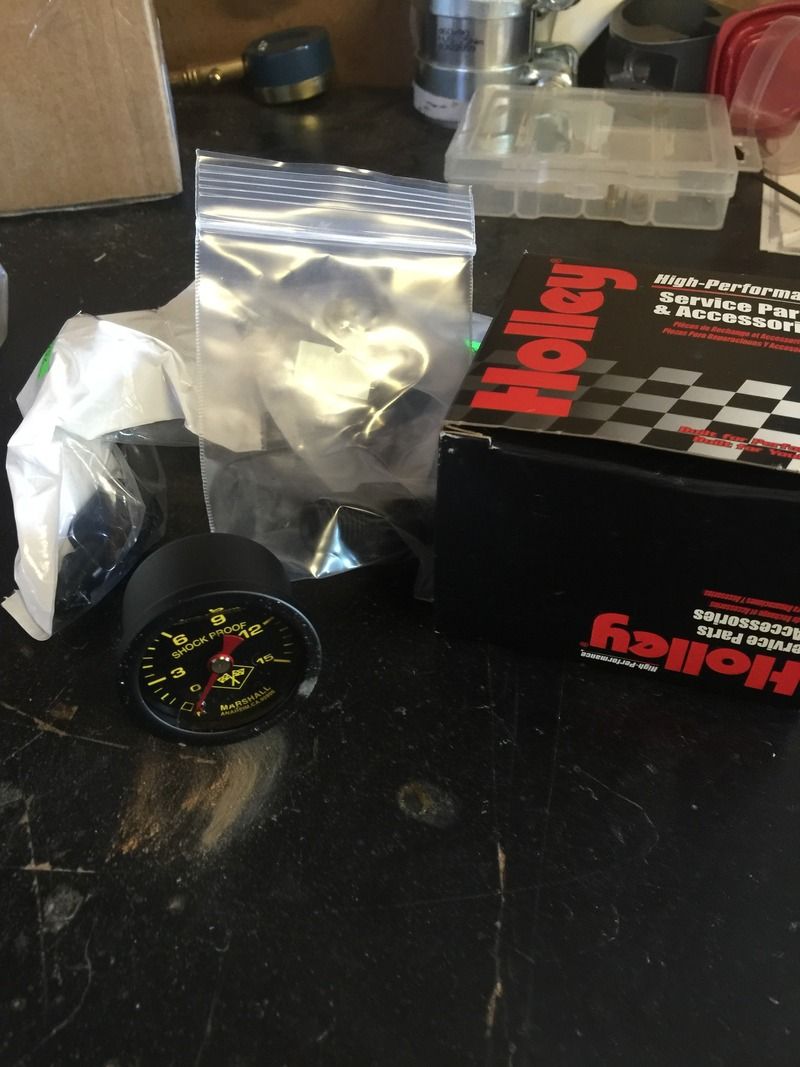
Holly fuel pressure regulator, Marshall gauge, and some AN Pushlock fittings:
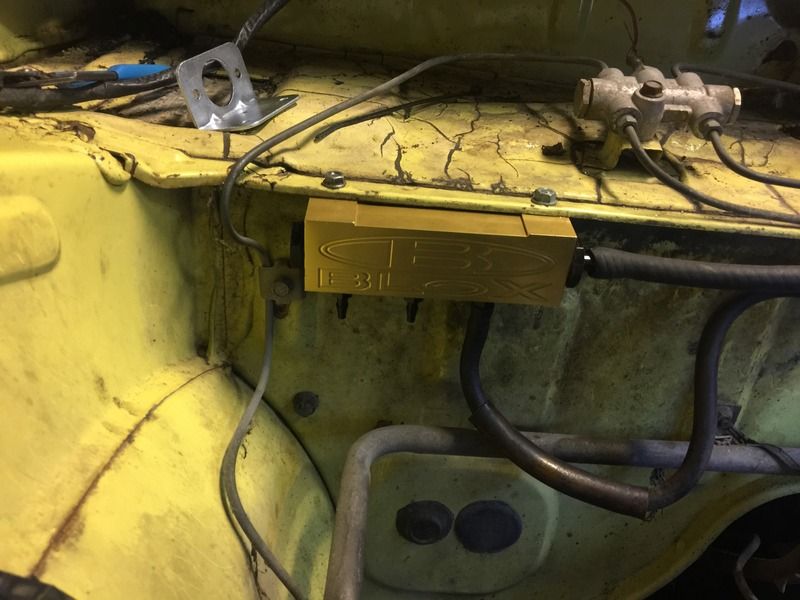
Got a BLOX billet vacuum manifold so I only have to drill and tap a single fitting on the intake manifold and not run a bunch of tacky T fittings. Mounted it tucked up against the firewall and connected the brake booster and misc hoses, still have more plumbing to do:
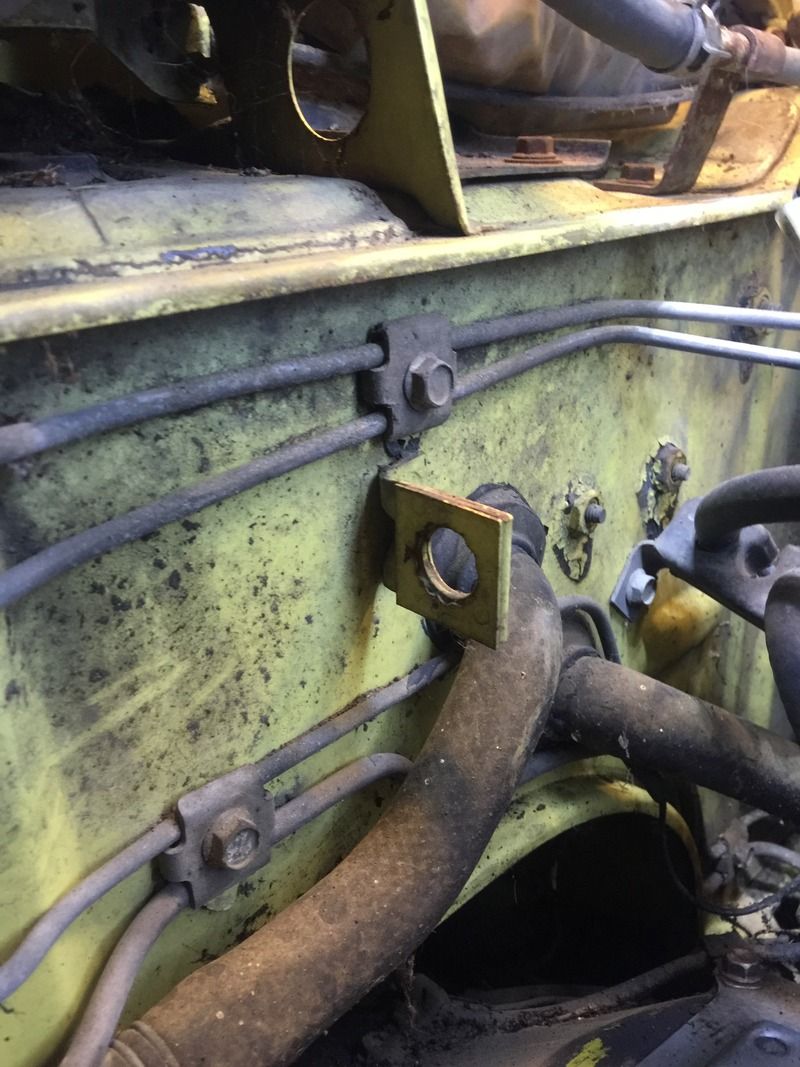
Needed to mounted the FPR...where to mount it? I searched around for a while as aesthetics and proper planning are important to me...so this looks like a good spot, but has a pesky bracket (for the brake booster hardline) in the way:
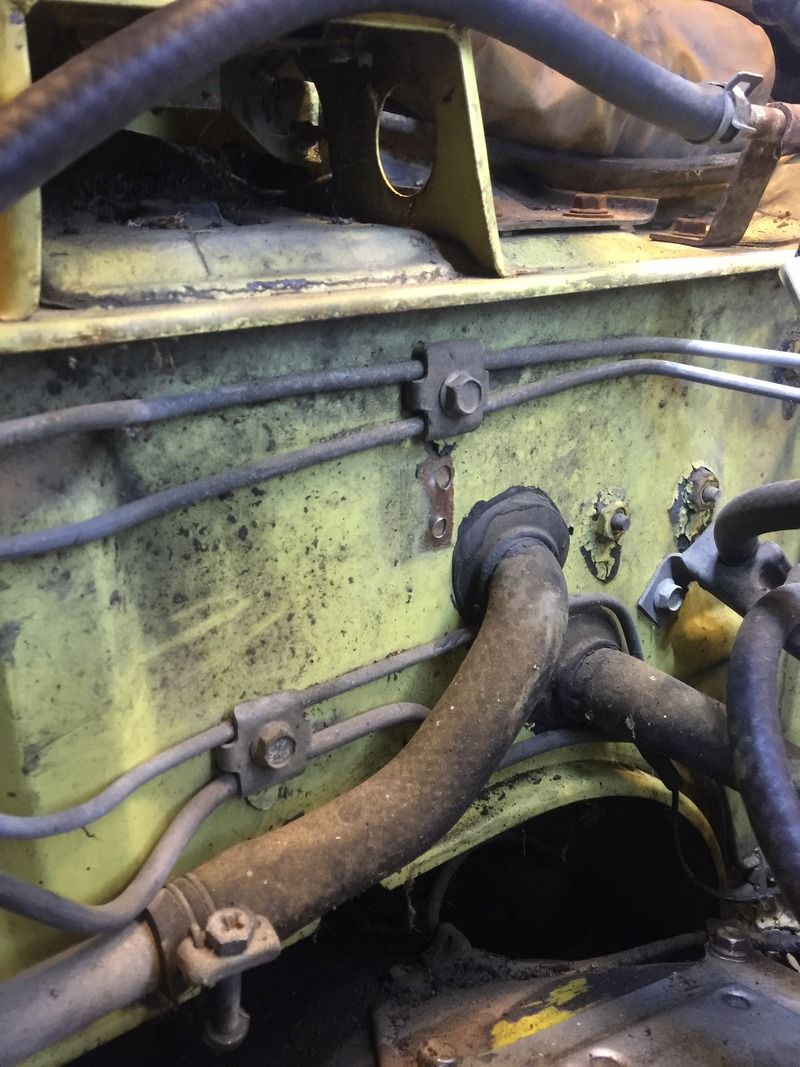
Well, just remove it:
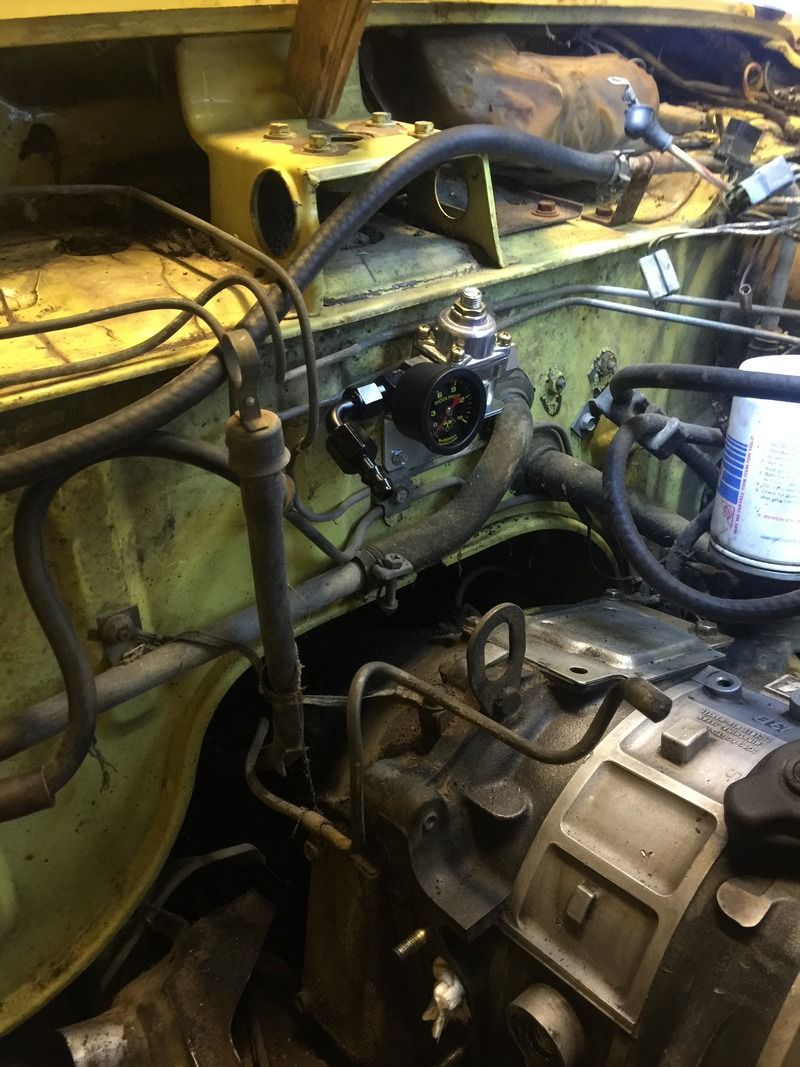
Screwed the FPR on with the included bracket and some self-tappers. It isn't fully tightened here because I still need to add the hose barb fittings (which haven't shown up yet) to connect the OE fuel hoses:
Overall, despite the fuel tank, I felt like good progress today. Can't wait to get all the fittings in I need so I can slap this carb on try to get it to run!
I emptied another gallon of Super Clean in it and added about 2 gallons of water. I shook the tank vigorously for 15 minutes or so and then let it sit overnight. Holy crap a shit ton of more rusty water dumped out the next morning. Success, right? Not really; peering into the tank with a flashlight revealed still plenty of rusty surfaces and big chunks floating around that don't easily drain.
So I put another couple gallons of straight water in it and picked up some 99cent toilet brushes and got to work scrubbing, as best I could through the fuel sender hole, the inside of tank. This dumped a crap ton of even more rusty water, and the brushes were super rusty/dirty, but again, still rusty inside the tank.
I didn't have any chains to shake around inside the tank, so instead I dug into my spare nut n bolt drawer and found a good handful of 20 large bolts and dropped them into the tank. I spent the next 20 minutes- all I could do as my arms were on fire- shaking the huge fuel tank with the large bolts in it. I then filled the tank with more water and dumped it and again, the water was PURE orange. I also spent what felt like the next hour shaking the tank trying to get the bolts out...these fuckers wouldn't shake out easily! Took forever but finally got em. Not doing that again, a chain would be much easier.
But again, after looking into the tank with a flashlight, STILL lots of rust on surfaces. The bottom of the tank is looking pretty good, but the sides, not so much. My last attempt here is I filled the tank with the last gallon of Super Clean I have and filled the tank entirely with water and I've been letting it sit since yesterday and will empty it in another day. I'm not holding out much hope and may have to get it hot tanked anyways.
Moving on, I got some additional parts in today so I got to work mocking them up.
Here's the EMPI (Weber knock off) IDA 51.2mm carb, modified with 3rd progression hole and enlarged float bowl:

I added some mesh screens to the trumpets in favor of air filters. This isn't a daily so I think it will be fine. Under that gold screen in the center is the jets; SUPER easy to change out everything, you don't have to get into the fuel bowl:

Look at all that airflow!

In this I tried to best show how I modified the stock carb throttle linkage bellcrank to the IDA carb. The throttle stop on the stock linkage was facing the wrong direction, so I kept the stock linkage on the carb and put the old linkage overtop. I have to use my hacksaw to cut off part of the stock linkage to allow the throttle cable to slip in and also cut off part of the stock linkage that was hitting the throttle stop screw. Saved me $30 bucks from having to order a new linkage:

The Australian-made Weber IDA intake manifold:

The POR15 fuel restore kit:

Holly fuel pressure regulator, Marshall gauge, and some AN Pushlock fittings:

Got a BLOX billet vacuum manifold so I only have to drill and tap a single fitting on the intake manifold and not run a bunch of tacky T fittings. Mounted it tucked up against the firewall and connected the brake booster and misc hoses, still have more plumbing to do:

Needed to mounted the FPR...where to mount it? I searched around for a while as aesthetics and proper planning are important to me...so this looks like a good spot, but has a pesky bracket (for the brake booster hardline) in the way:

Well, just remove it:

Screwed the FPR on with the included bracket and some self-tappers. It isn't fully tightened here because I still need to add the hose barb fittings (which haven't shown up yet) to connect the OE fuel hoses:

Overall, despite the fuel tank, I felt like good progress today. Can't wait to get all the fittings in I need so I can slap this carb on try to get it to run!
-
RX-7 Chris
- Posts: 7800
- Joined: Tue Oct 02, 2007 9:14
- Location: Colorado Springs
- Contact:
Re: My 1974 REPU Project
I'd recommend just having the tank dipped at this point.
Have you tried cleaning up the inner fenders and firewall? I bet you can get those looked really good.
Have you tried cleaning up the inner fenders and firewall? I bet you can get those looked really good.
1984 RX-7 GSL-SE [size=84]My restomod project[/SIZE]
1964 Ford Galaxie 500XL flat black w/ white interior, 2 dr fastback, 390 thunderbird, C6 auto, 2500 rpm high stall converter, shift kit, AC, Holley 750 cfm
[size=100]RIP 1983 RX-7[/SIZE]
My Car Blog
-
chickenwafer
- Posts: 2515
- Joined: Wed Mar 11, 2009 9:14
- Location: Greeley
Re: My 1974 REPU Project
RX-7 Chris wrote:I'd recommend just having the tank dipped at this point.
Have you tried cleaning up the inner fenders and firewall? I bet you can get those looked really good.
Yeah, I agree. I'm goimg to try to find somewhere to hot tank it Monday.
Last night I drilled and tapped the IDA manifold for vacuum reference. Didn't take any pics of this process as I was too focused on not messing up my $300 manifold lol. But I got it done and mounted the manifold with a new gasket ans then mounted the carb, did the final mount of the FPR with the new hose barb fittings, and made the 6AN pushlock feed hose.


Didn't try to start it because it was too late and my daughter was sleeping.
So today after work I rushed home and had to fix a few things for attempting to start it; plumb the fuel return to an external tank since the factory tank is removed, pressure test the system, and then fire.
Luckily everything went really quickly. I decided to throw a battery in it and pressure test the system; no leaks! But I heard this weird noise like liquid dripping into an empty aluminum can. I look down the carb amd fuel is dripping in quickly pooling ontop of the throttle butterflies! Amd it won't stop. I disconnect the fuel pump and it's still bleeding out...so I say fuck it and open the throttle to drop all the fuel into the chamber thinking I'll just crank it until the excess fuel blow out.
So with the fuel pump disconnected, i hit the starter and this thing wants to run! It stumbles and coughs and fires up after omly a few revolutions. I quickly jump out and reconnect the fuel pump, the FPR says 5psi, and it's running on it's own! Idle is high so I back out the throttle screw and get it down to about 1k rpm.
It's ALIVE!
The best part is it runs pretty good. Obviously needs some fine tuning and has some stumbles, but good. It restarts perfectly and I was able to get it up to operating temperature and it appears everything is good. I'm super pumped and can't wait to drive this thing!
-
speedjunkie

- Senior Member
- Posts: 5293
- Joined: Wed Jan 02, 2008 9:14
- Location: Colorado Springs
- Contact:
Re: My 1974 REPU Project
SWEET!!! Great to hear that it's running. I will say, I'm already seeing too much care and thoughtful planning going into this project for it to be a rat rod. LOL
I like the direct and clean fuel line routing from the FPR to the carb. Now if you could just get that fuel tank cleaned out you'd be in business.
I like the direct and clean fuel line routing from the FPR to the carb. Now if you could just get that fuel tank cleaned out you'd be in business.
-
chickenwafer
- Posts: 2515
- Joined: Wed Mar 11, 2009 9:14
- Location: Greeley
Re: My 1974 REPU Project
speedjunkie wrote:SWEET!!! Great to hear that it's running. I will say, I'm already seeing too much care and thoughtful planning going into this project for it to be a rat rod. LOL
I like the direct and clean fuel line routing from the FPR to the carb. Now if you could just get that fuel tank cleaned out you'd be in business.
Thanks man! Yeah I'm super stoked.
So yesterday I get home from work, throw in the battery and the thing fires right up! Seriously this thing starts goooood. Like little to zero effort. Just one pump of throttle and boom, it's alive.
With it idling I did notice a lot more smoke than before. The owner I bought it from said he had origjnally parked it because it smoked. I also added a lot of 2stroke premix to the fuel, too much, to a ratio of 40:1, so I don't think that helped things lol. Lots of carbon still blows out of the exhaust so I haven't ruled out the exhaust being part of the smoking issue, either.
I realized before when it was running I also had a big vacuum leak, so I fixed that and now it idles even better. I also was able to "drive" it, actually pulled into the street amd drove it around the block for the first time! Holy crap the big wheels rub like crazy! It made a horrible noise when turning so I'll be trimming the fenders to gain the additional clearance. At first I was worried about hacking up the fenders, but honestly they are pretty dented abd banged up as is and I will try to clearance them as best possible.
On my little test drive I discovered the transmission works, but cant say for sure if it's good until I get into some higher speeds. Amd the brakes are virtually non existent, pedal went to the floor multiple times and doesn't inspire confidence. So can't go too fast because I can't stop so I can't test the functionality of things. Matt and I topped off fluid and bleed them but the pedal still goes limp so I'm guessing I'll need a new master cylinder.
Overall feeling pumped and hoping to finish up the quick little things so I can drive this thing!
-
RX-7 Chris
- Posts: 7800
- Joined: Tue Oct 02, 2007 9:14
- Location: Colorado Springs
- Contact:
Re: My 1974 REPU Project
Have you tried running seafoam through the motor? Just pour some down the carb while holding the throttle up so it doesn't stall.
1984 RX-7 GSL-SE [size=84]My restomod project[/SIZE]
1964 Ford Galaxie 500XL flat black w/ white interior, 2 dr fastback, 390 thunderbird, C6 auto, 2500 rpm high stall converter, shift kit, AC, Holley 750 cfm
[size=100]RIP 1983 RX-7[/SIZE]
My Car Blog
-
chickenwafer
- Posts: 2515
- Joined: Wed Mar 11, 2009 9:14
- Location: Greeley
Re: My 1974 REPU Project
RX-7 Chris wrote:Have you tried running seafoam through the motor? Just pour some down the carb while holding the throttle up so it doesn't stall.
My opinion is still out on Seafoam is still out. I used it on my RX8 when the compression was low on one face (stuck side seal) and after using it compression dropped across the board and slowly kept going down until the motor had no power and compression. Maybe the Seafoam loosened up some carbon that chunked a seal, maybe it's coincidence, who knows. I do know plenty of rotary guys swear by the stuff, though.
I clearance/cut the front fenders after getting home from work today for the large wheels/tires. Actually came out decent, not too hacked, and the wheels clear! Forgot to take pics but will get some up eventually.
To test out the fender clearancing I took Bumblebee for another quick spin, this time being braver and also pumping up the pedal before driving it. This made the pedal slightly stiffer and bite initially better, but stopping power is still horrible. But I gave it some gas and it moved out! With the transmission in D it even shifted, I got up to around 25mph and then after coming off the throttle it died LOL. I hate this automatic, I can't clutch it quickly and rev it to keep the motor alive.
Not sure why it died coming off load, but just some carb tuning. I also don't have the vacuum advance connected as well so that could contribute to running issues. But the smoking hasn't cleared up, I need to dilute the jug of gas I have to see if the excessive 2 stroke mixture is contributing to that. There's also something else smoking/burning off underneath the truck, I'm assuming (or hoping) it's just crud and dirt on the exhaust being burned off. Hopefully a new exhaust system (coming soon!) will fix that as well as the smoking, but I'm not holding out hope it will stop the smoking.
Also planning the SA 5-speed gearbox swap sooner than later, not liking this auto as I thought LOL. So if anyone has an SA RX-7 gearbox, I'll buy it!

Re: My 1974 REPU Project
What exhaust are you getting? I'm surprised there is one commercially available.
-
chickenwafer
- Posts: 2515
- Joined: Wed Mar 11, 2009 9:14
- Location: Greeley
Re: My 1974 REPU Project
Like you guessed, there are no mass produced exhaust systems for the REPU that I've found, it's just too small of a market. So I have to go custom. There are a few 13B headers/manifolds that bolt up, but after, everything needs to be fabricated. For this reason, I'm planning a short system that will feature a single muffler and a side exhaust style megaphone design.
I'm thinking it's going to be loud, like real freaking loud, with just one straight-thru baffled muffler. Luckily it's only a 45* bend and a megaphone so if its too loud I'm only chopping off about $30 in piping and then I can extend the system conventionally to the rear with additional mufflers. I'd just rather not for cost and weight, and plus I want to be unique with a side exit system.
Matt stopped by today and helped me set the timing, we got it locked down and then he took Bumblebee for a quick spin. The transmission had some issues and would randomly shift into top gear when he was trying to go WOT. We found the tranny was super low on fluid, even after adding nearly a quart it's still barely on the dipstick. So I'll add more fluid here this week and that should help the jerky shifting.
The exhaust still smokes a lot, still need to dilute the 2stroke ratio. And the exhaust system is just COVERED in dirt, mud, oil and grim and smokes good once up to temp.
Lastly, I finally decided to go for broke and just do the POR15 process on this fuel tank. I used the cleaner/degreaser which helped a lot; bunch of rusty water and loosen up a bunch scale. After a good rinsing, I did the POR15 Metal prep and that worked real good removing rust. Then rinsed with hot water and got ready for the tank sealer.
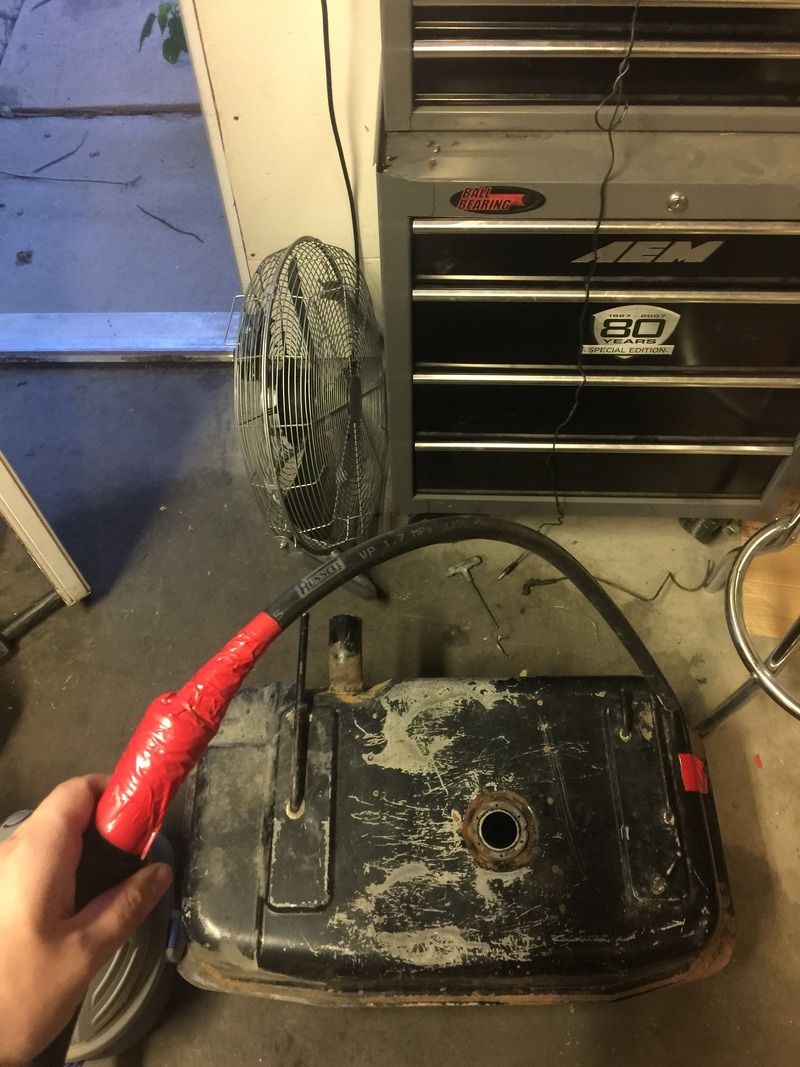
Biggest issue I had was getting rust chunks and debris out of the tank, no mater how much I rinsed these stubborn chunks just wouldn't flush out. I tried to stick my shop vac in the fuel sender hole but it was too large (obviously that's what she said), so I got the bright idea to duct tape a piece of 6AN fuel hose to the shop vac hose, which fit perfectly into the tank and let me vac up the rust scale inside the tank. I did this for about 30 minutes, shaking the tank, vacuuming, and repeating. But finally got it cleaned out.
So, remember how I patted myself on the back for "cheating the system" and piecing together my own POR15 fuel tank restoration kit buy purchasing everything individually off Amazon Prime? Well...I did maths wrong. I got less fuel tank sealer because in the video reviews I've found most car tanks only use about 1/2 to 1/3rd of the included quart. So I got an 8oz container, which is significantly less than a quart. So the sealer I got wasn't enough to fully coat the tank, about 2/3rds. Most of the top and some of the internal baffles were left uncoated. So I'll be ordered another 8oz container to finish off the tank.
That's about it, sorry for the long post LOL
Heating up the tank to dry the Metal prep:
My shop vac hose mod LOL
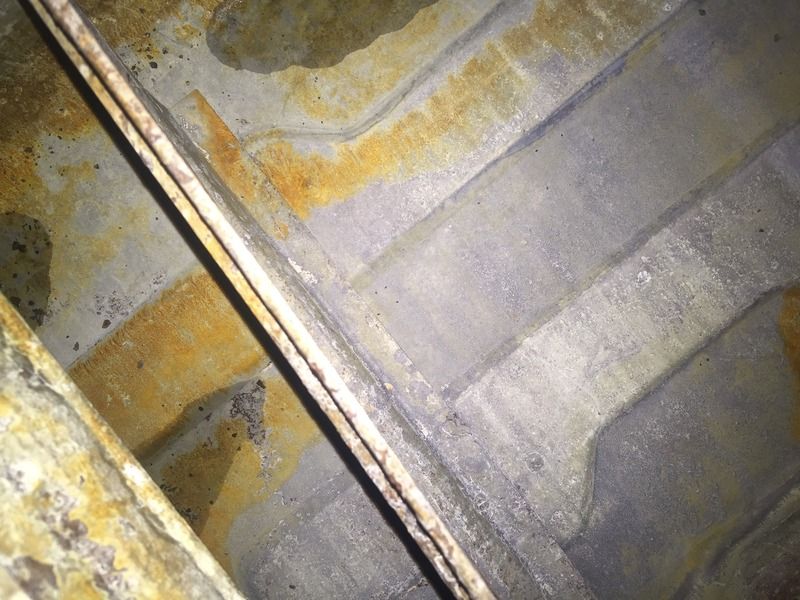
Best shot of inside of the tank AFTER the Metal Prep and PRIOR to the sealer. You can see the tiny rust peddles in there prior to finishing vacuuming
I'll post up some of the exterior after some fresh paint tomorrow and with the sealer dry
I'm thinking it's going to be loud, like real freaking loud, with just one straight-thru baffled muffler. Luckily it's only a 45* bend and a megaphone so if its too loud I'm only chopping off about $30 in piping and then I can extend the system conventionally to the rear with additional mufflers. I'd just rather not for cost and weight, and plus I want to be unique with a side exit system.
Matt stopped by today and helped me set the timing, we got it locked down and then he took Bumblebee for a quick spin. The transmission had some issues and would randomly shift into top gear when he was trying to go WOT. We found the tranny was super low on fluid, even after adding nearly a quart it's still barely on the dipstick. So I'll add more fluid here this week and that should help the jerky shifting.
The exhaust still smokes a lot, still need to dilute the 2stroke ratio. And the exhaust system is just COVERED in dirt, mud, oil and grim and smokes good once up to temp.
Lastly, I finally decided to go for broke and just do the POR15 process on this fuel tank. I used the cleaner/degreaser which helped a lot; bunch of rusty water and loosen up a bunch scale. After a good rinsing, I did the POR15 Metal prep and that worked real good removing rust. Then rinsed with hot water and got ready for the tank sealer.
Biggest issue I had was getting rust chunks and debris out of the tank, no mater how much I rinsed these stubborn chunks just wouldn't flush out. I tried to stick my shop vac in the fuel sender hole but it was too large (obviously that's what she said), so I got the bright idea to duct tape a piece of 6AN fuel hose to the shop vac hose, which fit perfectly into the tank and let me vac up the rust scale inside the tank. I did this for about 30 minutes, shaking the tank, vacuuming, and repeating. But finally got it cleaned out.
So, remember how I patted myself on the back for "cheating the system" and piecing together my own POR15 fuel tank restoration kit buy purchasing everything individually off Amazon Prime? Well...I did maths wrong. I got less fuel tank sealer because in the video reviews I've found most car tanks only use about 1/2 to 1/3rd of the included quart. So I got an 8oz container, which is significantly less than a quart. So the sealer I got wasn't enough to fully coat the tank, about 2/3rds. Most of the top and some of the internal baffles were left uncoated. So I'll be ordered another 8oz container to finish off the tank.
That's about it, sorry for the long post LOL
Heating up the tank to dry the Metal prep:

My shop vac hose mod LOL

Best shot of inside of the tank AFTER the Metal Prep and PRIOR to the sealer. You can see the tiny rust peddles in there prior to finishing vacuuming

I'll post up some of the exterior after some fresh paint tomorrow and with the sealer dry
-
chickenwafer
- Posts: 2515
- Joined: Wed Mar 11, 2009 9:14
- Location: Greeley
Re: My 1974 REPU Project
I was going to upload some photos of the finished fuel tank but photobucket it down right now.
Anyways, I finished the fuel tank a couple days ago. I got more POR15 fuel tank sealant and coated the ENTIRE interior of the tank nicely with new sealant. I snapped a few pics and I think it came out pretty good. I also sprayed some black paint on the surface to keep it looking (hopefully) nice. I plan to get it back into the truck this week and get it filled up so it can finally run on it's own tank.
Getting the truck registered and insured this week, too.
That means the only thing preventing any serious miles will be the brakes, which are horrible, the leaking exhaust that has cracks and smokes, and the giant rust hole in the passenger side floor/rocker between the seat and door.
I found Rock Auto has most of the brake parts I need for pretty cheap, around $250 I should be able to overhaul the system entirely. They have a brand new master cylinder for a 74 Ford Courier that *should* be a bolt on, StopTech pads, rear drums and shoes and hardware kit for the REPU, and brake lines. The rotors they have listed are either 4 lug or 5 lug, and all REPU's were 6 lug, so I found the B2000 pickup uses the same size rotor and they 6 lug, and they're also vented unlike the OE REPU rotors. And cheap. Winning! This will fix the brake. I know they won't be serious performance equipment, but for now, it will get Bumblebee driving.
For the exhaust, I plan on getting a tubular Rotary Works header for a 1st gen, which I've heard should fit fine, and then take the truck to an exhaust shop and have them fab something. I still want to try a side exit system, seen a few people who have done so, it can be done! One person had the exhaust exit directly under the battery box under the truck bed! I think I'm too worried about exploding batteries to do that but I guess it shouldn't be too bad? Who knows.
Lastly, fixing the rust, I plan to go semi cheap but also since the floorboard is pretty rough on that side, welding in a new patch would be a major PITA and require a lot of I honestly can't do. I've read from guys who restore old cars the actual better plan is to bond, or glue, a patch piece of metal in since welding will probably blow apart any old existing metal in there. So I'll be getting some 3M Duarabond aircraft adhesive and bond and rivet a metal patch piece into place, then coat it in paint and finish the interior floor in truck bed coating. This is a rat rod and I know this method won't win any concours shows but the rest of the truck won't either, LOL, so who cares if it works.
Lastly, progress will be slowly even more since my son was born on Sunday, June 5th! This will be the first project vehicle I keep after the birth of a child so I'm not sure how progress will go but I don't plan on getting rid of the truck. Hell, my goal is for him to work on with me in a number of years. Pretty cool.
-
speedjunkie
- Senior Member
- Posts: 5293
- Joined: Wed Jan 02, 2008 9:14
- Location: Colorado Springs
- Contact:
Re: My 1974 REPU Project
Congrats on the new kid! aka extra set of hands in the shop. lol
That's awesome the truck is getting close to driveable (with the fuel tank). Now we can go on fun drives again.
I'm really surprised they still have parts for the REPU, especially with as rare as it is. But that's awesome that they do.
I'd probably skip dumping the exhaust right next to the battery box as well. That would make me nervous.
-
chickenwafer
- Posts: 2515
- Joined: Wed Mar 11, 2009 9:14
- Location: Greeley
Re: My 1974 REPU Project
speedjunkie wrote:Congrats on the new kid! aka extra set of hands in the shop. lol
That's awesome the truck is getting close to driveable (with the fuel tank). Now we can go on fun drives again.
I'm really surprised they still have parts for the REPU, especially with as rare as it is. But that's awesome that they do.
I'd probably skip dumping the exhaust right next to the battery box as well. That would make me nervous.
Thanks man! Looking forward to some drives soon for sure!
Parts are pretty difficult to find for the REPU. But luckily since it's based on a Ford Courier, a lot of parts are interchangeable. Just have to get creative. Some parts are essentially unavailable or irreplaceable that were unique to the REPU, such as the interior which was completely unique to the REPU, and the front bumper, grill, and fenders. Those items are gold.
Here's a pic of inside the fuel tank after doing the POR15 sealant,

There is some slight bubbling but overall pretty happy with the results. Time will tell if it doesn't gum up tho.
Who is online
Users browsing this forum: No registered users and 42 guests