---------------------------
Some people would rather pay the dealer or a quick change place to go through the trouble of getting the dirty stuff out, and clean stuff in. For those that would rather not trust the local Grease Monkeys, here's what you'll need to do:
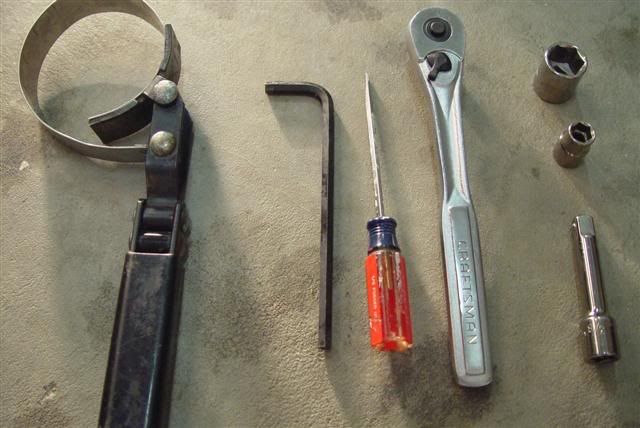
What you'll need:
- 17mm socket
- 10mm socket or nut driver
- Small flathead screwdriver or panel clip puller
- 6mm Allen wrench
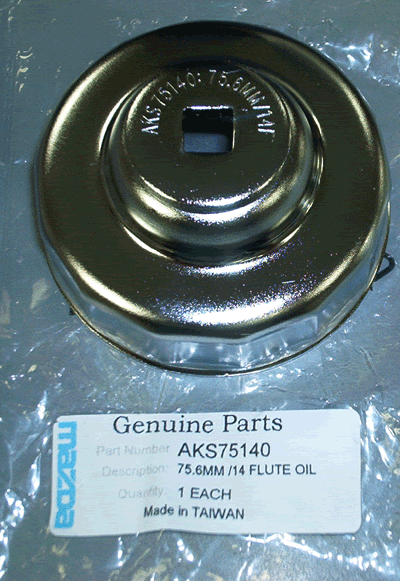
- Oil filter wrench, rubber strap wrench, or one of these
- Jack and stands, or ramps
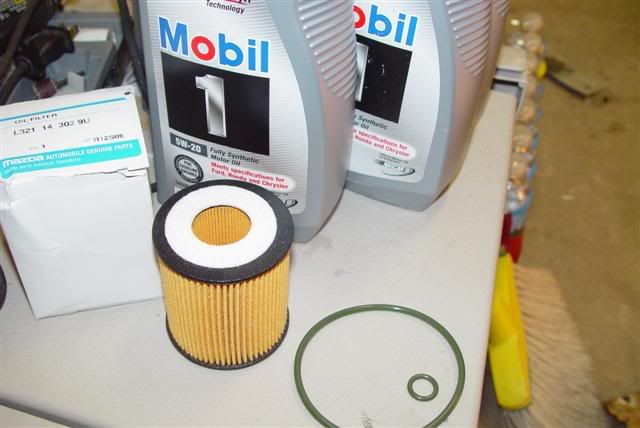
- Oil filter kit (Mazda part# L321 14 302 9U)
- 5 quarts of your favorite 5w20
- Paper shop towels
- Rubber gloves to make clean up easier

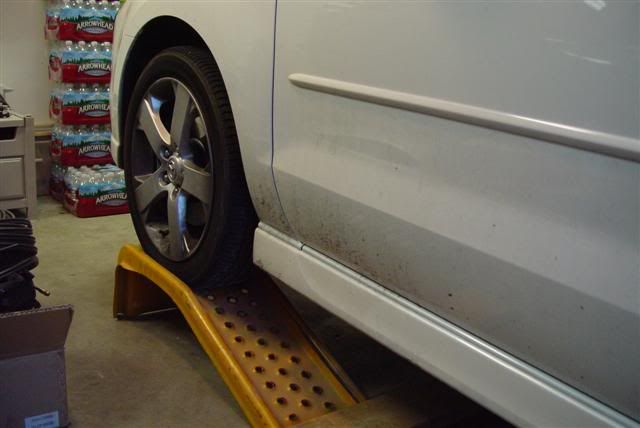
First thing to do is to get the car off the ground. I prefer ramps, but a jack with stands will do just fine. Use the proper jacking method outlined in the owners manual.
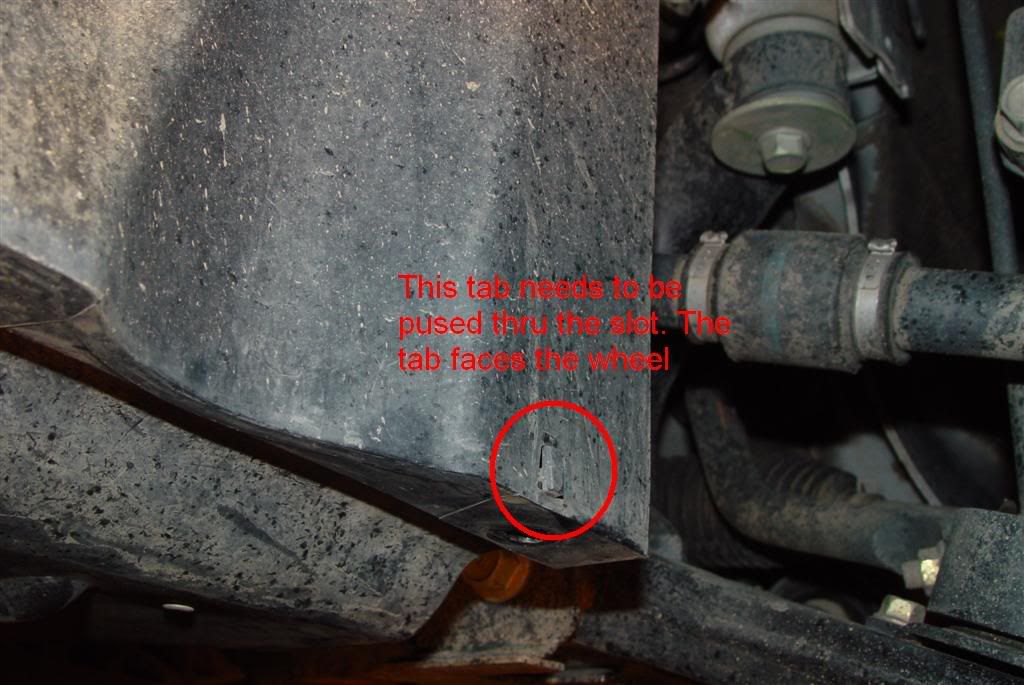
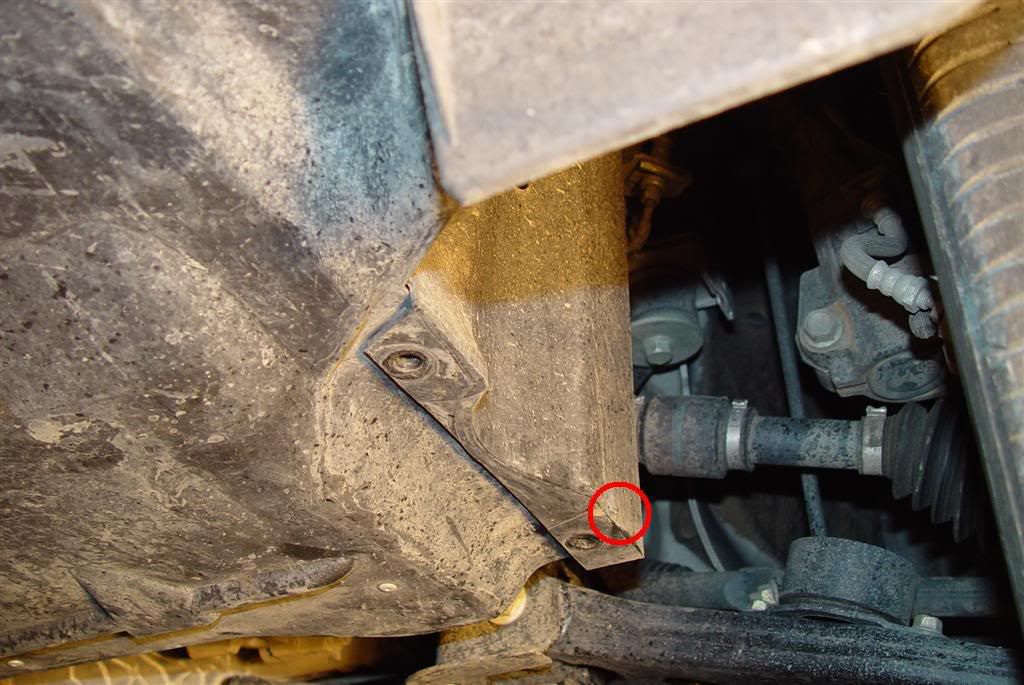
After the car is safely raised, you'll need to remove the plastic engine cover from under the engine. It is held in place by 7 10mm bolts, and 2 plastic expansion panel clips. There is also a tab/slot on each rear corner by the wheels that needs to be removed. The 10mm bolts aren't on very tight, and you may prefer to use a nut driver over the clumsiness of a ratchet on loose bolts.
There are 3 bolts along the front edge of the cover just to the rear of the bottom edge of the bumper, and 2 on the rear sides, near each wheel.
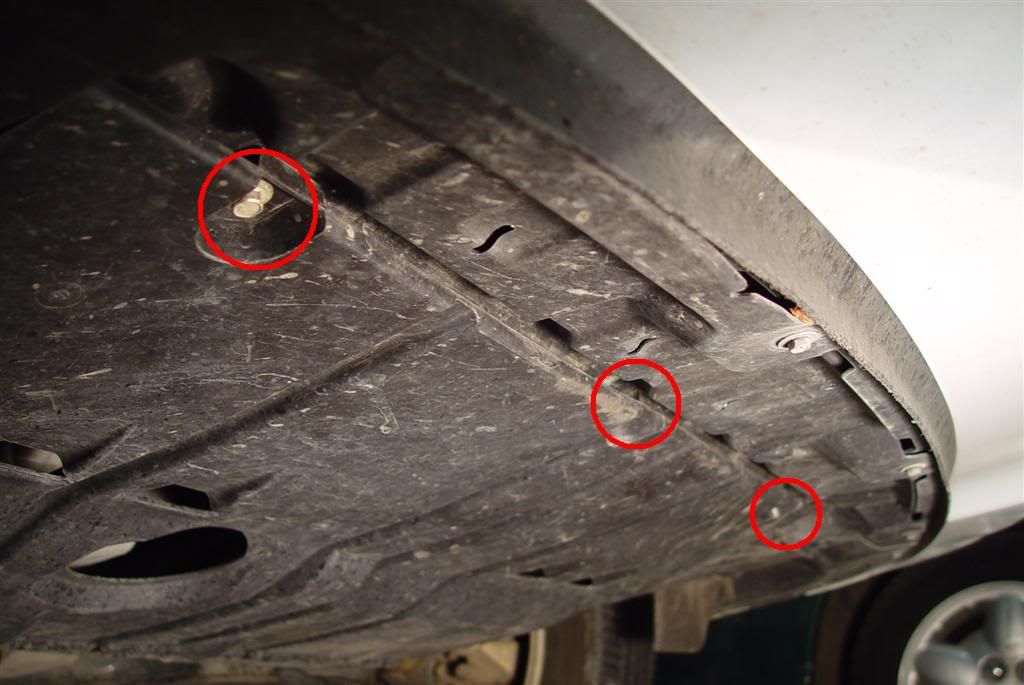
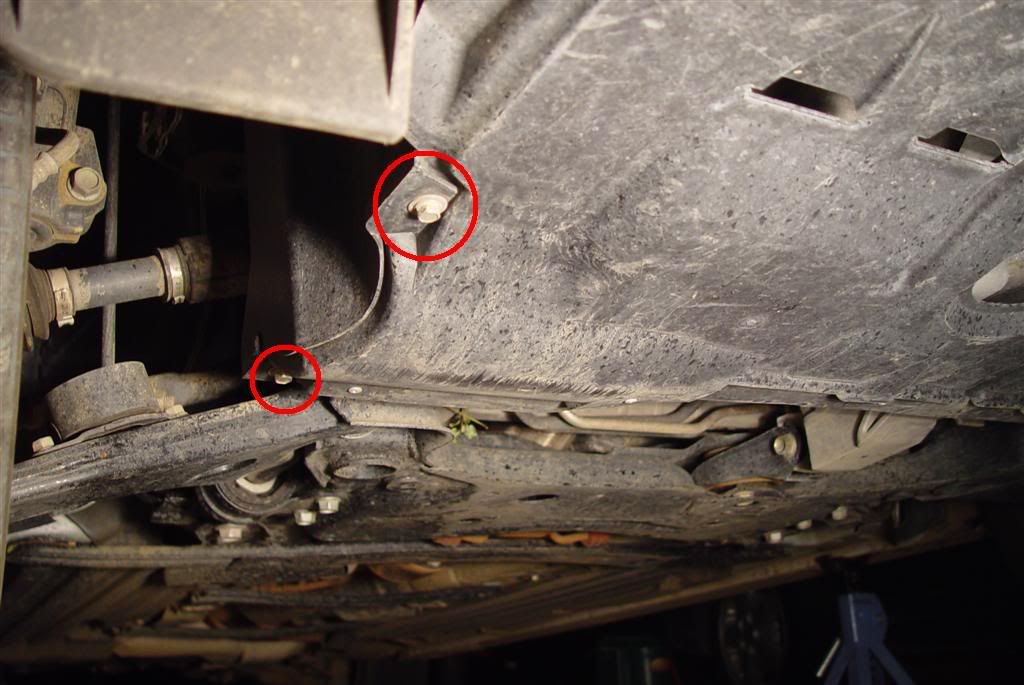
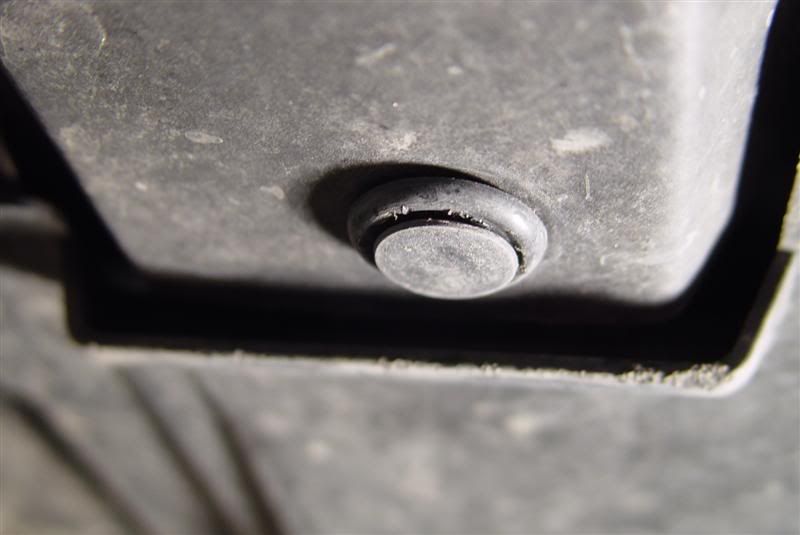
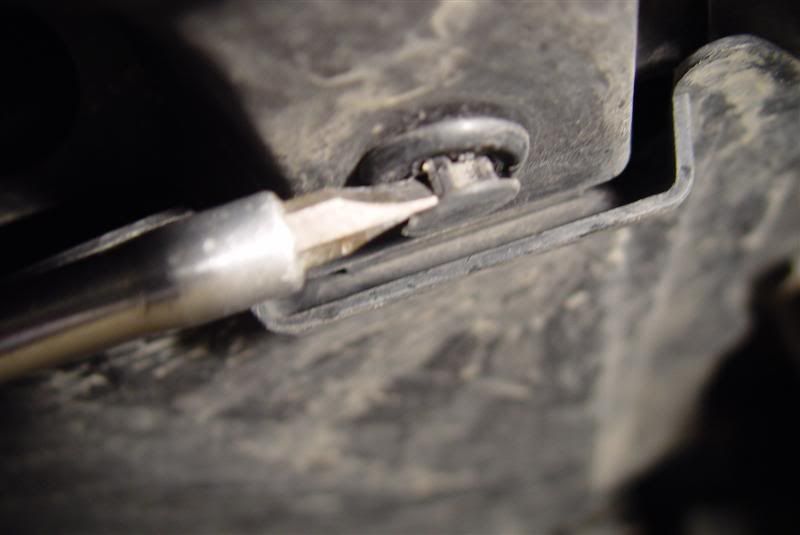
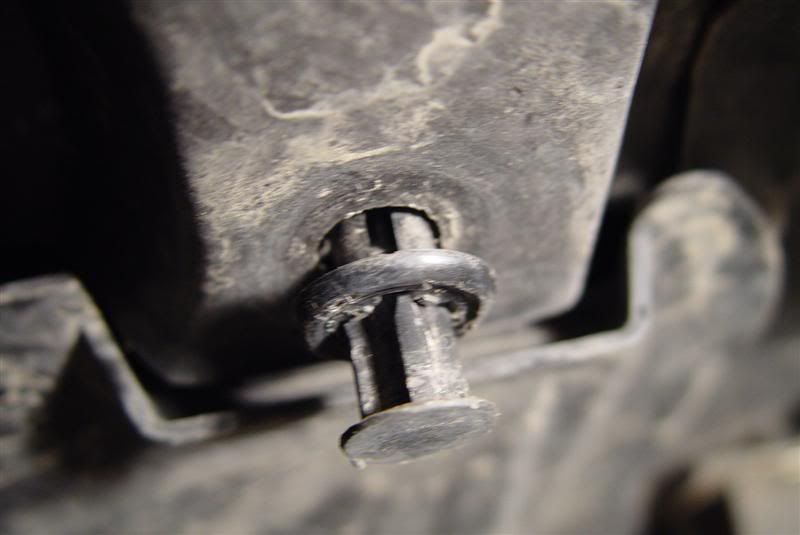
The 2 expansion clips are located on each front corner of the engine cover. They are in two parts. You'll need to pry out the center to release the clip. You can use a small flatblade screwdriver and gently pry the center, moving from side to side, or you can use an interior clip remover if you have one.

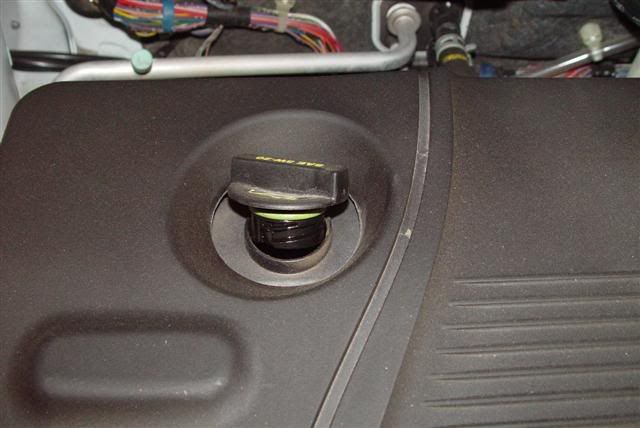
OK, now you're ready to drain the oil. I like to remove the oil filler cap just enough to relieve vacuum when the oil is draining, to let it drain easier and more thoroughly.
Use the 17mm socket to remove the oil pan drain plug. The drain plug faces the rear of the car.
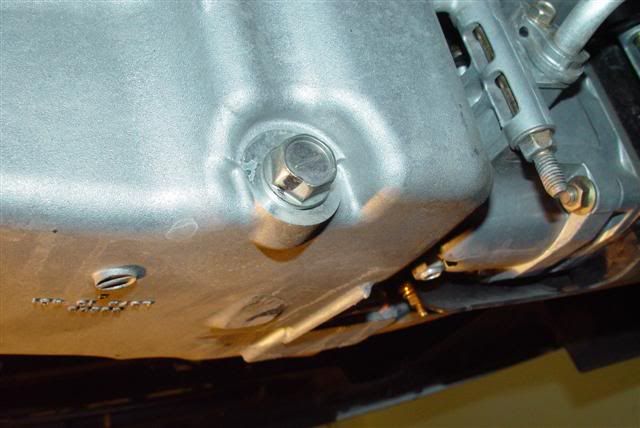
Make sure to have a couple shop towels handy here.
Once you loosen it up with the first turn, put your socket down and loosen the rest by hand. You'll need to move it away quickly once it's out of the hole so the oil can stream steady into your drain pan. Make sure to keep an eye on the draining oil so that the stream doesn't move out of the way of your drain pan opening and start to spill on the floor. I usually let the oil drain for a little bit, to get the most out of the engine. It may be a good time for one of these:

Once the oil has stopped draining, clean off the drain plug and replace it. Get it hand tight, and give it another 1/4-1/2 turn.
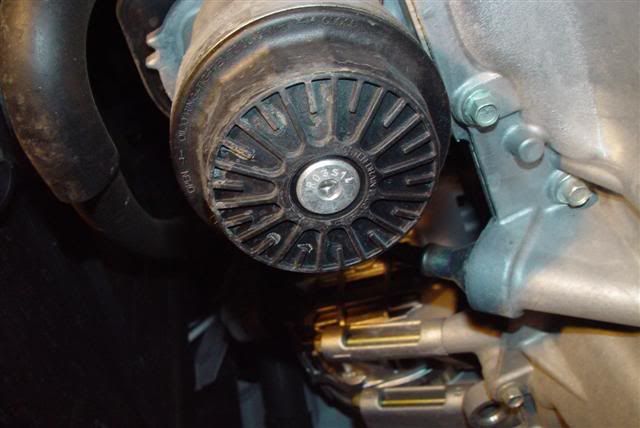
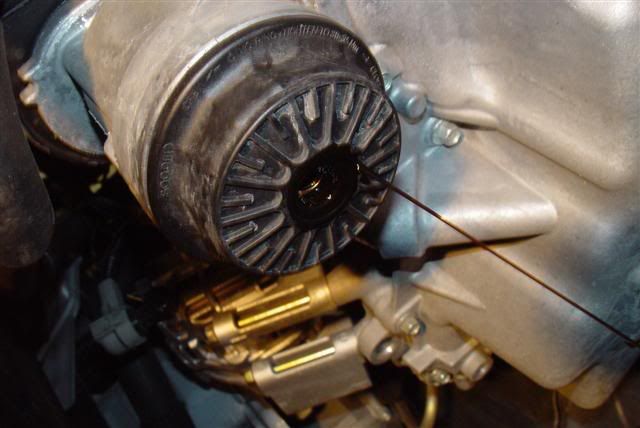
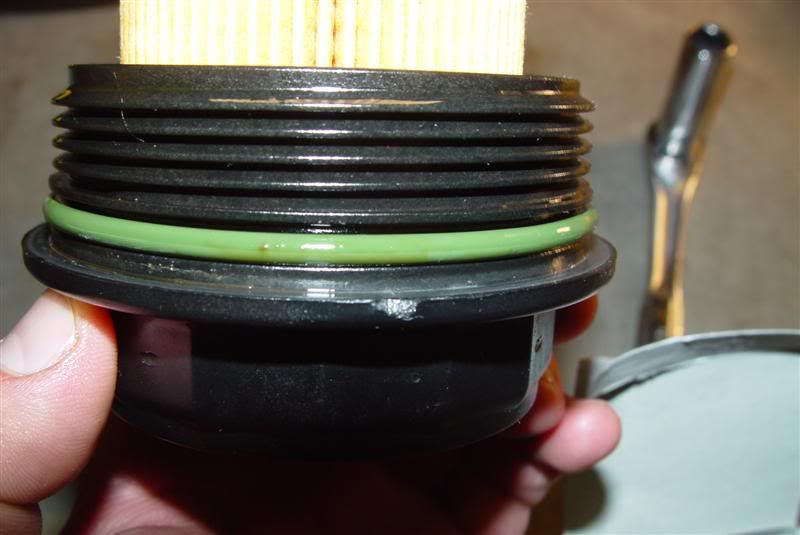
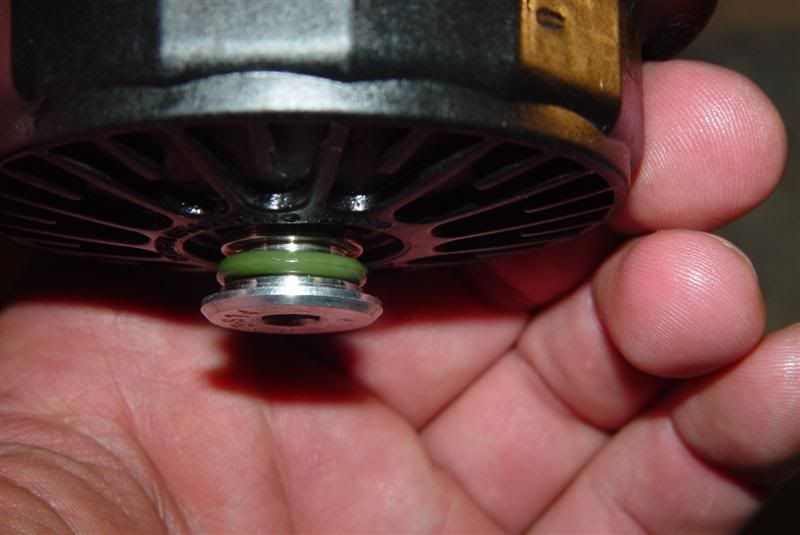
Use whatever tool you have to loosen the oil filter housing about 1 to 1 1/2 turns. The preferred tool is the one that is designed for the housing, using anything else and you're at risk of cracking it. The cartridge filter housing is spring loaded, so the goal here is to loosen it just enough to relieve spring pressure on the filter element so the oil can drain properly. Then take the 6mm Allen wrench and remove the drain plug in the middle of the filter housing. This is where the oil from the filter will drain out, so be prepared with your oil pan. Again, once it starts draining, you can leave it for a little while to drain completely. Once it finishes, there will still be some oil in the housing. Remove it from the engine, and place it upside down on your oil pan.
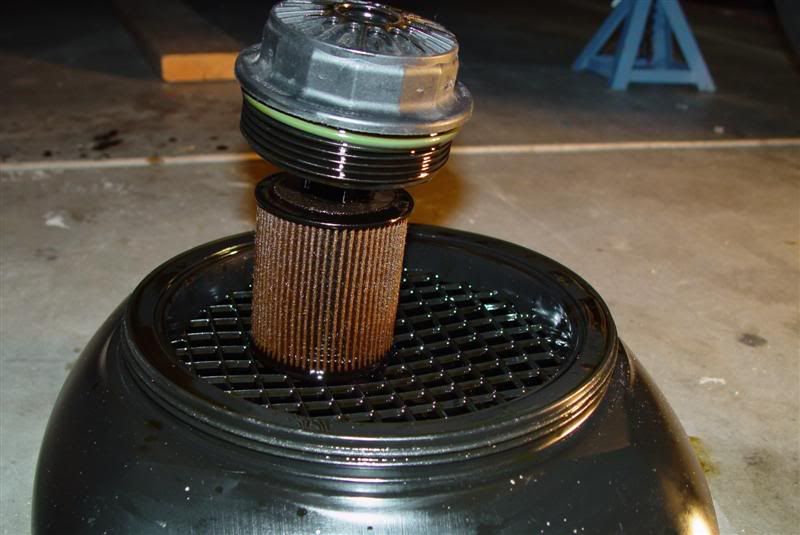
Remove the old filter from the housing and dispose of properly. Use shop towels to clean the inside of the housing, the drain plug, and the filter cavity on the engine. Take your new filter kit and replace both O-rings, one on the drain plug, and one on the housing. Dip your finger in a bottle of your new oil and coat the O-rings before putting them in place. A small flat head screwdriver makes getting them in place easier, but be careful not to damage them. Place the new filter element onto the housing, and push it firmly in place. Reinstall the housing to the engine, and tighten the drain plug. Torque specs are stamped on the housing.
Use a funnel to add the the 5w20 oil to the engine. Most people are finding that the dipstick will show full after adding between 4 and 4.5 quarts. The manual calls for 4.3 when changing the filter. With most cars, I don't use a funnel, but if you spill oil, you'll have to go through the hassle of removing the top engine cover to clean it up.
Tighten the filler cap, close the hood, and start the engine. Let it run for about a minute then shut it off. Check for leaks under the car. You rock, so there should be none.
Replace the lower cover using the reverse of the removal process. Lower your car from the ramps or jack stands.
Finished! Now just decide whether you ever want to do this again!
