The Front Doors
1) The first thing I recommend doing is unpluging the negative trminal of your battery before you start.
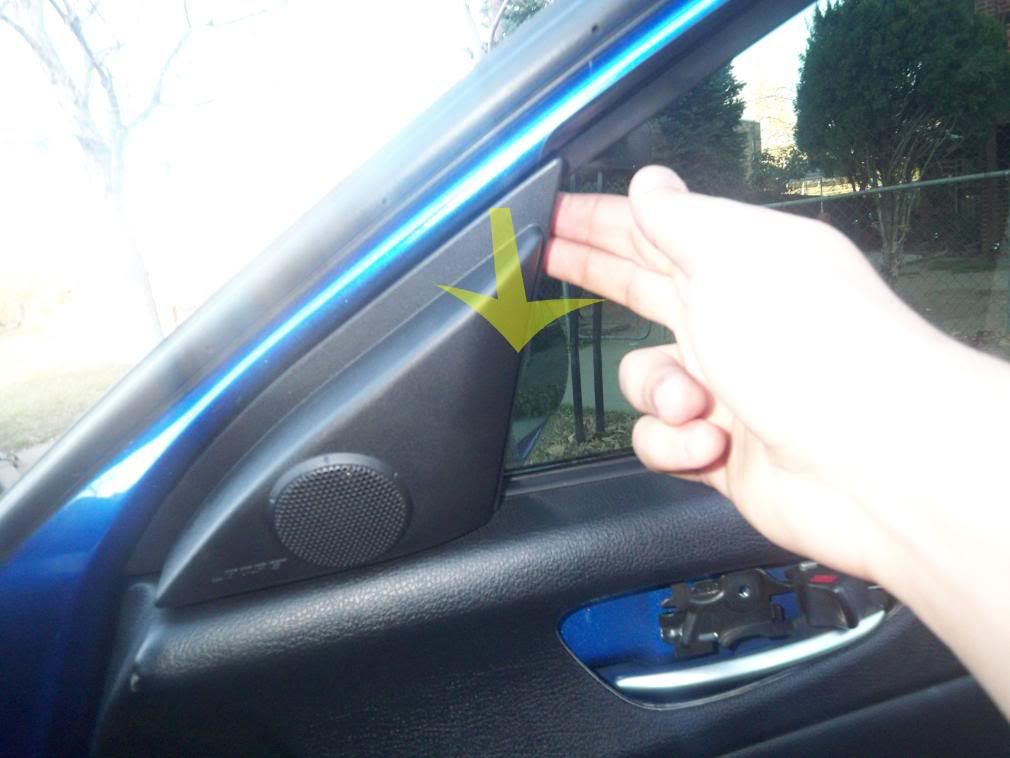
2) You need to remove the tweeter speakers from the doors. This is very simple, simply just place your fingers on the edge and pull as shown in the picture. It just pops out. You may leave it hanging or unplug it. I left it hanging.
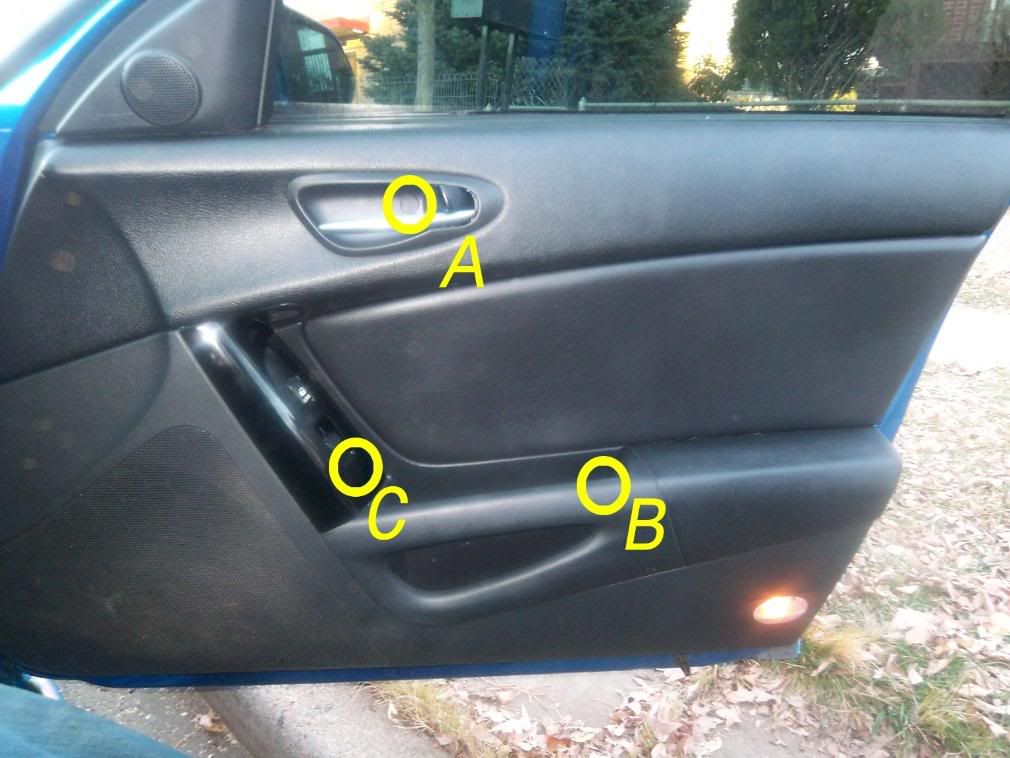
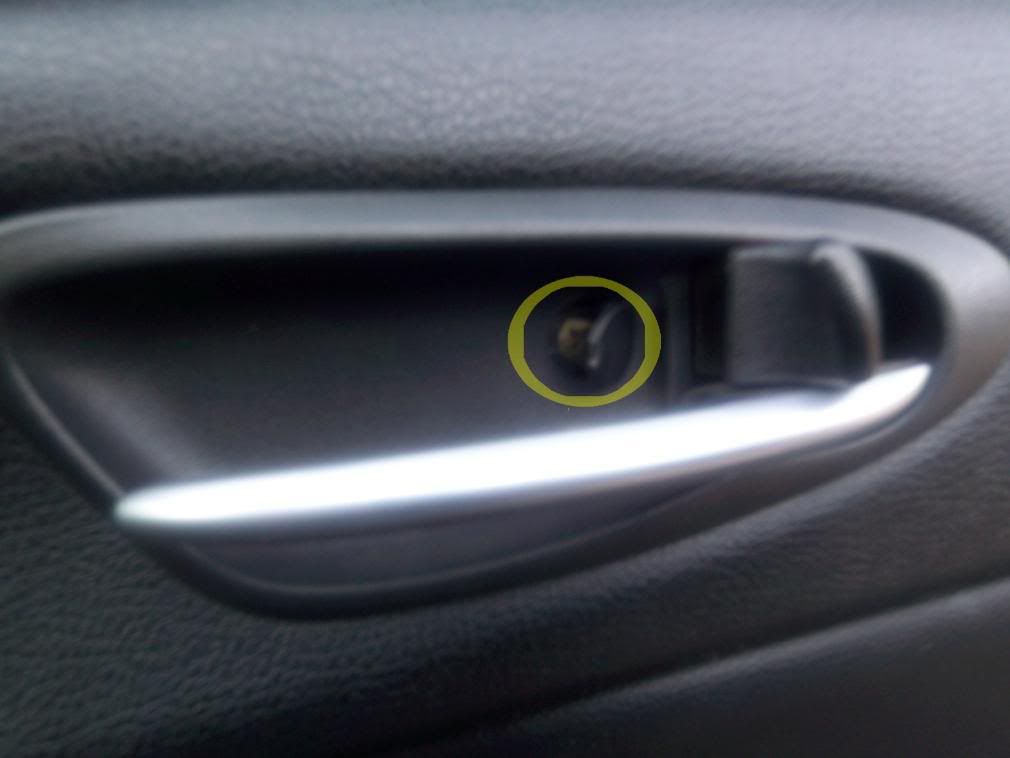
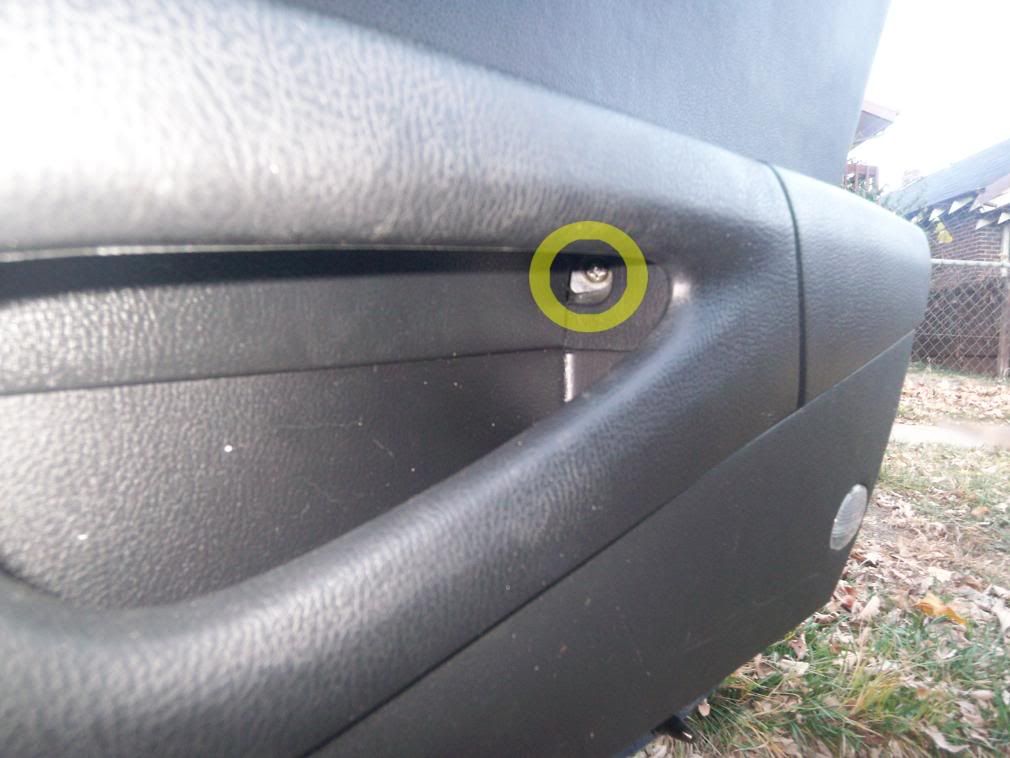
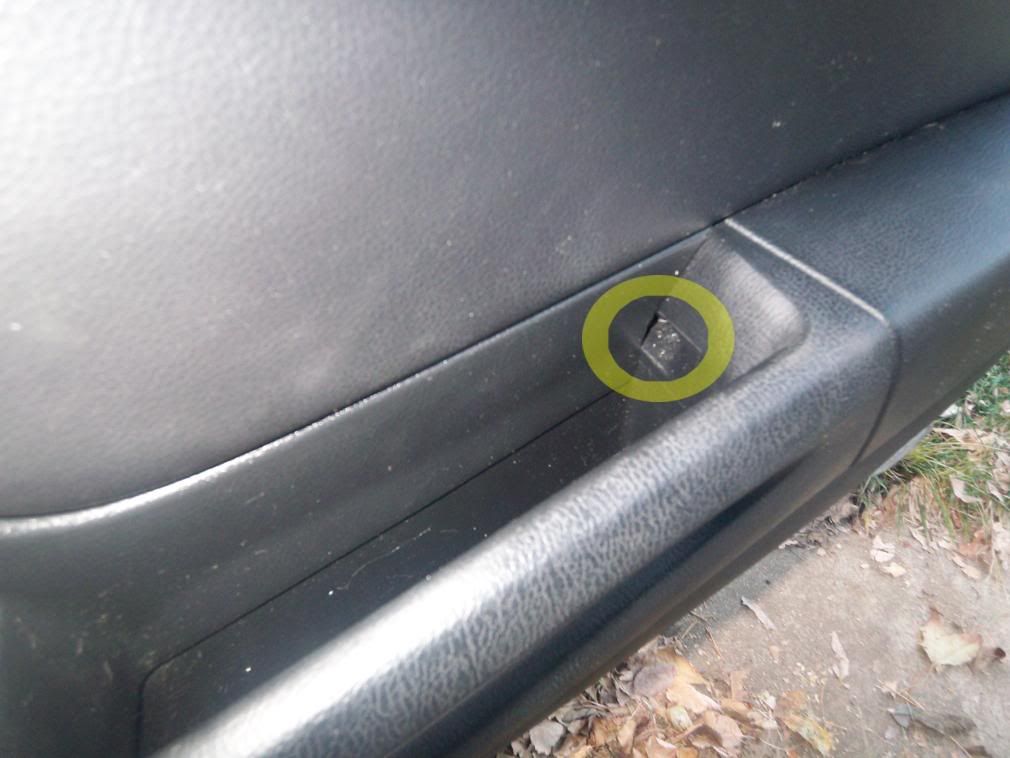
3) After removing the tweeter you will have to remove three screws before it's possible to pull off. They are Labled A B and C in the picture below. For Aall you have to do is use a small flat head screwdriver and pop the cap open ant there's the first screw. B is hidden kinda. There are 2 different views below. After A is removed the bezele should easily slip out when you hold the handel open.
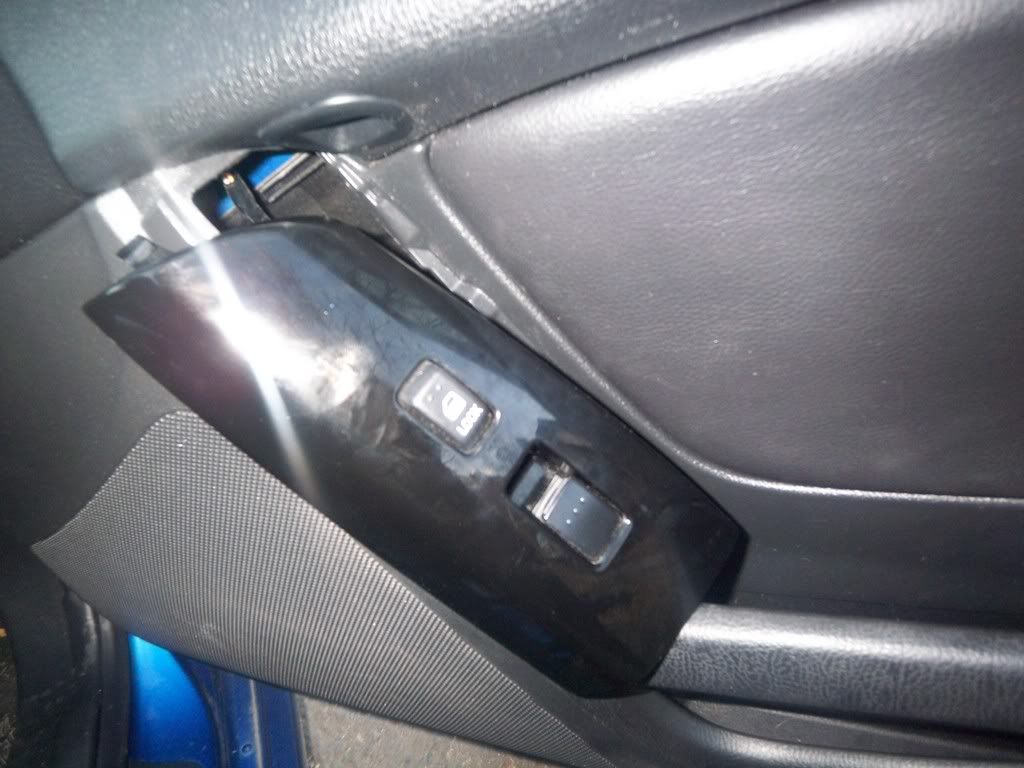
4) For the third screw, C, you are going to have to remove the peice that houses the switches for the window and lock. To do this simply put a small flat head screw driver in between the unit and panel near the bottom of the door and carefully pry up enough to get your fingers under it. Prull it up and out and it should easily pop out. There are two connecters, unplug them both and set the unit aside.
5) Now that you have the panel somewhat freed from the door frame all yoou have to do is pull the bottom of the door out. do not pull too hard. Just pull the bottom out only as shown.
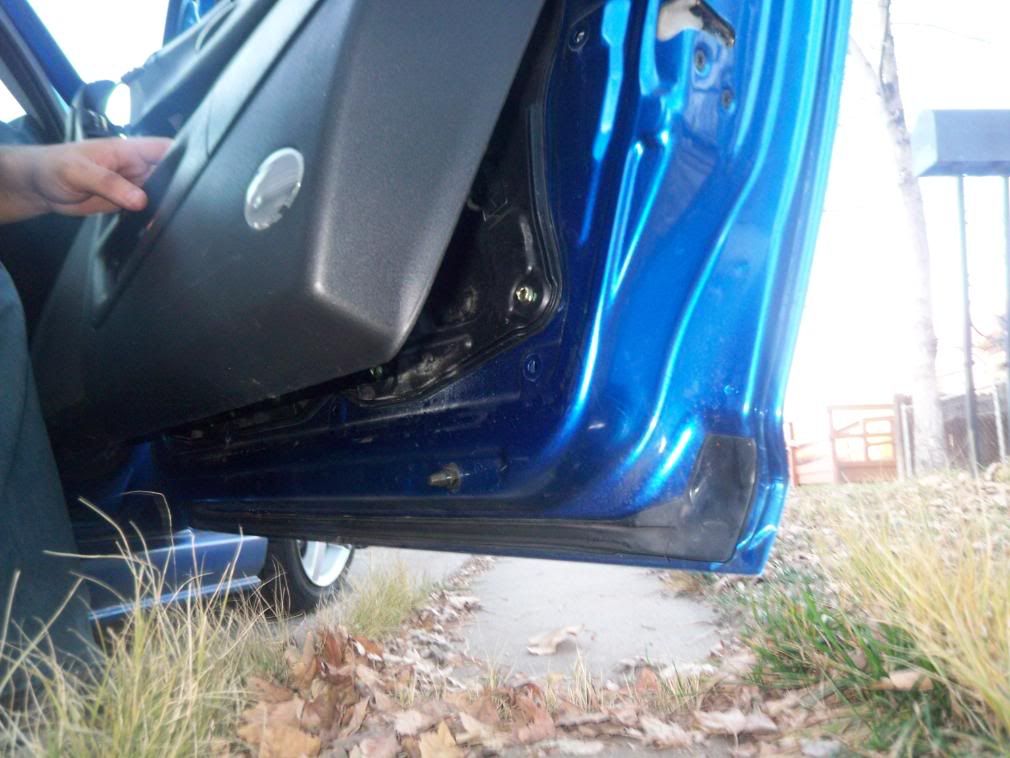
6) Now that you have the bottom of the panel separated from the door you have to remove the upper part. To do this just simply grab the handel on the panel and pull straight up. If you pull out you will break some clips that are molded in to the entire panel.
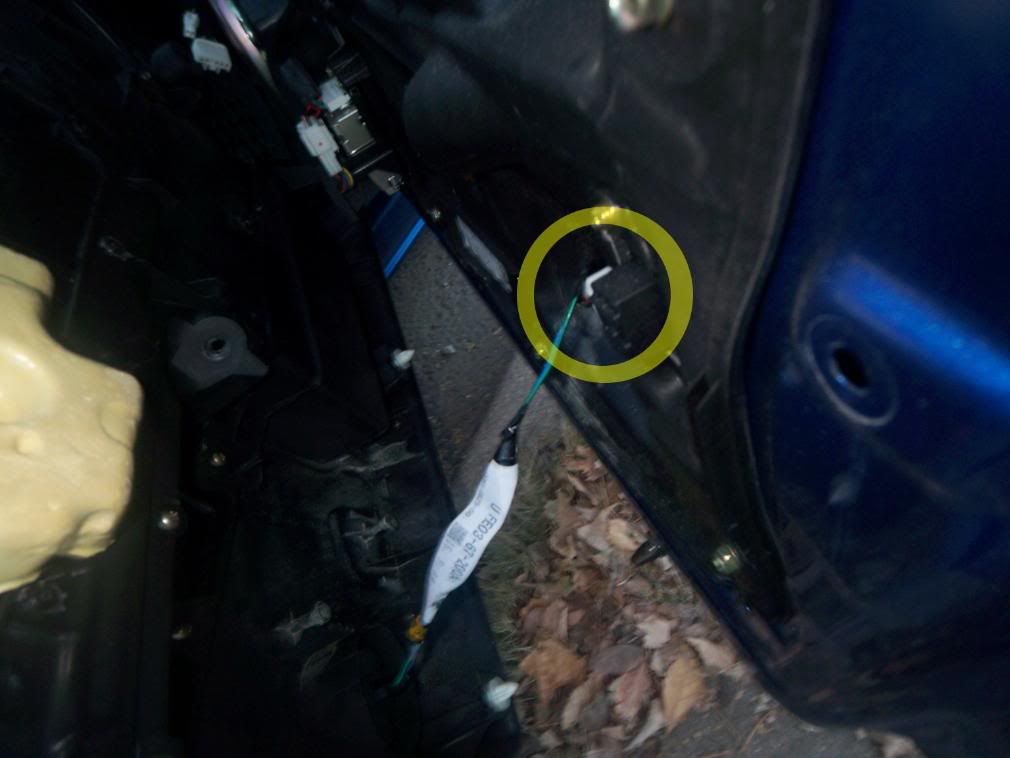
7) The panel just can't be ripped away and thrown to the side just yet. You need to remove one clip on the top inside of the door shown in the first pic and also remove the light. To remove the light you have to pull on it with some force. (Side Note: tie the bulb around the other wires near it before you close the door or you will break it. i know this from experience)

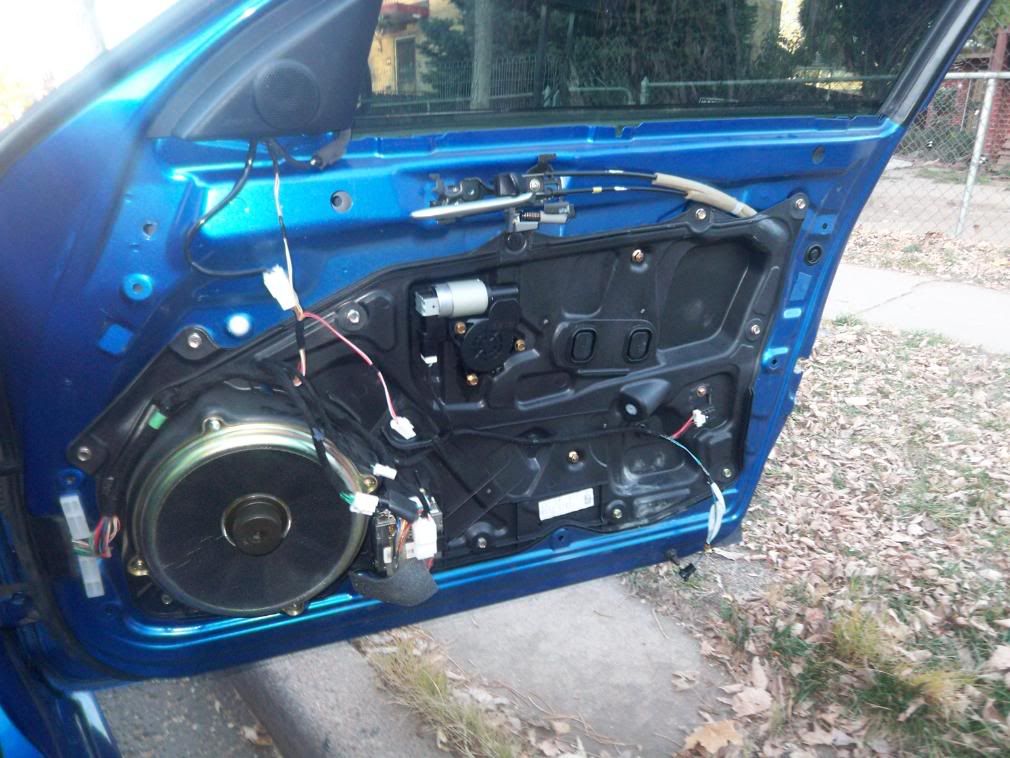
8) Congradulate yourself and find out why you just removed your door panel and have something that looks like this.
The Rear Doors
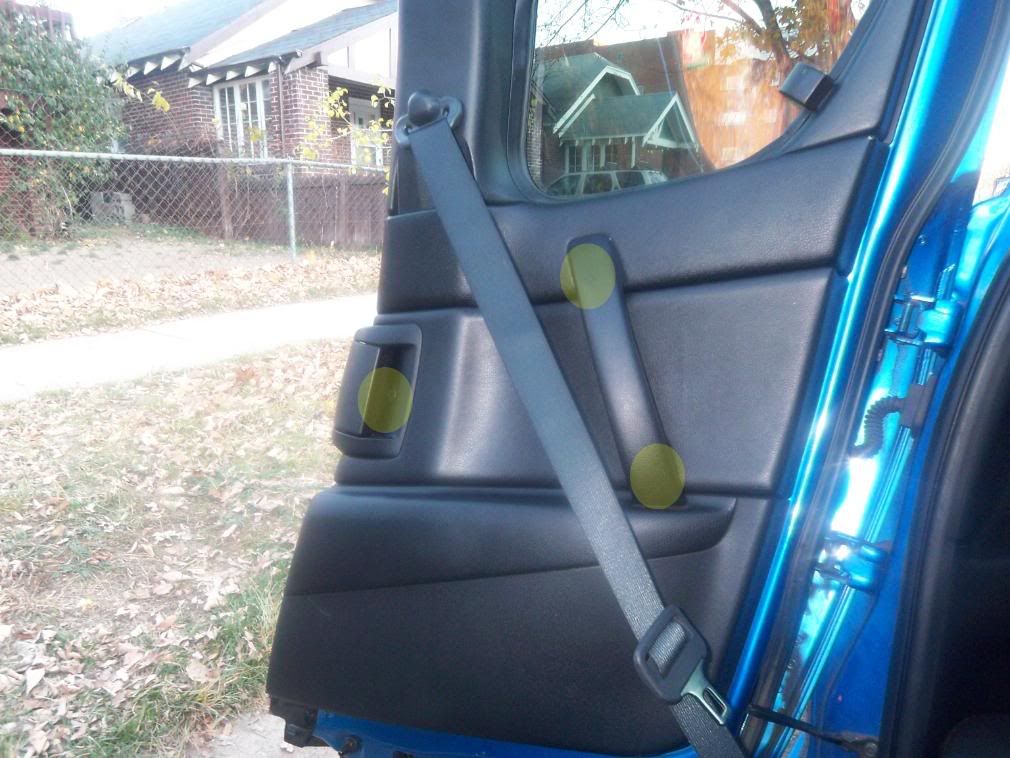
1) For the rear doors, there are also three screws that need to be taken out before you go ripping the panel out. They are marked in the picture below. (Don't ask why I didn't put A B and C this time) We'll start with the one by the handle that opens the door. That comes off just like the front door. Open the little round door with a small flat head screwdriver and the bezel should slide right out when you have the door handle held open. Now your "good to go". (No I don't work for Taco Bell) [img]http://coloradomazdaclub.com/forums/style_emoticons/<#EMO_DIR#>/biggrin.gif[/img]
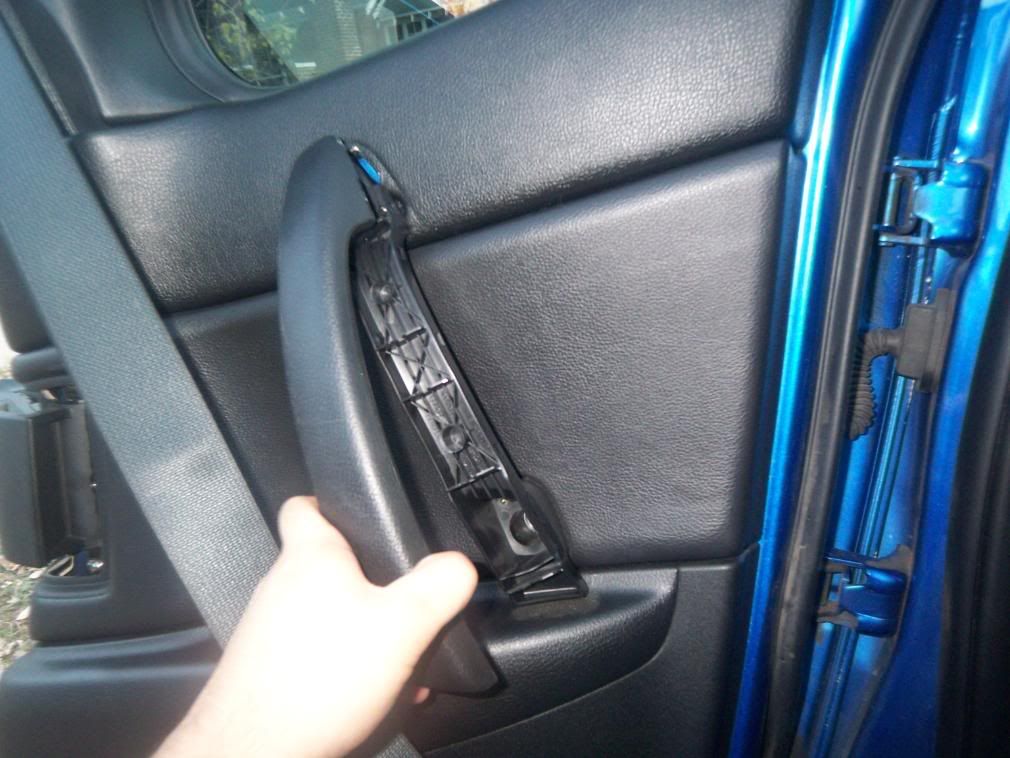
2) This step is to get to the other two screws out that are hidden in the handel in the middle of the panel. To get to these look at the pics below. All you have to do is grip around the bottom of the handel with your fingers, feel the seem in the back of the handel and pull straight out. It'll come right off.

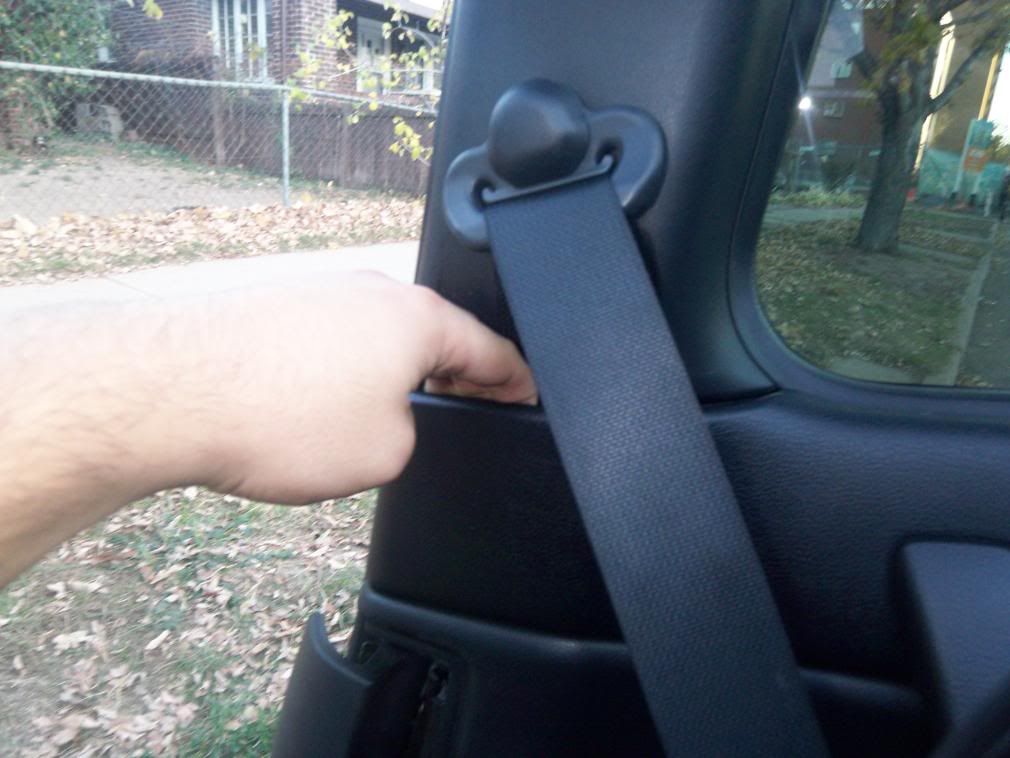
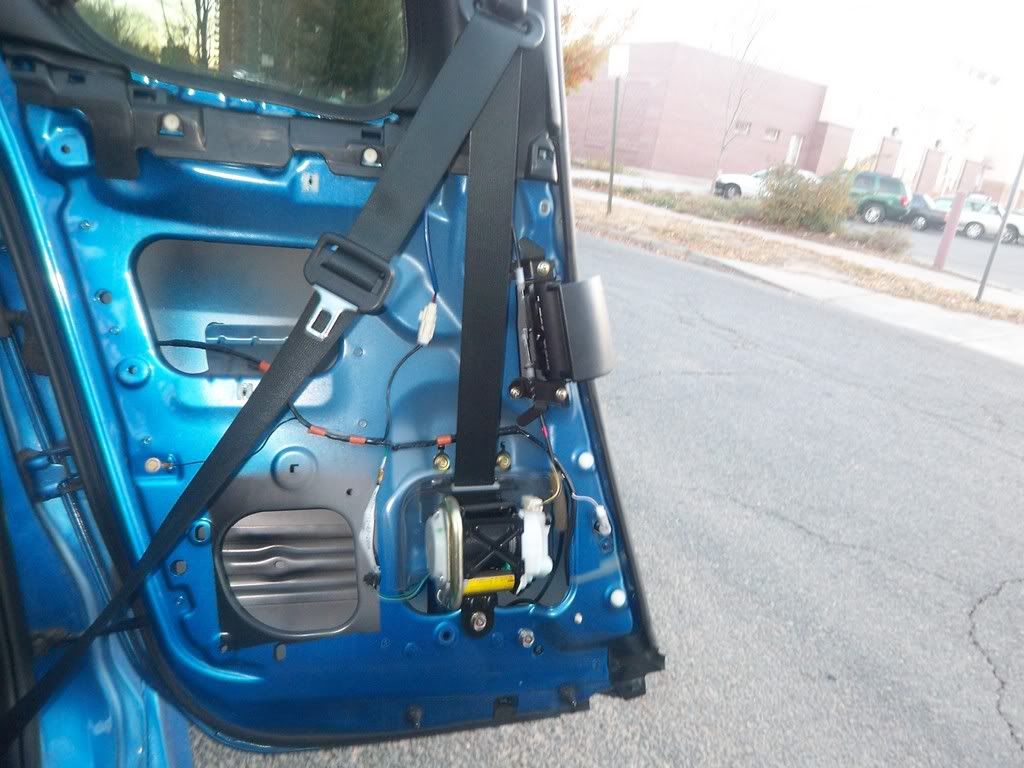
3) Now it's time to pull the panel off. For this just reach in where the seat belt retracts and pull that corner out.
4) After you pull that corner out grab that corner and the handle and pull. It'll come off in one peice and you get a bare door. Congradulate your self and ask again. Why did I just take the rear door panels off?
The Rear Side Panels
1) this is the easiest panel to remove. You first need to start by removing the rear seats. A DIY on this can be found HERE. (This difficulty is rated a -5 on a scale of 1 to 1,000,000,000,000,000...) [img]http://coloradomazdaclub.com/forums/style_emoticons/<#EMO_DIR#>/laugh.gif[/img]
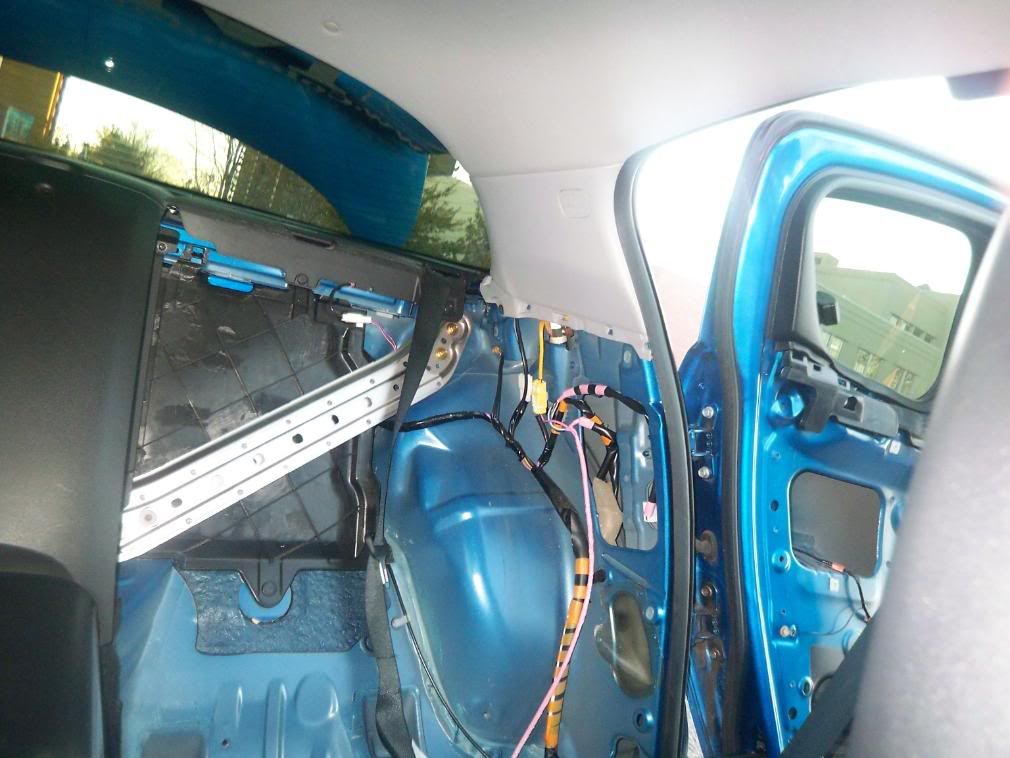
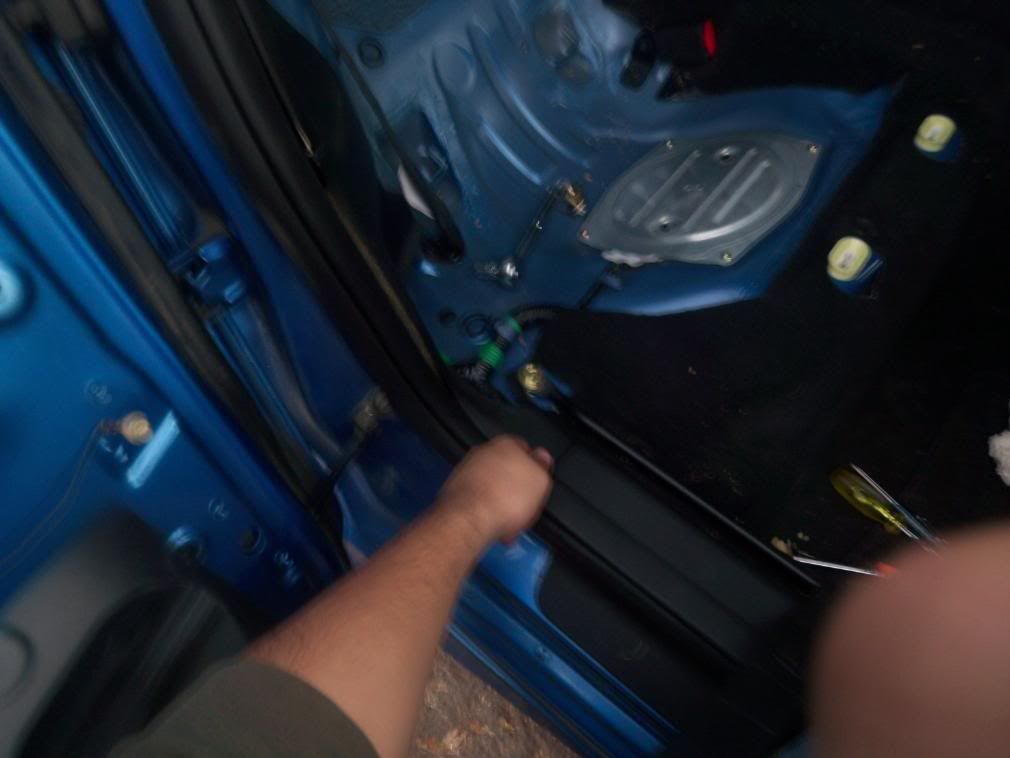
2) After the seats have been removed you have to let free the panel at the bottom of the door opening showed in the pics below.
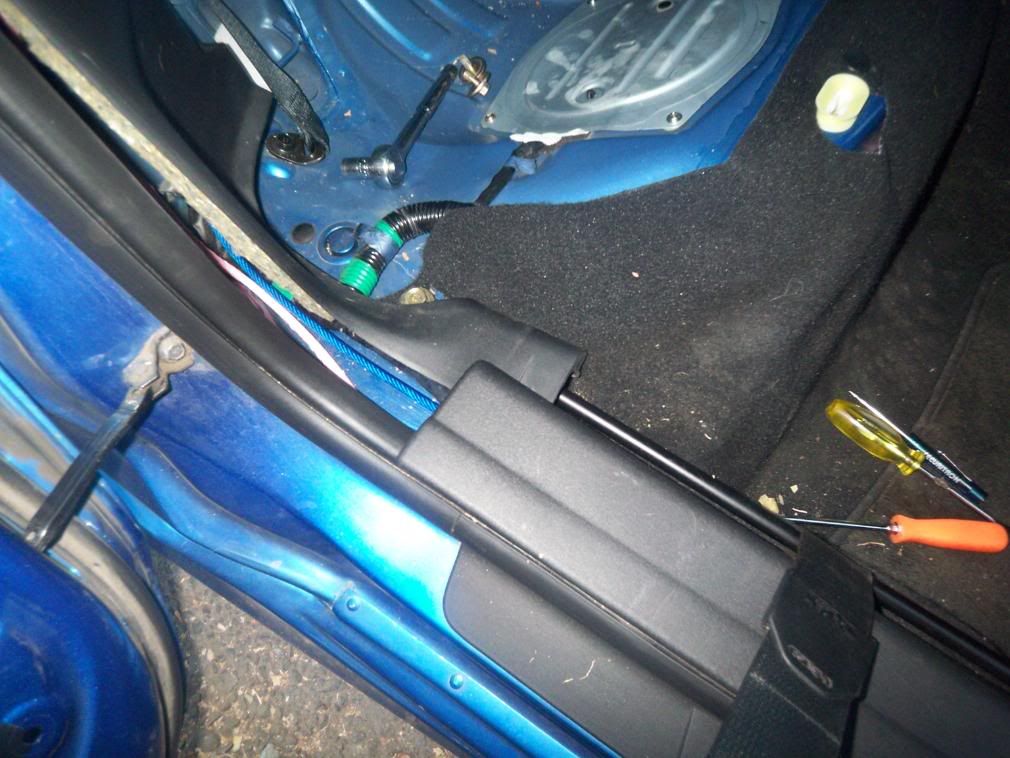
3) After it is freed from under the door sill you just simply pull the panel off just right under the air bag and you're done. Congradulations your rear of the car should look like this. (If not please stop and touch nothing. Seek medical help. [img]http://coloradomazdaclub.com/forums/style_emoticons/<#EMO_DIR#>/laugh.gif[/img] J/K.