The 3 obtained a nice gouge in the front bumper cover from the shelving rack in our garage. How difficult of a DIY repair is this?
And if someone has a step by step how-to with material required, that would be great. Autopia didn't have anything of use, unfortunately.
Request: How to repair dent/gouge in plastic bumper cover.
-
RedRoadster

- Posts: 641
- Joined: Fri Sep 21, 2007 9:14
- Location: Colorado Springs
- Contact:
Request: How to repair dent/gouge in plastic bumper cover.
95 Classic Red Miata - 'Kona'
Racing Beat Sways, AEM WB O2 sensor, ACT clutch, Ground Control Springs, Bilstein HDs, Fat Cat bumpstops, 95 stock 14s (winter) or 99 sport 15s (summer)
Flyin' Miata stuff:
FM II Link GT2560R turbo, Butterfly brace, N/A dual exhaust, Oil filter relo kit, Rear shock mounts
08 Sunlight Silver Mazda 3s GT Sedan - 'Tuna'
OEM Wing spoiler, Sirius and Media switcher
05 Onyx Black Mazda 6i Hatchback - 'Smokey'
-
RedRoadster
- Posts: 641
- Joined: Fri Sep 21, 2007 9:14
- Location: Colorado Springs
- Contact:
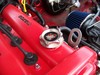
Some pics of the damage.
- Attachments
-
-
-
95 Classic Red Miata - 'Kona'
Racing Beat Sways, AEM WB O2 sensor, ACT clutch, Ground Control Springs, Bilstein HDs, Fat Cat bumpstops, 95 stock 14s (winter) or 99 sport 15s (summer)
Flyin' Miata stuff:
FM II Link GT2560R turbo, Butterfly brace, N/A dual exhaust, Oil filter relo kit, Rear shock mounts
08 Sunlight Silver Mazda 3s GT Sedan - 'Tuna'
OEM Wing spoiler, Sirius and Media switcher
05 Onyx Black Mazda 6i Hatchback - 'Smokey'
Racing Beat Sways, AEM WB O2 sensor, ACT clutch, Ground Control Springs, Bilstein HDs, Fat Cat bumpstops, 95 stock 14s (winter) or 99 sport 15s (summer)
Flyin' Miata stuff:
FM II Link GT2560R turbo, Butterfly brace, N/A dual exhaust, Oil filter relo kit, Rear shock mounts
08 Sunlight Silver Mazda 3s GT Sedan - 'Tuna'
OEM Wing spoiler, Sirius and Media switcher
05 Onyx Black Mazda 6i Hatchback - 'Smokey'
-
paintchips
- Member
- Posts: 43
- Joined: Tue Mar 17, 2009 9:14
- Location: pueblo
- Contact:
the repair isnt too tough. you just need some apoxy resin, med grade. sanding material from 240 grit to 1000 grit preferably on a da sander. glaze putty in case there is any bubbles in the resin. and a bondo putty spreader set. the tough part will be deciding how to paint the piece. this may be the only part i would recomend not doing yourself unless your pretty handy around correct enamel mixing ratio's correct thinning agents and a trim gun. ill wait for some feedback before i post a long tutorial explaining how to fix the damage. ")
-
Cesaros
like PaintChips said, its not to tough, but your bumper will continue to degrade in strength and possibly tear again, or crack if not replaced. These bumpers arent made to fix, just replaced if torn or cracked. my front bumper cracked a little last winter, and after plasti-welding it, it has continued to degrade itself and tear little by little since these do flex a little (VERy little) at highway speed.
-
RedRoadster
- Posts: 641
- Joined: Fri Sep 21, 2007 9:14
- Location: Colorado Springs
- Contact:
@Cesaros: given it wasn't a full tear all the way through, but a pretty bad dent/gouge, does that change your opinion at all?
@paintchips: Yeah, I wouldn't dare try to do something that large with just a bottle of touch up paint... I'd send it out. But everything else I feel comfortable with, as much as I LOVE sanding...
@paintchips: Yeah, I wouldn't dare try to do something that large with just a bottle of touch up paint... I'd send it out. But everything else I feel comfortable with, as much as I LOVE sanding...
95 Classic Red Miata - 'Kona'
Racing Beat Sways, AEM WB O2 sensor, ACT clutch, Ground Control Springs, Bilstein HDs, Fat Cat bumpstops, 95 stock 14s (winter) or 99 sport 15s (summer)
Flyin' Miata stuff:
FM II Link GT2560R turbo, Butterfly brace, N/A dual exhaust, Oil filter relo kit, Rear shock mounts
08 Sunlight Silver Mazda 3s GT Sedan - 'Tuna'
OEM Wing spoiler, Sirius and Media switcher
05 Onyx Black Mazda 6i Hatchback - 'Smokey'
Racing Beat Sways, AEM WB O2 sensor, ACT clutch, Ground Control Springs, Bilstein HDs, Fat Cat bumpstops, 95 stock 14s (winter) or 99 sport 15s (summer)
Flyin' Miata stuff:
FM II Link GT2560R turbo, Butterfly brace, N/A dual exhaust, Oil filter relo kit, Rear shock mounts
08 Sunlight Silver Mazda 3s GT Sedan - 'Tuna'
OEM Wing spoiler, Sirius and Media switcher
05 Onyx Black Mazda 6i Hatchback - 'Smokey'
-
paintchips
- Member
- Posts: 43
- Joined: Tue Mar 17, 2009 9:14
- Location: pueblo
- Contact:
if you've ever repaired a panel or something metalic its pretty much the same process. the only difference is epoxy resin is made for use on plastics and fiberglass. Ive used the stuff to repair plastic bumper that have been completly broken into seperate pieces and never had any problems with cracking or paint peel, you just have to let it dry properly. other than that its just like using bondo.
-
RedRoadster
- Posts: 641
- Joined: Fri Sep 21, 2007 9:14
- Location: Colorado Springs
- Contact:
I've done a full door and quarter panel color change on an old vehicle that i partially mangled. rough sand -> primer shoot/sand x2 -> color shoot /sand x2 -> clear shoot.
What i don't know how to do is spot prep the area to accept the resin and what to do to the resin after it sets and does it need primer?
What i don't know how to do is spot prep the area to accept the resin and what to do to the resin after it sets and does it need primer?
95 Classic Red Miata - 'Kona'
Racing Beat Sways, AEM WB O2 sensor, ACT clutch, Ground Control Springs, Bilstein HDs, Fat Cat bumpstops, 95 stock 14s (winter) or 99 sport 15s (summer)
Flyin' Miata stuff:
FM II Link GT2560R turbo, Butterfly brace, N/A dual exhaust, Oil filter relo kit, Rear shock mounts
08 Sunlight Silver Mazda 3s GT Sedan - 'Tuna'
OEM Wing spoiler, Sirius and Media switcher
05 Onyx Black Mazda 6i Hatchback - 'Smokey'
Racing Beat Sways, AEM WB O2 sensor, ACT clutch, Ground Control Springs, Bilstein HDs, Fat Cat bumpstops, 95 stock 14s (winter) or 99 sport 15s (summer)
Flyin' Miata stuff:
FM II Link GT2560R turbo, Butterfly brace, N/A dual exhaust, Oil filter relo kit, Rear shock mounts
08 Sunlight Silver Mazda 3s GT Sedan - 'Tuna'
OEM Wing spoiler, Sirius and Media switcher
05 Onyx Black Mazda 6i Hatchback - 'Smokey'
-
paintchips
- Member
- Posts: 43
- Joined: Tue Mar 17, 2009 9:14
- Location: pueblo
- Contact:
you just need to sand the area with 80 grit about six inches all the way around the damaged area. than you can lay the apoxy down in the damaged area. let it set for about an hour than begain to sand down the apoxy with a light powered orbital sander. than when the entire area is level take some glaze putty and apply it over the epoxy are with the flat side of a razorblade. (this step is just to fill any bubbles that may occur in the apoxy sanding) if you are going to send it out to be painted i wouldent really worry about primer because they will have to probably re-primer the entire bumper dependind what their process is. there really is a few ways to aproach the repair but if you want to repair the hole yourself that is how i would do it. the hardest part really is just getting the apoxy layer to match the bumper so when the two layers meet they come together seemlessly. you will probably have to lay down two to three layers of opxy so there isnt an edge left where the two layers meet. hope this kinda made sense?
Who is online
Users browsing this forum: No registered users and 32 guests