Build thread
-
RX-7 Chris
- Posts: 7800
- Joined: Tue Oct 02, 2007 9:14
- Location: Colorado Springs
- Contact:
the car is looking great
1984 RX-7 GSL-SE [size=84]My restomod project[/SIZE]
1964 Ford Galaxie 500XL flat black w/ white interior, 2 dr fastback, 390 thunderbird, C6 auto, 2500 rpm high stall converter, shift kit, AC, Holley 750 cfm
[size=100]RIP 1983 RX-7[/SIZE]
My Car Blog
-
speedjunkie

- Senior Member
- Posts: 5360
- Joined: Wed Jan 02, 2008 9:14
- Location: Colorado Springs
- Contact:
FDEEZ wrote:Great work! Can't wait to see your finished cluster.
When finished, will your turn signals still light up on the dash?
Thanks! Yeah my goal is to keep everything but the original gauges, so I'll still have the idiot lights and turn signals, and since the cruise control indicator is on the stock tach, I'm going to mount a light in the hole where the odometer reset button usually is and wire it to the cruise control wiring.
iani1.1 wrote:Yea... Totally forgot cause of this beautiful piece of machinery

That's understandable lol.
RX-7 Chris wrote:the car is looking great
Thanks! I haven't done much tonight. Last night I started modding the gauge clusters. There are two tabs on the sides of the Speedhut gauges, where it holds the clear cover in place where it needs to be. I figured out where those tabs should be on the stock clear cover and I drilled a couple holes for them to go into so the gauge could sit flush against the cover. Worked out pretty well. I'm going to do the same with the other two gauges, and then cover the gauges and the clear cover with painter's tape and put the black skeleton over it, then fiberglass around the gauges and across the back so it will hold the gauge exactly where it should be.


And this shows how the lights don't match the SPA gauges. I emailed Speedhut about sending them back to get the color changed, and I'm also going to get my current mileage put into the odometer now that I was able to get the mileage.

I also can't get the lights to dim or brighten and I'm pretty sure I have them hooked up to the right wires. I've never had success with getting aftermarket gauges to dim or brighten.

-
RX-7 Chris
- Posts: 7800
- Joined: Tue Oct 02, 2007 9:14
- Location: Colorado Springs
- Contact:
most LED bulbs don't dim.
1984 RX-7 GSL-SE [size=84]My restomod project[/SIZE]
1964 Ford Galaxie 500XL flat black w/ white interior, 2 dr fastback, 390 thunderbird, C6 auto, 2500 rpm high stall converter, shift kit, AC, Holley 750 cfm
[size=100]RIP 1983 RX-7[/SIZE]
My Car Blog
RX-7 Chris wrote:most LED bulbs don't dim.
Eh, kinda. LEDs produce a constant amount of light for some quantity of time (and how much current you throw at it, but there is a narrow range for that), but you can dim them by running the bulb for some percent of time. The circuit design to make it happen is a bit complex though, so I could see it being cut for cost savings.
-
RX-7 Chris
- Posts: 7800
- Joined: Tue Oct 02, 2007 9:14
- Location: Colorado Springs
- Contact:
what he said, lol.
1984 RX-7 GSL-SE [size=84]My restomod project[/SIZE]
1964 Ford Galaxie 500XL flat black w/ white interior, 2 dr fastback, 390 thunderbird, C6 auto, 2500 rpm high stall converter, shift kit, AC, Holley 750 cfm
[size=100]RIP 1983 RX-7[/SIZE]
My Car Blog
-
speedjunkie
- Senior Member
- Posts: 5360
- Joined: Wed Jan 02, 2008 9:14
- Location: Colorado Springs
- Contact:
Well I'm not even sure what kind of lighting it uses, I would assume LEDs but I don't know for sure. What I do know is one of the other guys that did this project before said that his kit came with a dimmer switch and he mounted it to the bottom of his steering column. So if they've always used LEDs, apparently they do dim LOL. I'll see if I can change some wiring to get them to dim using the stock switch, but if they won't I'll ask the company if they can supply a dimmer and I'll mount it where the stock one is somehow. But first I think I'll ask if they can even be dimmed anymore.
I sent off the gauges again this afternoon to get the color changed. I asked if they could make the numbers the same color for daytime instead of white and they said they can but they don't suggest it against a black face because the numbers are pretty dark. I've seen pics of others and it doesn't look too bad though. I'm having them adjust the mileage too. At least I hope they are. I think the girl is getting tired of me because she only answers about half the questions I ask her anymore lol. Sorry, but if I spend $600 on gauges I want them to be exactly what I want.
I haven't spent any time on the car yet tonight. I'm planning to see why some of the lights in the HVAC controls aren't lighting up, I need to troubleshoot why I'm not getting any fuel pressure now, and I might see about mounting the homelink setup somewhere and finishing the wiring. I'm planning on getting with Mike B when he gets back in town this weekend and buying some more stuff from him, interior stuff and the starter/battery harness, and I need to get with the kid in Washington to see if he's ever going to send me the rear bins so I can finally finish this battery re-relocation and put the interior back together. I think I'll check into parts to make the airbag hole into a glovebox too. We'll see how much time I have tonight though.
-
speedjunkie
- Senior Member
- Posts: 5360
- Joined: Wed Jan 02, 2008 9:14
- Location: Colorado Springs
- Contact:
I emailed with Speedhut again today and they added a dimmer to my order, and I'm planning on putting it where the stock dimmer switch is. Unfortunately I have to keep the stock one connected or the lights won't turn on at all, but I'll just push it back into the dash. I won't be using it anymore anyway. While they have the gauges they're also going to put my current mileage in the odometer, and I'm talking to them about the numbers and hashes being the same cobalt blue during the day as how they light up at night. I think it'll be alright because I believe the logo is cobalt blue and you can see that just fine during the day.
I pulled the HVAC box back out last night and added some foil tape to reflect the light a little better, and of course I had to add more JB Kwik to fix the screw mounts again because the plastic and JB Weld and JB Kwik sucks so bad and breaks. This is how the lights turned out though. The problem was three of the four lights were installed the wrong direction I guess and wouldn't light up, so I turned them in the socket 180 degrees and they lit up. Then the light wasn't even so I added the foil.

Wow, I didn't realize that picture sucked so bad until now lol.
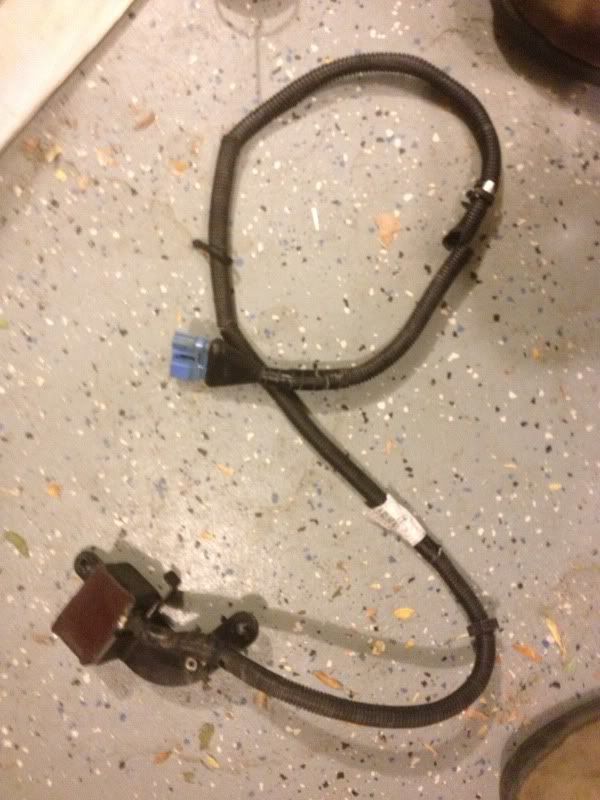
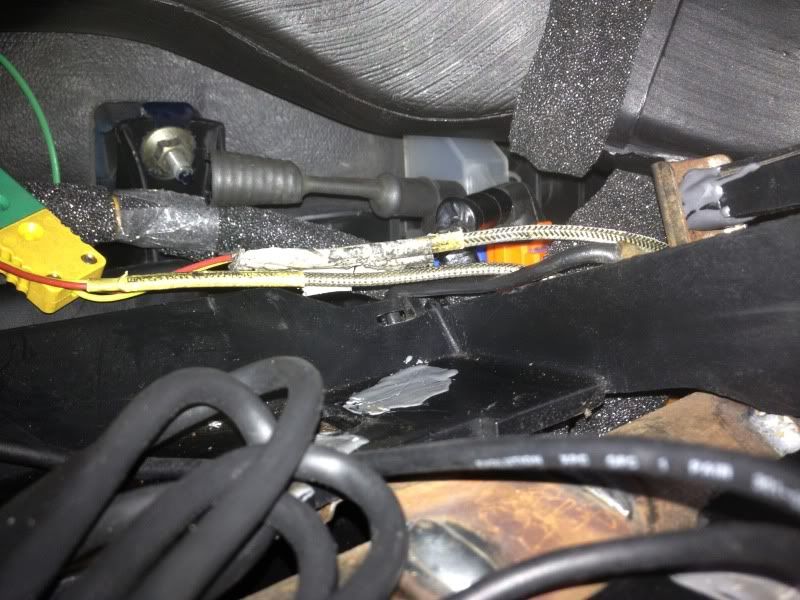
The other night I pulled this harness out of the car, it's the impact sensor for the airbags (since I don't have airbags anymore), and then last night I was reading a build thread on 7club and he said he didn't have horns anymore after pulling out the airbags and some wiring. I checked, and sure enough I don't have horns now lol. ARGH!!!! So I'm researching that problem.
I looked into the fuel pressure issue. It looks like I have pressure according to the gauge on the fuel rail, but my gauge inside the car is showing zero. Ugh. I'm not looking forward to figuring out all these little problems. I haven't tried starting the car yet, hopefully there are no more serious problems.
I'm surprised I haven't mentioned this yet, but I'm talking to a guy in FL who makes customized acrylic shift knobs and he's going to make me a matching shift knob and ebrake pair, along with a matching horn button and a new button for the ebrake. They're going to be black, either satin finish or polished, with the turbo rotor that's on my gauges engraved into the top of the shift knob and about an inch from the end of the ebrake handle on the top, and then my screenname trailing behind it on the ebrake and around the axis of the shift knob, and all the engravings will be blue. The shift knob will be the same 2" diameter as my current one and will be weighted. And the horn button will have the turbo rotor engraved into it and it will be blue as well. I have to send him my Nardi button so he can make sure the horn button will work, but it's worth it as far as I'm concerned. I love custom stuff lol. It's a lot of money for an ebrake and shift knob, around $200, but like I said, I love custom stuff, and it might actually be cheaper this way than trying to get a set of aluminum ones and get them engraved.
I still have to change the hoses on the heater core and hoses in the engine bay so I have heat, and my AC isn't even close to being finished haha. I still need a condenser, new starter harness with AC connections, custom lines...it's quite a bit. I'm not looking forward to mounting the condenser to get it to work with my ducting.
And I'm trying to find white plastic pieces to replace the stock orange ring around the lighter socket and the piece that covers the bulb to light the ignition key hole, or figure out some way to bleach the plastics. I'm putting white LEDs in the sockets already. I have something that I think might work for the keyhole, but I have no clue on the lighter socket ring. If anyone has any clues, let me know.
And I'm still looking for a place to do zinc plating.
I pulled the HVAC box back out last night and added some foil tape to reflect the light a little better, and of course I had to add more JB Kwik to fix the screw mounts again because the plastic and JB Weld and JB Kwik sucks so bad and breaks. This is how the lights turned out though. The problem was three of the four lights were installed the wrong direction I guess and wouldn't light up, so I turned them in the socket 180 degrees and they lit up. Then the light wasn't even so I added the foil.

Wow, I didn't realize that picture sucked so bad until now lol.
The other night I pulled this harness out of the car, it's the impact sensor for the airbags (since I don't have airbags anymore), and then last night I was reading a build thread on 7club and he said he didn't have horns anymore after pulling out the airbags and some wiring. I checked, and sure enough I don't have horns now lol. ARGH!!!! So I'm researching that problem.

I looked into the fuel pressure issue. It looks like I have pressure according to the gauge on the fuel rail, but my gauge inside the car is showing zero. Ugh. I'm not looking forward to figuring out all these little problems. I haven't tried starting the car yet, hopefully there are no more serious problems.
I'm surprised I haven't mentioned this yet, but I'm talking to a guy in FL who makes customized acrylic shift knobs and he's going to make me a matching shift knob and ebrake pair, along with a matching horn button and a new button for the ebrake. They're going to be black, either satin finish or polished, with the turbo rotor that's on my gauges engraved into the top of the shift knob and about an inch from the end of the ebrake handle on the top, and then my screenname trailing behind it on the ebrake and around the axis of the shift knob, and all the engravings will be blue. The shift knob will be the same 2" diameter as my current one and will be weighted. And the horn button will have the turbo rotor engraved into it and it will be blue as well. I have to send him my Nardi button so he can make sure the horn button will work, but it's worth it as far as I'm concerned. I love custom stuff lol. It's a lot of money for an ebrake and shift knob, around $200, but like I said, I love custom stuff, and it might actually be cheaper this way than trying to get a set of aluminum ones and get them engraved.
I still have to change the hoses on the heater core and hoses in the engine bay so I have heat, and my AC isn't even close to being finished haha. I still need a condenser, new starter harness with AC connections, custom lines...it's quite a bit. I'm not looking forward to mounting the condenser to get it to work with my ducting.
And I'm trying to find white plastic pieces to replace the stock orange ring around the lighter socket and the piece that covers the bulb to light the ignition key hole, or figure out some way to bleach the plastics. I'm putting white LEDs in the sockets already. I have something that I think might work for the keyhole, but I have no clue on the lighter socket ring. If anyone has any clues, let me know.
And I'm still looking for a place to do zinc plating.
-
speedjunkie
- Senior Member
- Posts: 5360
- Joined: Wed Jan 02, 2008 9:14
- Location: Colorado Springs
- Contact:
Last night I worked on putting the AC lines in the engine bay (just the ones from the firewall) and hooked up the coolant lines to the heater core. I didn't start until 11pm and I finished at 130am lol. First I wrapped the gold reflective tape around the AC lines since they are right by the turbo, and put heat tape on the heater core lines too for the same reason.

Tonight I topped off the coolant and started and ran the car for about 10 minutes to get the bubbles out. While it was running I tested the heat in the car and all the settings on the HVAC controls to make sure they're working properly. Everything is working great so far! Aside from not having a horn still, but I'll get to that in a minute. I also checked the SPA fuel pressure gauge and it's showing pressure now, and I didn't do anything to work on it. Oh well, it works so I'm happy lol.
I started troubleshooting the horn issue first thing when I got home. I still haven't discovered what's going on. I haven't removed anything that should matter. I've troubleshot everything other guys have mentioned so I'm stumped. But it's 115am and I'm going to bed. Ugh.
-
speedjunkie
- Senior Member
- Posts: 5360
- Joined: Wed Jan 02, 2008 9:14
- Location: Colorado Springs
- Contact:
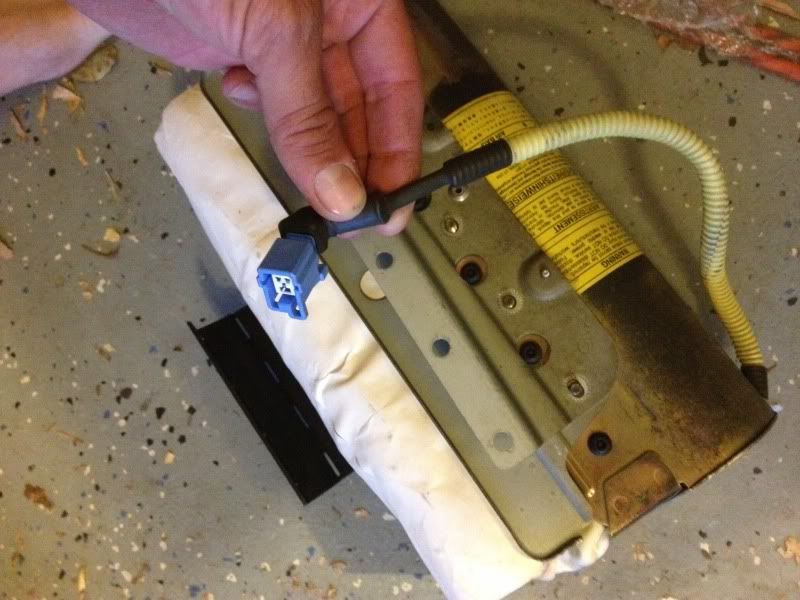
I finally fixed the horn issue! And it was really easy too. I just cut the connector off the airbag, spliced the wires, plugged everything back in, and viola! I got the idea from someone on 7club who was helping me out because he had the same issue, but I guess his issue was more in depth. I wondered if it would work if I plugged that back in, but I didn't think it would be that easy. And I was about to test it and plugged the airbag back in, but then I thought maybe it would go off as soon as it had battery power since the impact sensor wasn't plugged in anymore, so I decided not to chance it lol.
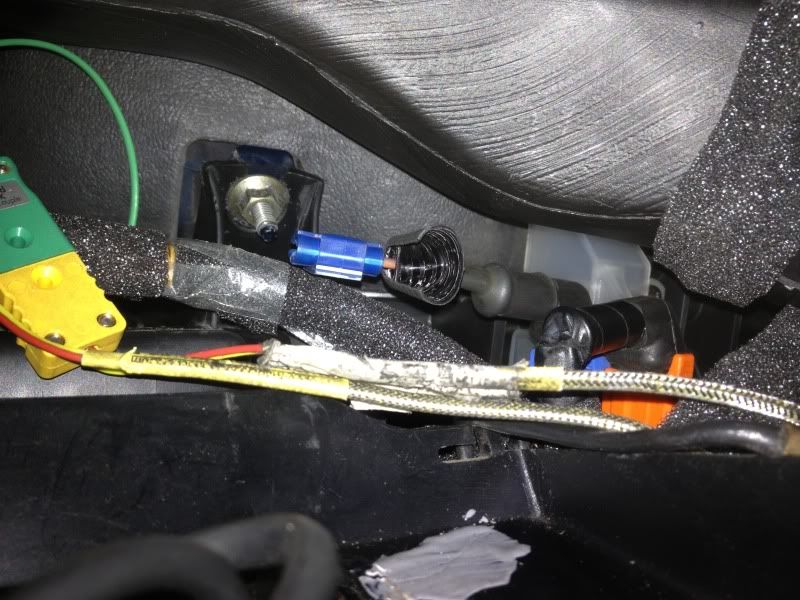
And when I folded the black part back over you can't even see the splice. Not that it matters since it's behind the dash haha, but still. And actually until I mold a glovebox or some fiberglass in there, it will be visible when it's open.
I also moved the wiring for the gauges directly to the dimmer switch wiring. Someone else on 7club that's done these gauges told me that's how he did his. I have a dimmer switch coming from Speedhut but I'd like to use the stock one if I can. We'll see when I get the gauges back. They emailed me today too and said they were ready to be put back together and shipped to me, but then I told them I want the logos the same color as the numbers and ticks, so I'll get them back even later now. But at least they should be the way I want them.
And Elliot from Turblown cleared up some things for me for the new ECU. Last night I was trying to put the map he gave me onto the ECU, but it wouldn't set up right and install the software. He said there is a new version and gave me a link but it's not to the download, it's to a forum talking about it LOL. I downloaded software a couple weeks ago but I'm not sure if it's the right one.
I also ran the wire for the GPS sensor for the speedo, and tried to install the homelink but realized it would be behind a panel once I put it back on. I feel like I'll never find a good place for it lol.
I'm also going to have to make a new piece for the DIN panel with new holes for the tuning cables. I don't feel like doing that just yet though lol.


And when I folded the black part back over you can't even see the splice. Not that it matters since it's behind the dash haha, but still. And actually until I mold a glovebox or some fiberglass in there, it will be visible when it's open.

I also moved the wiring for the gauges directly to the dimmer switch wiring. Someone else on 7club that's done these gauges told me that's how he did his. I have a dimmer switch coming from Speedhut but I'd like to use the stock one if I can. We'll see when I get the gauges back. They emailed me today too and said they were ready to be put back together and shipped to me, but then I told them I want the logos the same color as the numbers and ticks, so I'll get them back even later now. But at least they should be the way I want them.
And Elliot from Turblown cleared up some things for me for the new ECU. Last night I was trying to put the map he gave me onto the ECU, but it wouldn't set up right and install the software. He said there is a new version and gave me a link but it's not to the download, it's to a forum talking about it LOL. I downloaded software a couple weeks ago but I'm not sure if it's the right one.
I also ran the wire for the GPS sensor for the speedo, and tried to install the homelink but realized it would be behind a panel once I put it back on. I feel like I'll never find a good place for it lol.
I'm also going to have to make a new piece for the DIN panel with new holes for the tuning cables. I don't feel like doing that just yet though lol.
-
speedjunkie
- Senior Member
- Posts: 5360
- Joined: Wed Jan 02, 2008 9:14
- Location: Colorado Springs
- Contact:
When I got home tonight I downloaded new firmware and software I needed for the Adaptronic and uploaded the map Turblown sent me. Should be good to run in the car now, but I think I might drive it on the PFC first to make absolutely sure things are the same.
I also took pictures of how my horn wires are hooked up on the steering wheel for a guy on 7club that's been having problems, and I discovered that some of the bolts holding the quick release to the hub adapter are stripped, so I'll go to ACE tomorrow to see what they have. I tried to tap them but apparently I don't have a tap the right size.
I also took pictures of how my horn wires are hooked up on the steering wheel for a guy on 7club that's been having problems, and I discovered that some of the bolts holding the quick release to the hub adapter are stripped, so I'll go to ACE tomorrow to see what they have. I tried to tap them but apparently I don't have a tap the right size.
-
speedjunkie
- Senior Member
- Posts: 5360
- Joined: Wed Jan 02, 2008 9:14
- Location: Colorado Springs
- Contact:
Today I started looking more at places to redo my brackets and things in the engine bay. All the stuff I had done in black oxide a couple years ago that is now rusty (DUH!!!!). I was looking at electrolytic nickel plating because it's still conductive and some of the pieces have grounding points on them. I talked to Advanced Surface Technologies in Arvada because they're the only place around here that I could find to do the service. I asked if they did only big jobs or small jobs too and they said they did small jobs as well. Then I told them what I wanted to have done and they said "oh, we don't do car parts, only industrial stuff"...uuuuuhhhhhhhhhhh, ok. I also looked at electroless nickel plating and saw that Ximpak here in the Springs does it, so I called them, but they said electroless is non-conductive. Then I started looking into it more and decided to call back and ask more questions, and they said they can just plug the threaded holes and cover the posts so it will still be conductive. SWEET! They said one lot is $95, so hopefully all my stuff will fill only one lot. Now I have to take all the stuff back out of the engine bay. I guess I'll be doing that Saturday and sand blast everything and drop the stuff off Monday.
I also bought this ebrake handle and shift knob this morning...
http://www.mossmiata.com/Shop/ViewProducts.aspx?PlateIndexID=96533
I'm still going to get them etched with the turbo rotor and possibly my screen name too. I decided against the acrylic pieces because the ebrake handle was just going to be a generic cylindrical shape and I wanted something with more character, and it was also going to be way more expensive. I'm still going to have him make me a matching horn button and ebrake button though, since I don't think this handle comes with a new button.
Al is supposed to solder my circuit ribbon onto my circuit board on the cluster, but he's looking pretty busy these days so I may need to find someone else to do that too.
I got an email back from Speedhut yesterday saying they were almost put back together and ready to ship but the logos were still a different color than the numbers and ticks, so she said it would push delivery back a few days. That's alright, as long as it's the way I want it. I just hope the faces are centered and everything is good with them this time. I really need to get this back on the road.
And I also stopped at ACE during lunch today and picked up new screws for the steering wheel quick release. I might see if I can tap the holes tonight and reinstall that.
-
speedjunkie
- Senior Member
- Posts: 5360
- Joined: Wed Jan 02, 2008 9:14
- Location: Colorado Springs
- Contact:
Friday night I reassembled the steering components after tapping the holes.
Saturday I removed all the pieces from the engine bay that I want to get plated. All weekend I looked for somewhere to use a blast cabinet because Ximpak said they don't do any prep work, just the plating. The hobby shop on Peterson closed about a year ago, Academy doesn't have a blast cabinet, and Carson said theirs is inop. Great. I stopped by Cody's (Wankel88) and used his for a little bit but it was taking forever so I decided to try to take the stuff somewhere and get it done. A friend told me about American Stripping so I stopped by there a little bit ago and he said it would be a couple weeks until they were done, it would be more expensive, and he's retiring in a couple weeks. Eh, nevermind. I picked up a blast cabinet from Harbor Freight yesterday because they're on sale and I figured I could just use it when I get a bigger air compressor, because apparently the one I have doesn't have enough CFM to do the job. But I'm going to try it with this compressor anyway and see what happens because I need to get this done and it doesn't seem like there is anyone around here that can do it. So I'll be assembling that tonight and trying to blast I guess.
So I thought I needed a whole new starter harness because I couldn't find the AC compressor wiring on mine. Come to find out (and remember) it's a separate little harness that connects to the starter harness, and I found that harness on a spare compressor I had laying around. WIN!!!!
I started replacing the o-rings on all the AC lines yesterday, and I'm planning to install the lines and the compressor while the power steering pump is somewhat taken apart and it will be easier to install the compressor. Then I'll put the starter harness back in and put all the brackets and things back in after they come back from plating. I also looked online this morning for a universal condenser and I think I found one that will work perfectly, and it's only $50. As soon as I see if the measurements are what I think they are, I'm going to buy that. I really want to have the AC done when everything else is done too, rather than waiting to complete the AC job until later.
I imagine my gauges will be done this week and Al said he'd probably be able to do the soldering for me this week sometime and also fiberglass the gauges in. WOOHOOO! Knock everything out at once.
And I think I'm just going to cut my rear bins because I don't have time to wait for the other ones, and I can finish the battery re-relocation as well.
I'm also still looking at options on finishing the new additional glovebox, but that's something I don't mind waiting on for now. I can finish that while the car is running at least.
I'm thinking about waiting to fully run on the new ECU until later. I might need someone to tune it and I don't want the car to be down for that. I can just keep running it on the PFC for now.
-
speedjunkie
- Senior Member
- Posts: 5360
- Joined: Wed Jan 02, 2008 9:14
- Location: Colorado Springs
- Contact:
This morning I went and had my ebrake handle and shift knob engraved. They didn't come out exactly as I'd originally wanted, but I still like them.

We tested on my old shift knob first.


Last night I was putting together the blast cabinet I bought the other day and then realized I never tried to call Tom down at Beauchamp Racing to see if I could use his blaster. I called him today and he was cool with it, so I went down there this afternoon after work and it took me 2.5 hours to blast everything. I'm going to stop at Ximpak first thing in the morning and drop that stuff off. Hopefully it will be finished by the end of the week at the latest.
I emailed Speedhut today to check on status and got an email back from them tonight. They shipped the gauges today. WOOHOO!! It looks like this project might actually be finished by this weekend. With any luck.
-
RX-7 Chris
- Posts: 7800
- Joined: Tue Oct 02, 2007 9:14
- Location: Colorado Springs
- Contact:
that would be great
1984 RX-7 GSL-SE [size=84]My restomod project[/SIZE]
1964 Ford Galaxie 500XL flat black w/ white interior, 2 dr fastback, 390 thunderbird, C6 auto, 2500 rpm high stall converter, shift kit, AC, Holley 750 cfm
[size=100]RIP 1983 RX-7[/SIZE]
My Car Blog
-
speedjunkie
- Senior Member
- Posts: 5360
- Joined: Wed Jan 02, 2008 9:14
- Location: Colorado Springs
- Contact:
I did a lot of work over the last few days and today. Wednesday morning I dropped off all my brackets at Ximpak to get electroless nickel plated, and they had them done Thursday morning already. The other day I worked on fixing the leaky 2-cycle tank problem I had. Thursday while the window guys were here I put my ignition harness back in, along with the AC compressor and most of the lines, and most of the brackets and things I had plated. Yesterday I put most of the engine bay back together, finished installing the remaining plated brackets and things, and I removed the IC so I could work on installing the condenser. Last night I cut the rear bins and started the battery relocation and today I finished it, reinstalled the bins and most of the interior, and I'm going to remove the ducting for the VMIC setup so I can mount the condenser and then put the IC back in. I think I'm going to have to modify the intake pipe or make a new one, I don't think the current one will fit with the AC lines going through there now. I have a few other little things I have to do (bleed the clutch line, recalibrate the wideband sensor, etc).
Who is online
Users browsing this forum: No registered users and 110 guests