I wish i had a huge garage. The first pic was taken at a paint shop several years ago.
All the work I'm doing on the car is in my tiny 3 car garage. I usually park the "V" and monster truck in the front yard whenever i work on the Rx7. It's currently sitting on truck jack stands for more clearance off the ground :-) Unfortunately I still have to use a creeper to get under the car.
FDEEZ's Build Thread
-
speedjunkie

- Senior Member
- Posts: 5294
- Joined: Wed Jan 02, 2008 9:14
- Location: Colorado Springs
- Contact:

So while the car was on jacks, I checked all my wheels and noticed quite a bit of horizontal and vertical play on my driver's side front wheel. I decided the wheel bearing was toast, so after a quick pit stop at the dealer, I've got all the parts to replace it.
Here's a quick write-up to replace the front Rx7 wheel bearing assembly:
1. Gotta remove some stuff first:
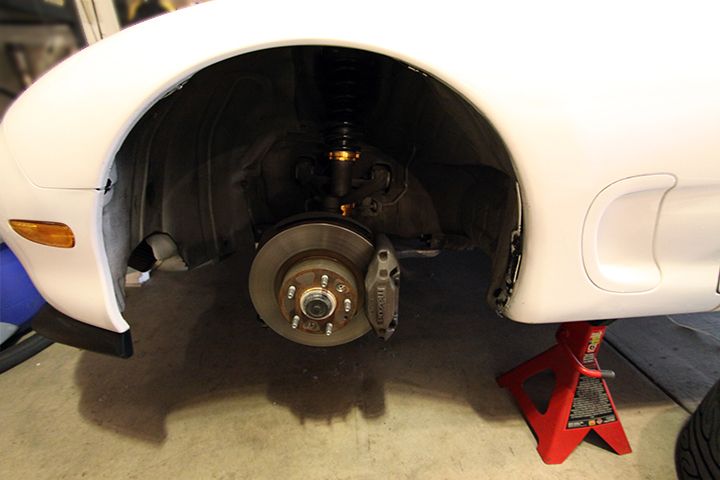
2. Remove brake caliper & support with a wire (clothes hanger) to prevent damage to the brake line. Then remove the hub cap:
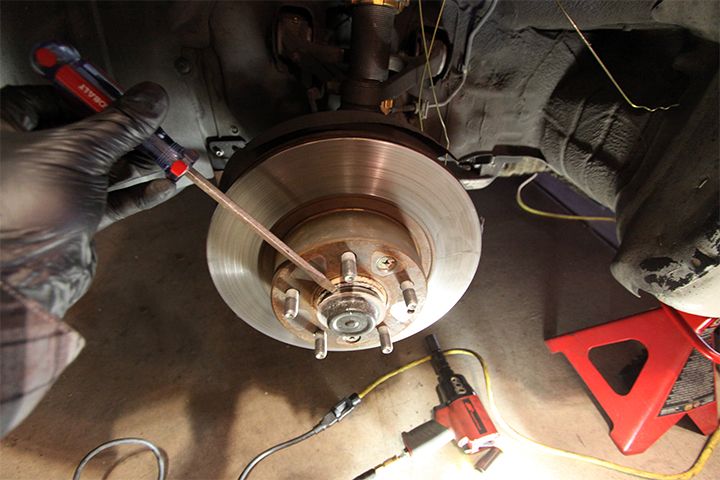
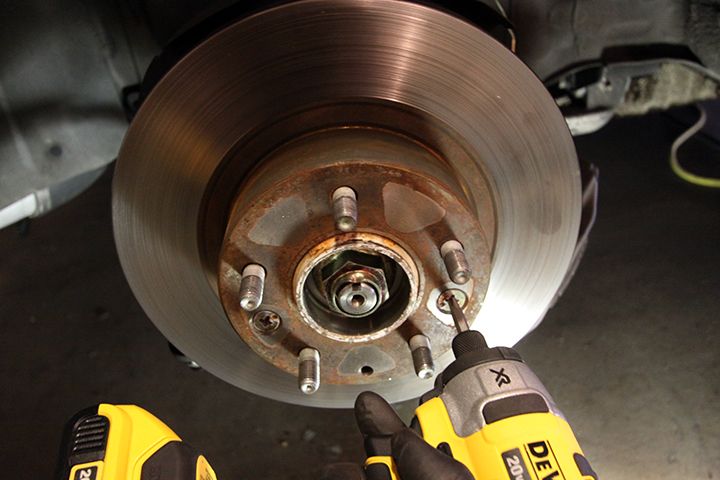
3. Remove the brake rotor via those two nuts. This is where an impact driver makes it a piece of cake:
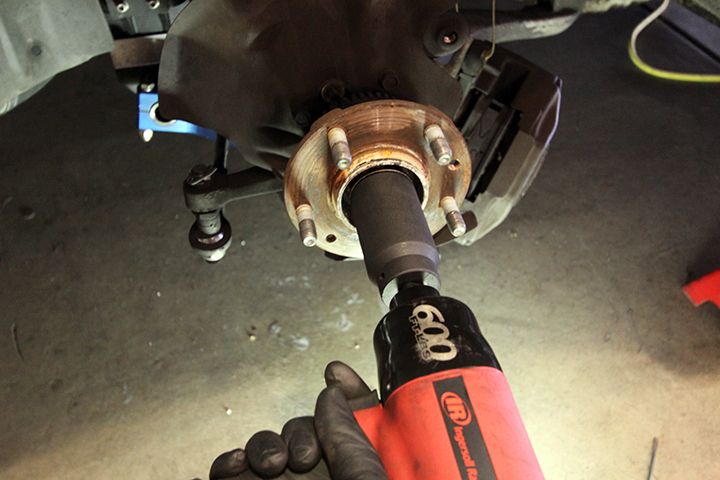
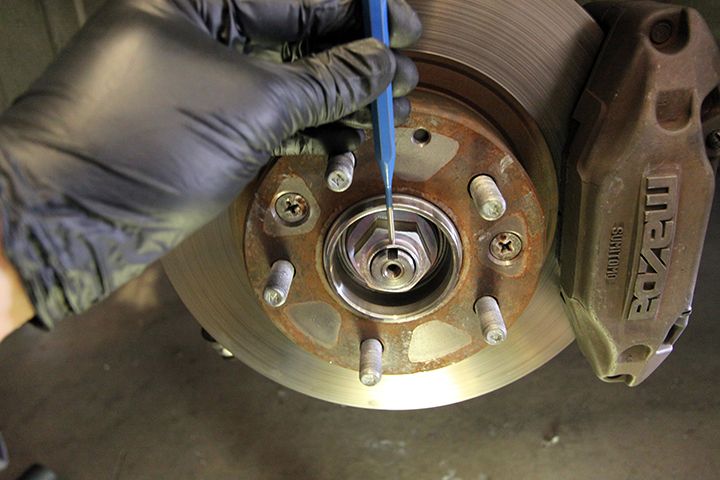
4. Remove big a$$ wheel hub nut with a 35mm socket & an impact wrench:
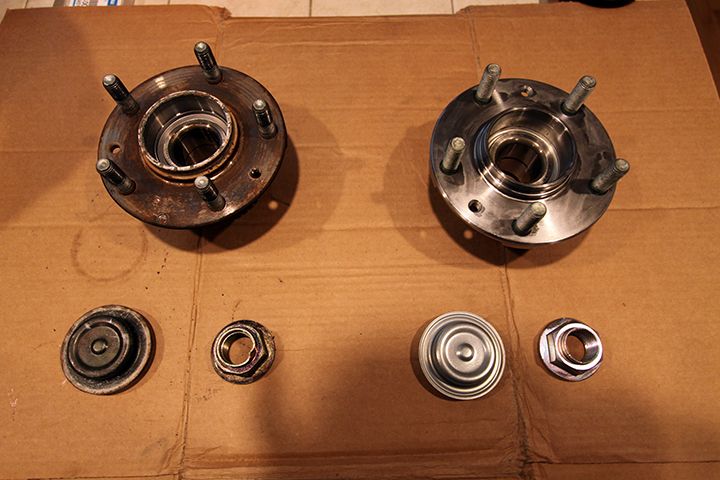
Here's a quick comparison of the old & new hub assemblies:
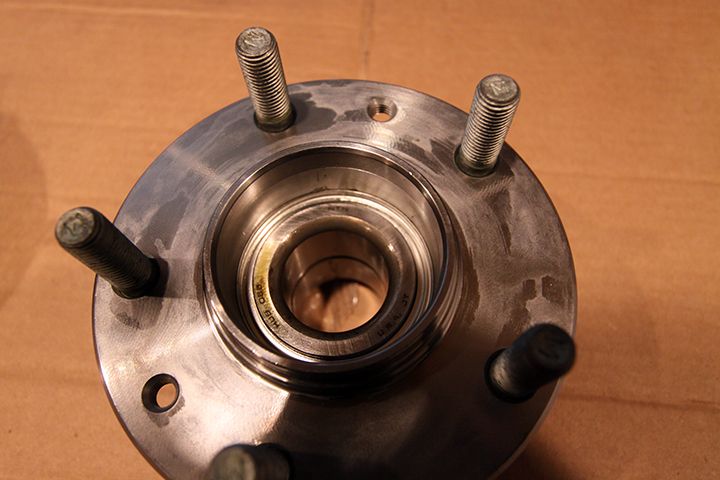
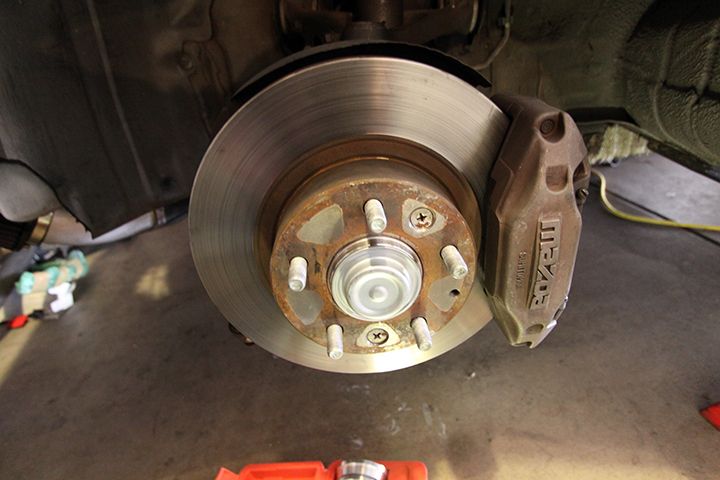
Nice & clean:
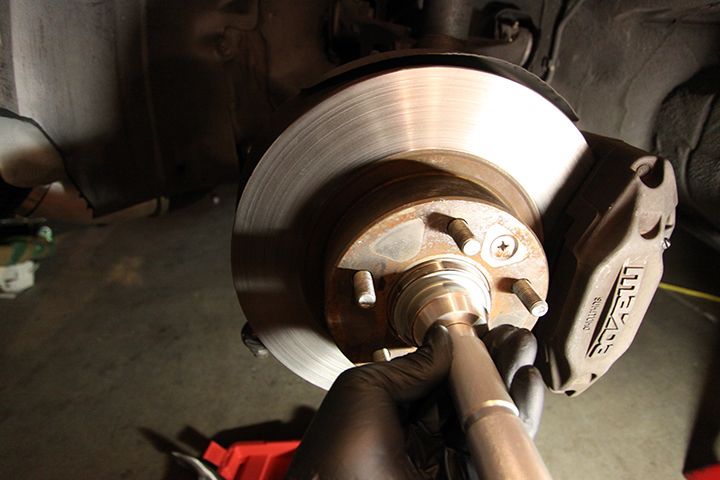
5. Re-install rotor & brake caliper & wheel hub nut. Then stake the nut as shown here:
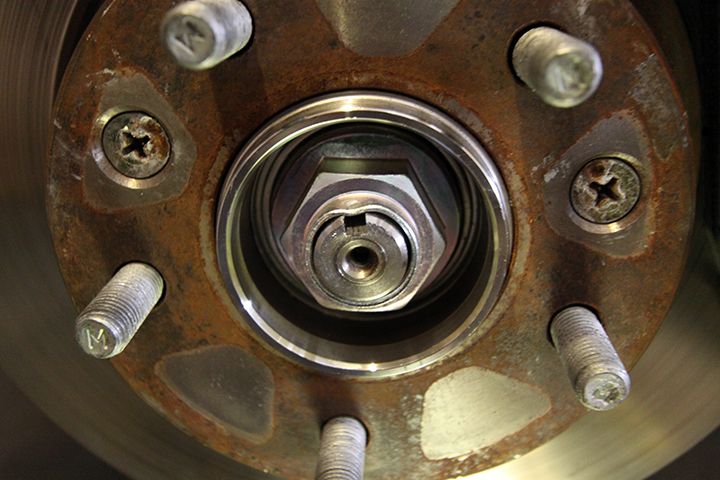
Staked nut:
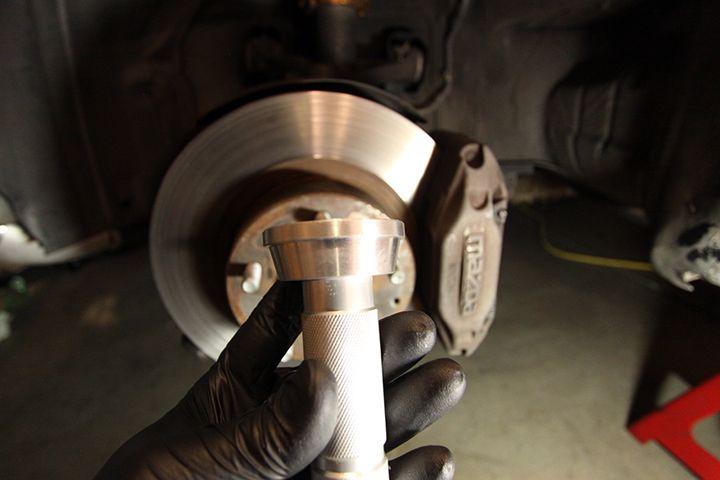
6. Install new hub cap. Getting this stubborn thing pressed inside the hub is what took the longest. My rubber mallet wasn't too effective, so I ended up using a seal driver.
7. All done!
Here's a quick write-up to replace the front Rx7 wheel bearing assembly:
1. Gotta remove some stuff first:
2. Remove brake caliper & support with a wire (clothes hanger) to prevent damage to the brake line. Then remove the hub cap:
3. Remove the brake rotor via those two nuts. This is where an impact driver makes it a piece of cake:
4. Remove big a$$ wheel hub nut with a 35mm socket & an impact wrench:
Here's a quick comparison of the old & new hub assemblies:
Nice & clean:
5. Re-install rotor & brake caliper & wheel hub nut. Then stake the nut as shown here:
Staked nut:
6. Install new hub cap. Getting this stubborn thing pressed inside the hub is what took the longest. My rubber mallet wasn't too effective, so I ended up using a seal driver.
7. All done!


-
speedjunkie
- Senior Member
- Posts: 5294
- Joined: Wed Jan 02, 2008 9:14
- Location: Colorado Springs
- Contact:
I bought one for each side. But since the passenger's side is still good, I'm debating about replacing it. I'll most likely replace it as preventative maintenance.
I ended up going with the Timken hub assemly ($130.99/each) from Autozone. There's definitely cheaper assemblies available (e.g. Duralast) for less than half the price I paid, but I chose Timken due to the 3yr warranty. I had to buy the axle nut and hub cap from the Mazda dealership (about $11/each).
If you do change out your hub assembly, DON'T smash the hell out of the axle nut when staking it. It's not as malleable as you would think. There's a possibility you'll hammer right through it. Don't ask how I know :-)
I am changing mine out since my right bearing is making some noise. I went with Timken as well and purchased them through Rockauto for $67/ea. Don't forget to use the 5% coupon found all over the net.
I am having Jesse purchase the nuts, forgot to add the dust shields.
Anyway I could borrow your impact wrench? I already purchased the 35MM deep socket off ebay for like $15 shipped;)
I am having Jesse purchase the nuts, forgot to add the dust shields.
Anyway I could borrow your impact wrench? I already purchased the 35MM deep socket off ebay for like $15 shipped;)
Wow, that's a great deal you got.
You can borrow the wrench. PM me your address and I'll drop it off tomorrow (since I'm off). I would give you my address, but I don't want anyone to know where my fortress of solitude is")
Quick note though...it requires quite a bit of CFM's at 90psi to take full advantage of the advertised torque.
You can borrow the wrench. PM me your address and I'll drop it off tomorrow (since I'm off). I would give you my address, but I don't want anyone to know where my fortress of solitude is
Quick note though...it requires quite a bit of CFM's at 90psi to take full advantage of the advertised torque.
So it is air, I don't have any air:( I was hoping it was electric or something.
I can try removing it with my method (mechanical). Remove dust cover, replace wheel back on and lower to ground, break nut with 1/2" drive and my weight with car on ground:), raise and remove.
so no worries, I don't have any air.
I can try removing it with my method (mechanical). Remove dust cover, replace wheel back on and lower to ground, break nut with 1/2" drive and my weight with car on ground:), raise and remove.
so no worries, I don't have any air.
FDEEZ wrote:You can skip all those steps and keep the wheel & hub completely off the ground. Since the nut screws on the steering knuckle, there's no need to keep the axle stationary while you torque the nut off. Its not like the rear axle.
Sweet, did you do anything to "unstake" the nut, or did you just power through it?
lOOkatme wrote:Sweet, did you do anything to "unstake" the nut, or did you just power through it?
The impact wrench went through it like butter. If I were manually removing it, I'd probably push the staked part up with a small flathead screwdriver. Also, my hub literally slid right off with absolutely no effort. If yours is stuck, you may need a BAH to pursuade it off.
Did some work on the car over the weekend.
Here's the source of all the lateral free play from my driver's side front wheel (disregard the poorly placed cotter pin...I didn't really know what I was doing 6 years ago when I installed it):
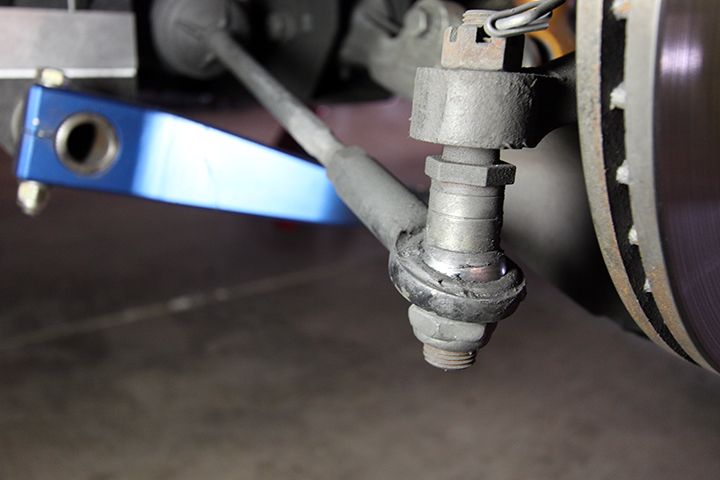
Time to replace the tie rod end. Unfortunately, while under the car, I noticed a small leak from my rack and pinion:
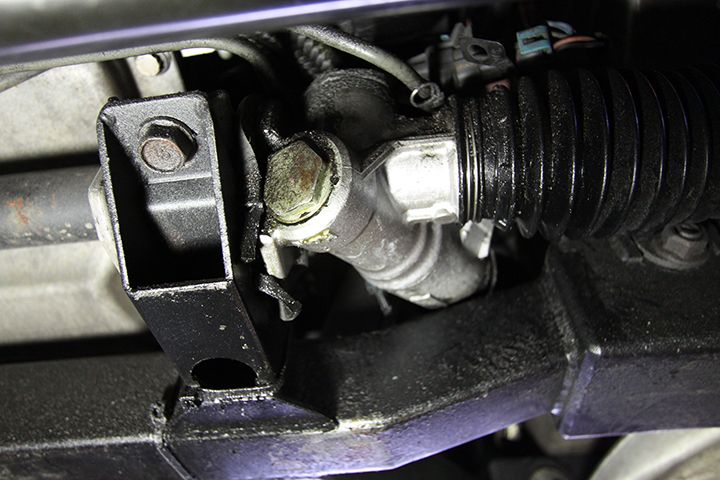
Luckily, I've got a brand new one laying around...whoop, whoop!:
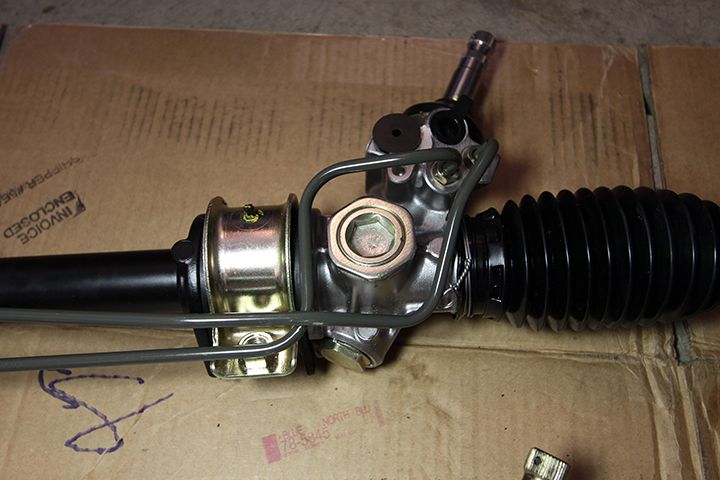
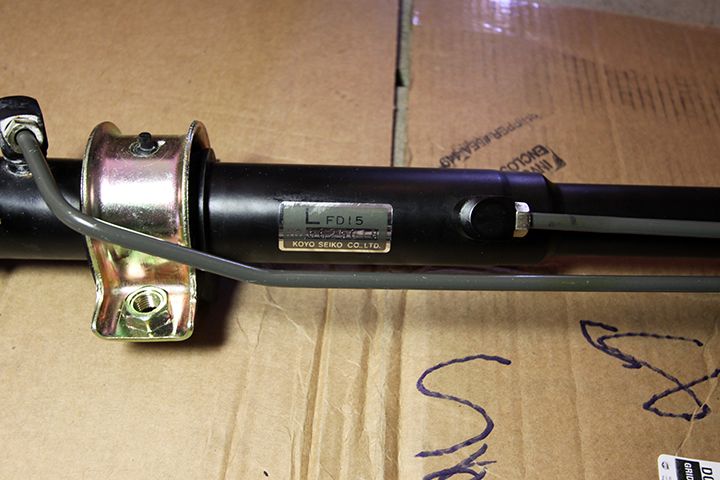
This must be one of the rarest items in the FD world. It's nearly impossible to find a brand new, used, or rebuilt FD rack & pinion:
So I'll briefly go over how to replace the steering rack. It's relatively easy once you're under the car.
Here's the source of all the lateral free play from my driver's side front wheel (disregard the poorly placed cotter pin...I didn't really know what I was doing 6 years ago when I installed it):
Time to replace the tie rod end. Unfortunately, while under the car, I noticed a small leak from my rack and pinion:
Luckily, I've got a brand new one laying around...whoop, whoop!:
This must be one of the rarest items in the FD world. It's nearly impossible to find a brand new, used, or rebuilt FD rack & pinion:
So I'll briefly go over how to replace the steering rack. It's relatively easy once you're under the car.
Who is online
Users browsing this forum: speedjunkie and 59 guests