Not really. It took me about 4 days to pull the engine considering I only worked on it about a couple hours a day haha. I haven't put the engine back in yet, it'll probably be a few days yet because I kinda wanna install the clutch while it's out. Although I need to get the engine hoist back so I might have to drop it back in soon anyway.
I rounded off a couple of the bolts when I was removing the turbine housing from the turbo today, so I need to get some replacements. And when I took the exhaust wrap off the downpipe, the part at the top of the downpipe basically broke apart in my hands. I'm not sure if it was due to water getting on it at the car wash and then getting it hot right away or what. I took the downpipe, turbine housing, turbo manifold, lower intake manifold, and the exhaust pipe from the Racing Beat catback to Applied Plastics today and they're doing Glacier Black ceramic coating on them, which is supposed to be good to 2000*F. I got the set screw plug from Brad while I was in Arvada and dropped off the filler neck to Dave Motley. I also got the welt strip and hood seal today, and I'm not exactly happy with the welt strip, so I'll probably be sending that back.
One thing I DIDN'T get to today was installing the oil pan lol. I ordered an ACT Monoloc last night too. That will replace the piece that locks onto the throwout bearing. I may have ruined the original one when I separated the throwout bearing from the clutch.
Build thread
-
speedjunkie

- Senior Member
- Posts: 5365
- Joined: Wed Jan 02, 2008 9:14
- Location: Colorado Springs
- Contact:
-
RX-7 Chris
- Posts: 7800
- Joined: Tue Oct 02, 2007 9:14
- Location: Colorado Springs
- Contact:
Re: Build thread
Can't you just shim the Delrin mounts up?
1984 RX-7 GSL-SE [size=84]My restomod project[/SIZE]
1964 Ford Galaxie 500XL flat black w/ white interior, 2 dr fastback, 390 thunderbird, C6 auto, 2500 rpm high stall converter, shift kit, AC, Holley 750 cfm
[size=100]RIP 1983 RX-7[/SIZE]
My Car Blog
-
speedjunkie
- Senior Member
- Posts: 5365
- Joined: Wed Jan 02, 2008 9:14
- Location: Colorado Springs
- Contact:
Re: Build thread
I guess I could, I hadn't thought about that. But if I do that I might as well just use the Noltec mounts. That is unless I could shim the Delrin mounts to the perfect height to where I can use the tranny brace, not have to use shims on the diff brace, and still not hit the strut bar. I might do that.
-
Saul_Good

- Senior Member
- Posts: 480
- Joined: Sun Jul 22, 2012 9:14
- Location: Cerritos, CA (DW says i can't play here anymore...)
- Contact:
Re: Build thread
The wrap falling apart is normal. Mine fell apart when i try to do anything with my header. I think its a set it and leave it alone piece. Id get one of those turbo blankets, or that fancy innovative heat shielding I see be used lately.
-
speedjunkie
- Senior Member
- Posts: 5365
- Joined: Wed Jan 02, 2008 9:14
- Location: Colorado Springs
- Contact:
Re: Build thread
Well that's good to know haha. I guess I'll wrap them again after they cure. I don't want to use a turbo blanket because you won't see cracks if they develop. I dropped off the five pieces on Monday and they called Tuesday to let me know they were finished so I picked them up Wednesday, but they said to let the pieces cure for five more days. So in the mean time I've been putting things back together as much as possible.
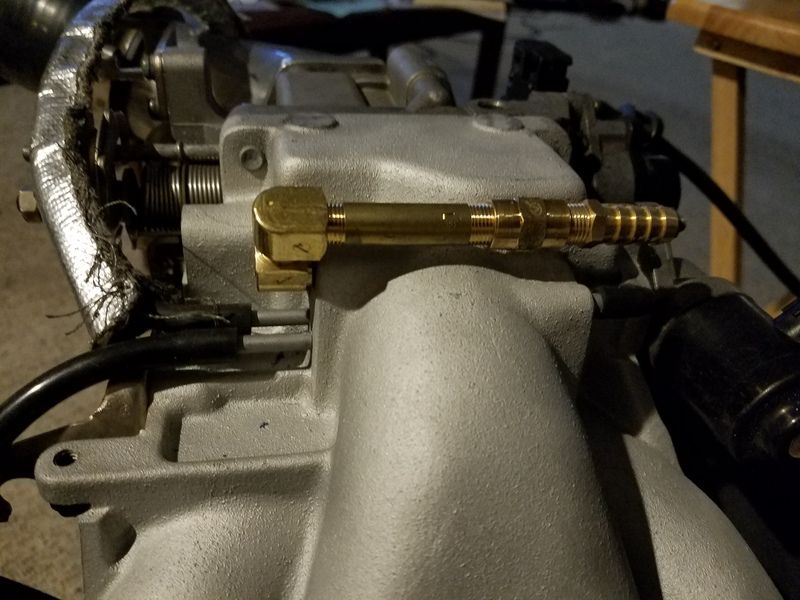
The other day I tackled the oil catch can hard line. I had a small piece of rubber hose on it before but now it's flared and using AN fittings. I stopped by Beauchamp Racing to sand blast my clutch discs (they have enough material left to reuse) and asked Tom about how to flare the hard line since there wasn't a lot of room to get the flare tool on it, and he ended up flaring it for me haha. He does that a lot. So I flared the aluminum line and put a fitting on it. I sand blasted the whole hard line while I was at Tom's and I'd like to get it powder coated again but I don't feel like taking it back off haha. So I guess it's staying on there in raw stainless steel for now.
I got the ACT Monoloc and installed it, but I'm not sure if it's right. It came with two wave rings and I used them and I asked ACT and another buddy that's used this with a twin plate clutch and they both said to use the wave rings. I'm just not sure it goes far enough into the clutch fingers to be able to disengage it from the throwout bearing later.
David Motley finished the powder coating on the filler neck the other day right away too so I picked that up and got it installed. I thought about swapping the thermostat since I was in there but I'm always afraid of taking out a perfectly good thermostat and replacing it with a new but faulty one, and this one isn't that old. I may go ahead and order one through Mazda anyway and just replace it.
Ok, here is the saga of the oil pan. I got it installed last night, but it was a hassle, which seems to happen more times than not. I cleaned up the oil pan studs and installed them, then I test fit the oil pan onto the studs and it was great. However, I didn't think to install the oil pickup tube and the adapter that came with it before I test fit the pan. I installed the pickup tube and adapter, put sealant on the flange of the oil pan for added leak protection, and attempted to install the pan. Something was hitting and I thought I wasn't going to be able to use the studs because I thought I had to turn the pan to get it around the pickup tube and then align it and bolt it on. So I removed the studs and tried again...something was still hitting. Come to find out the opening in the top of the pan wasn't wide enough and it was hitting the pickup tube bolts. So I wiped off the sealant because it would have dried before I went to install it, and then cut the top of the pan to make room. I contacted Len and told him about the issue and he said they had that issue with some previous pans but thought they had sent out only the fixed versions. He said he'd pay for shipping both ways if I wanted to send it back and get a different one or just have him machine it properly, but I'd rather not because it's not visible anyway and that's just more time I'd be waiting, and it doesn't change functionality any so it's just not worth it.
I test fit the pan and it worked. At that point I didn't feel like putting the studs back in and putting sealant on the pan, mostly because it was already past 1am. So I put the pan on with the supplied bolts and then started installing the engine mounts...fail. I tightened the pan down without making sure the engine mount bolt holes were lined up, which normally isn't a requirement but apparently now it is. So I loosened the oil pan bolts and put the engine mount bolts part of the way in to make sure they'd thread in and tightened the pan bolts back down, and then installed the oil pan. I finally finished at 2am lol.
So all the times I put the turbo stuff together in the past I used anti-seize. The problem is I didn't realize there were different temp ratings for anti-seize and I was using the minimum one that uses aluminum and the aluminum was melting and basically welding the pieces together, the exact opposite of what I wanted lol. So I spent the day yesterday driving around looking for high temp anti-seize, and I finally found some at Ford, it's called XL2, it uses nickel and it's good to 2400F. Unfortunately I had already used aluminum anti-seize so I had to remove all that first. I removed as much as possible and used the nickel stuff and put the turbo stuff back together tonight. I also found replacement bolts at ACE Hardware to bolt the turbine manifold to the CHRA, made of the same material although they were either 2mm too long or 2mm too short, so I bought them both and ended up using the longer ones.
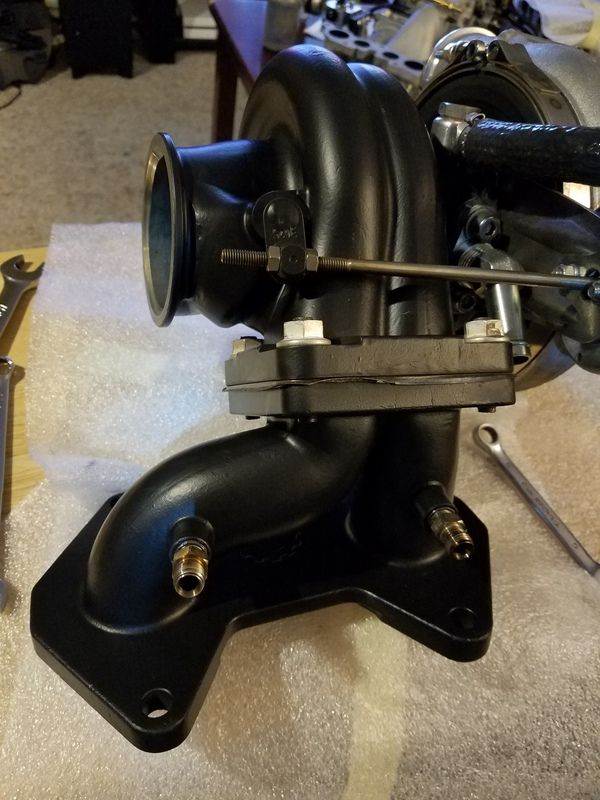
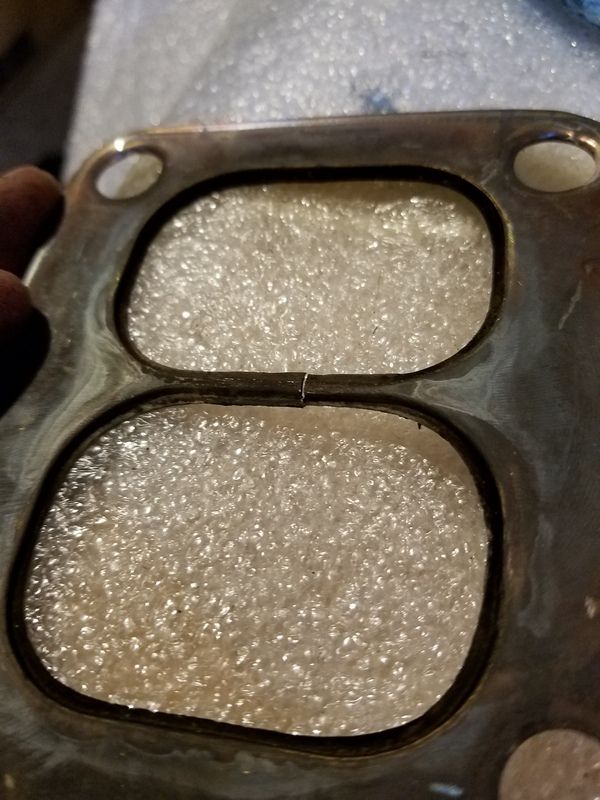
While putting the turbo stuff back together I noticed the gasket is cracked in the middle. Oh well, I'm not buying another one unless the middle is missing lol. Actually come to think of it, I really don't want that because it's gonna go through the turbo lol. I may have to look at getting another one real quick.
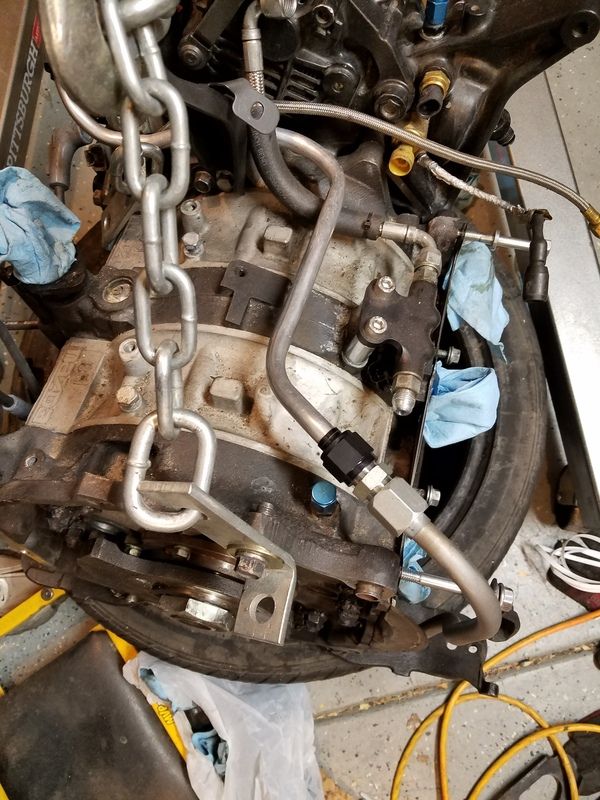
I think this is how and where I'm going to reroute the brake booster line. Although I'm kinda hesitant because it's all just so I can clean up the engine bay, not for functionality at all. But at least if I don't like it I can go back to what it was before.
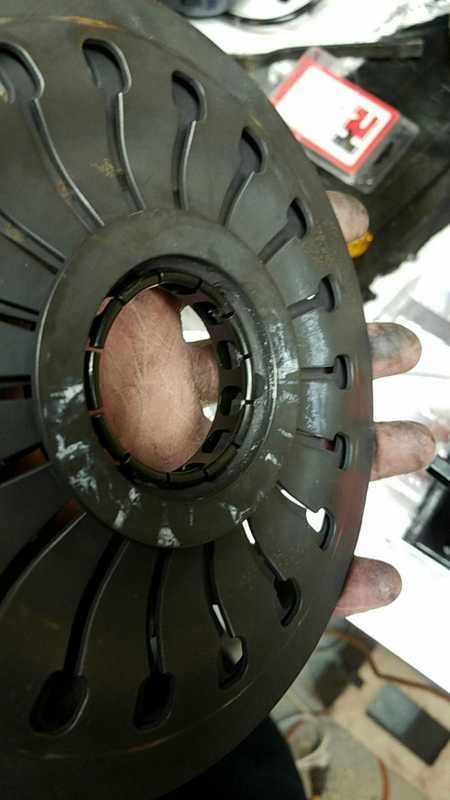
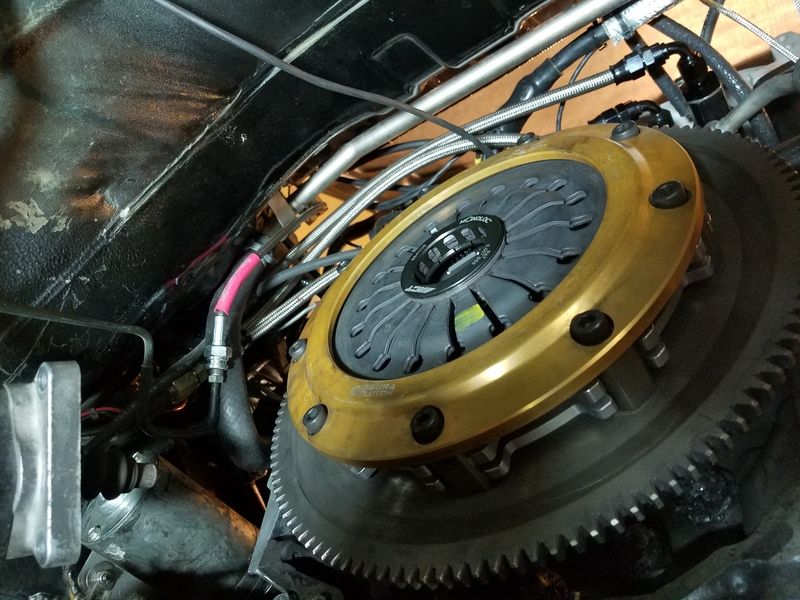
When I took the clutch discs to Tom's to sand blast he measured the mid plate and pressure plate and the pressure plate is warped, so I guess I'll be using the new stuff anyway, and the new clutch parts get here on Monday. At least the current mid plate and discs are still good and I can have them for spares.
I think I'll drop the engine back in tomorrow night, or maybe I'll wait until I put the clutch back on since it's only one more day. I'm still trying to decide on swapping back to the USDM tranny. I'm leaning that way but I'm not sure. And I'm wondering if I should go ahead and replace the pilot bearing or just wait until next time since there isn't much mileage on this one. I'll probably go ahead and replace it since I already have it.
I also want to rotate the rotors and see the apex seals. Might as well while it's accessible.
I picked up some washers to use as shims for the Delrin mounts in case I choose to go that way, but with the washers I got they're the same size as the Noltec mounts haha, and after thinking about it, I'll probably have to use regular size mounts anyway to get the tranny brace to seat properly.
The other day I tackled the oil catch can hard line. I had a small piece of rubber hose on it before but now it's flared and using AN fittings. I stopped by Beauchamp Racing to sand blast my clutch discs (they have enough material left to reuse) and asked Tom about how to flare the hard line since there wasn't a lot of room to get the flare tool on it, and he ended up flaring it for me haha. He does that a lot. So I flared the aluminum line and put a fitting on it. I sand blasted the whole hard line while I was at Tom's and I'd like to get it powder coated again but I don't feel like taking it back off haha. So I guess it's staying on there in raw stainless steel for now.

I got the ACT Monoloc and installed it, but I'm not sure if it's right. It came with two wave rings and I used them and I asked ACT and another buddy that's used this with a twin plate clutch and they both said to use the wave rings. I'm just not sure it goes far enough into the clutch fingers to be able to disengage it from the throwout bearing later.

David Motley finished the powder coating on the filler neck the other day right away too so I picked that up and got it installed. I thought about swapping the thermostat since I was in there but I'm always afraid of taking out a perfectly good thermostat and replacing it with a new but faulty one, and this one isn't that old. I may go ahead and order one through Mazda anyway and just replace it.

Ok, here is the saga of the oil pan. I got it installed last night, but it was a hassle, which seems to happen more times than not. I cleaned up the oil pan studs and installed them, then I test fit the oil pan onto the studs and it was great. However, I didn't think to install the oil pickup tube and the adapter that came with it before I test fit the pan. I installed the pickup tube and adapter, put sealant on the flange of the oil pan for added leak protection, and attempted to install the pan. Something was hitting and I thought I wasn't going to be able to use the studs because I thought I had to turn the pan to get it around the pickup tube and then align it and bolt it on. So I removed the studs and tried again...something was still hitting. Come to find out the opening in the top of the pan wasn't wide enough and it was hitting the pickup tube bolts. So I wiped off the sealant because it would have dried before I went to install it, and then cut the top of the pan to make room. I contacted Len and told him about the issue and he said they had that issue with some previous pans but thought they had sent out only the fixed versions. He said he'd pay for shipping both ways if I wanted to send it back and get a different one or just have him machine it properly, but I'd rather not because it's not visible anyway and that's just more time I'd be waiting, and it doesn't change functionality any so it's just not worth it.

I test fit the pan and it worked. At that point I didn't feel like putting the studs back in and putting sealant on the pan, mostly because it was already past 1am. So I put the pan on with the supplied bolts and then started installing the engine mounts...fail. I tightened the pan down without making sure the engine mount bolt holes were lined up, which normally isn't a requirement but apparently now it is. So I loosened the oil pan bolts and put the engine mount bolts part of the way in to make sure they'd thread in and tightened the pan bolts back down, and then installed the oil pan. I finally finished at 2am lol.

So all the times I put the turbo stuff together in the past I used anti-seize. The problem is I didn't realize there were different temp ratings for anti-seize and I was using the minimum one that uses aluminum and the aluminum was melting and basically welding the pieces together, the exact opposite of what I wanted lol. So I spent the day yesterday driving around looking for high temp anti-seize, and I finally found some at Ford, it's called XL2, it uses nickel and it's good to 2400F. Unfortunately I had already used aluminum anti-seize so I had to remove all that first. I removed as much as possible and used the nickel stuff and put the turbo stuff back together tonight. I also found replacement bolts at ACE Hardware to bolt the turbine manifold to the CHRA, made of the same material although they were either 2mm too long or 2mm too short, so I bought them both and ended up using the longer ones.

While putting the turbo stuff back together I noticed the gasket is cracked in the middle. Oh well, I'm not buying another one unless the middle is missing lol. Actually come to think of it, I really don't want that because it's gonna go through the turbo lol. I may have to look at getting another one real quick.

I think this is how and where I'm going to reroute the brake booster line. Although I'm kinda hesitant because it's all just so I can clean up the engine bay, not for functionality at all. But at least if I don't like it I can go back to what it was before.

When I took the clutch discs to Tom's to sand blast he measured the mid plate and pressure plate and the pressure plate is warped, so I guess I'll be using the new stuff anyway, and the new clutch parts get here on Monday. At least the current mid plate and discs are still good and I can have them for spares.
I think I'll drop the engine back in tomorrow night, or maybe I'll wait until I put the clutch back on since it's only one more day. I'm still trying to decide on swapping back to the USDM tranny. I'm leaning that way but I'm not sure. And I'm wondering if I should go ahead and replace the pilot bearing or just wait until next time since there isn't much mileage on this one. I'll probably go ahead and replace it since I already have it.
I also want to rotate the rotors and see the apex seals. Might as well while it's accessible.
I picked up some washers to use as shims for the Delrin mounts in case I choose to go that way, but with the washers I got they're the same size as the Noltec mounts haha, and after thinking about it, I'll probably have to use regular size mounts anyway to get the tranny brace to seat properly.
-
speedjunkie
- Senior Member
- Posts: 5365
- Joined: Wed Jan 02, 2008 9:14
- Location: Colorado Springs
- Contact:
Re: Build thread
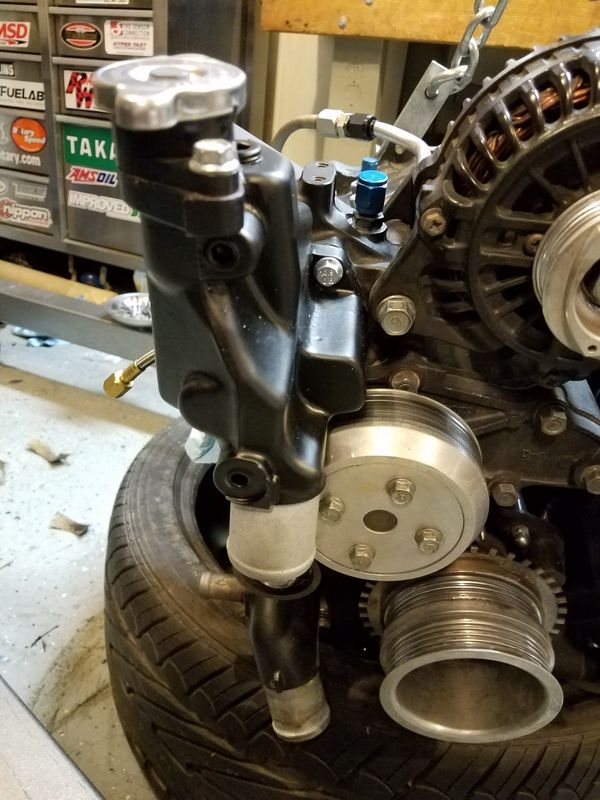
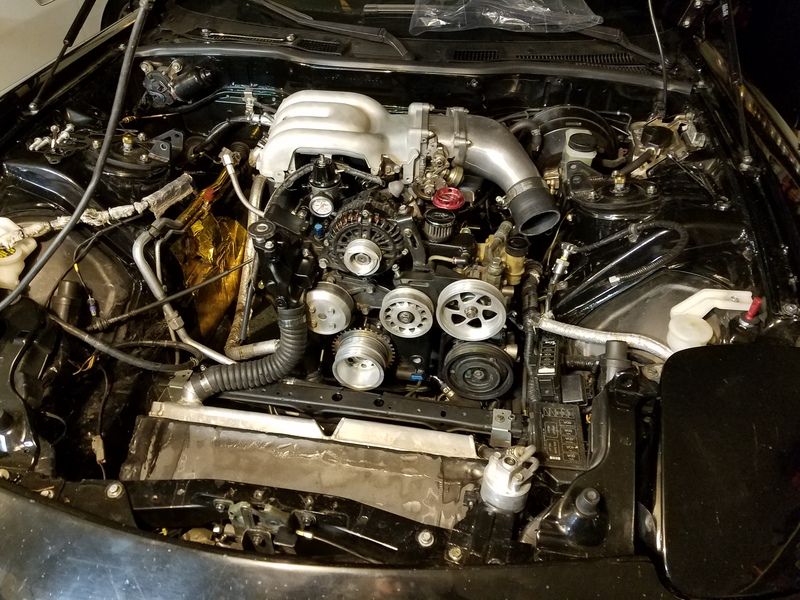
Zico and I got the engine back in tonight and I got pretty far on it. I forgot to check the apex seals while the engine was out but I might go back and do that still. I'm going to order a new turbo flange gasket, thermostat, and a brake booster hose.
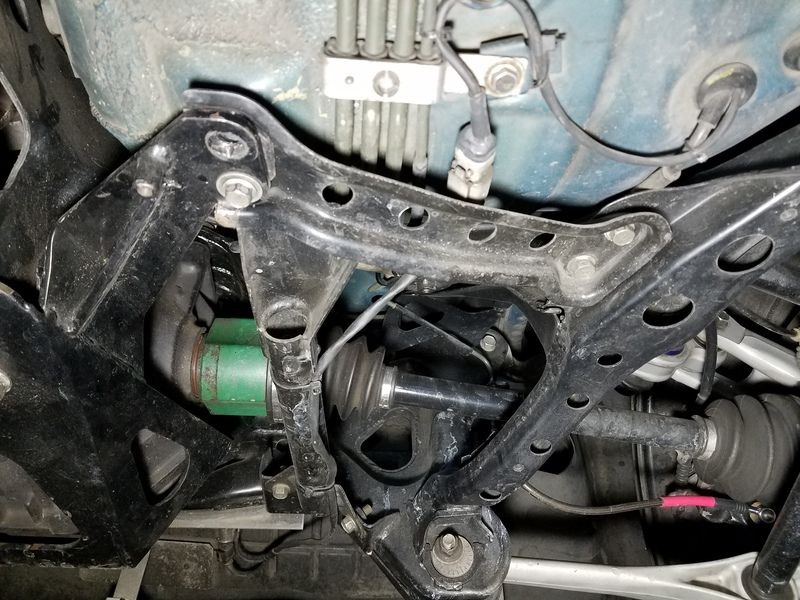
When we first got the engine in I checked to see how much room I'd have for the strut bar, if any. The only problem is the engine was tilted forward so I had to jack it up and guess at where it usually is. I think there will still be room, but not a lot. This is just a guess right here.
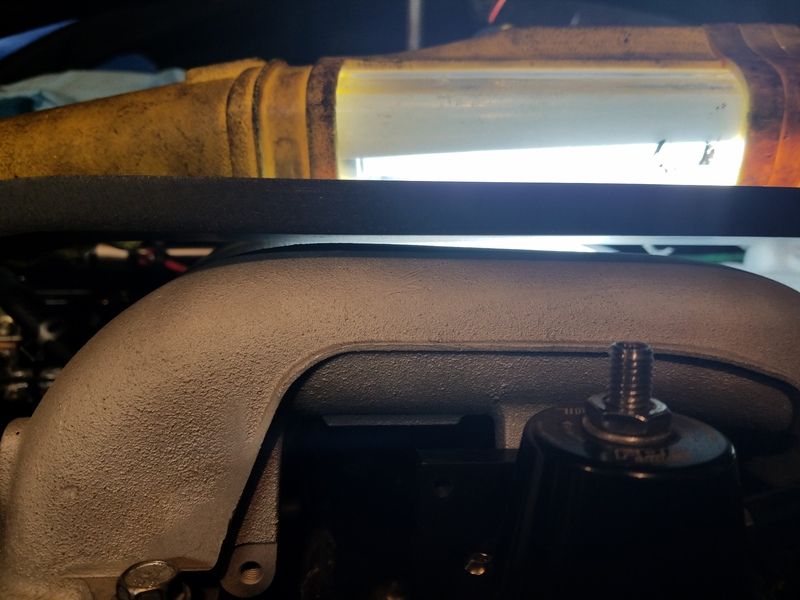

When we first got the engine in I checked to see how much room I'd have for the strut bar, if any. The only problem is the engine was tilted forward so I had to jack it up and guess at where it usually is. I think there will still be room, but not a lot. This is just a guess right here.

-
speedjunkie
- Senior Member
- Posts: 5365
- Joined: Wed Jan 02, 2008 9:14
- Location: Colorado Springs
- Contact:
Re: Build thread
I finished installing the UIM tonight and then installed the flywheel and clutch. And of course I forgot to measure the thickness of a new clutch disc. It's not a must, but I'm curious and would like to have that info. I might take the clutch cover back off and measure one but I really don't want to lol. It wouldn't be too difficult though. I chose not to change the pilot bearing because I was afraid I might mess it up and not be able to get it out or get the new one in correctly. Also because the current one is still in pretty good shape.
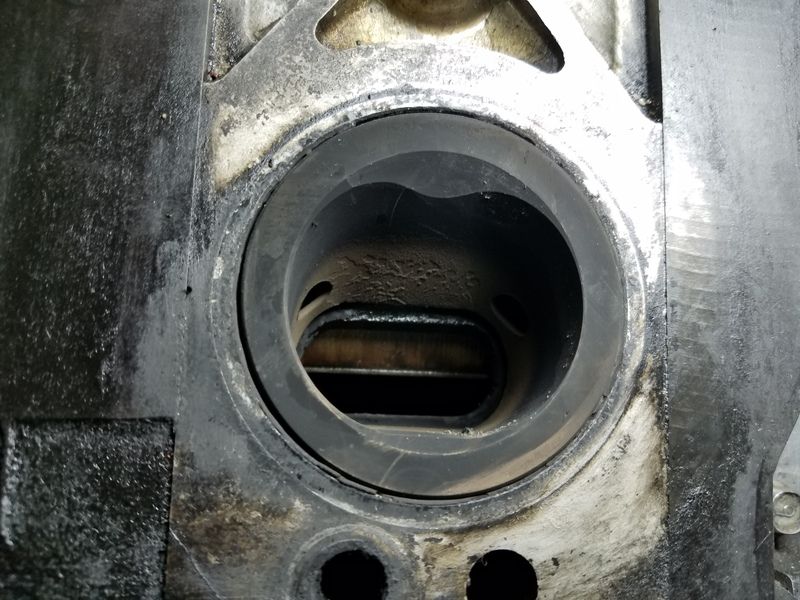
I found something tonight that I find a bit concerning, but maybe it's nothing. I was turning the engine over and checking the apex seals and noticed quite a bit more oil in the rear housing than in the front. I'm wondering if that's a sign of a bad oil control ring or if it's ok and the oil came from somewhere else. I didn't tilt the engine while it was out (other than the little bit of tilt while removing and installing) because I didn't want oil and coolant making a mess everywhere, so I doubt it ran into the rear housing from somewhere else while it's been out.
This is the front housing.
This is the rear housing.
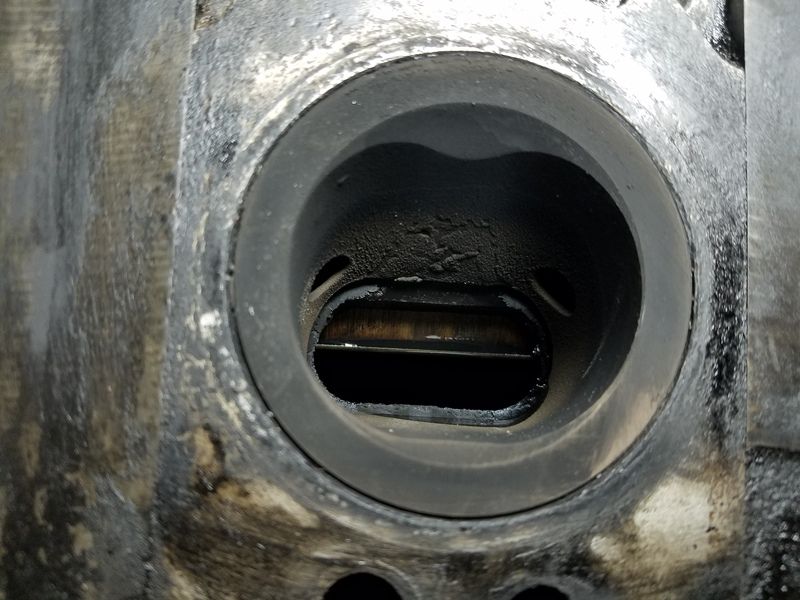

I found something tonight that I find a bit concerning, but maybe it's nothing. I was turning the engine over and checking the apex seals and noticed quite a bit more oil in the rear housing than in the front. I'm wondering if that's a sign of a bad oil control ring or if it's ok and the oil came from somewhere else. I didn't tilt the engine while it was out (other than the little bit of tilt while removing and installing) because I didn't want oil and coolant making a mess everywhere, so I doubt it ran into the rear housing from somewhere else while it's been out.
This is the front housing.

This is the rear housing.

-
RX-7 Chris
- Posts: 7800
- Joined: Tue Oct 02, 2007 9:14
- Location: Colorado Springs
- Contact:
Re: Build thread
Could that just be caused by excessive premix?
1984 RX-7 GSL-SE [size=84]My restomod project[/SIZE]
1964 Ford Galaxie 500XL flat black w/ white interior, 2 dr fastback, 390 thunderbird, C6 auto, 2500 rpm high stall converter, shift kit, AC, Holley 750 cfm
[size=100]RIP 1983 RX-7[/SIZE]
My Car Blog
-
speedjunkie
- Senior Member
- Posts: 5365
- Joined: Wed Jan 02, 2008 9:14
- Location: Colorado Springs
- Contact:
Re: Build thread
Premix is blue and I doubt it because it gets burned right away. Plus I should have it in the front housing too. Jesse said it was probably due to the oil filter passages. I'm also not losing any oil, none that I've noticed anyway. So as of right now I have no reason to think anything is wrong. Other than excessive smoke lol, but that is probably due to all the premix.
-
$crillaTor

- Senior Member
- Posts: 153
- Joined: Sat Jun 15, 2013 9:14
- Location: Colorado Springs
Re: Build thread
In the future, if you need it, I have a pilot bearing insertion tool. This guy: https://www.mazdatrix.com/toolmisc.htm
I know you can do it with a socket or any number of other things, but this tool works wonderfully in comparison.
I know you can do it with a socket or any number of other things, but this tool works wonderfully in comparison.
-
speedjunkie
- Senior Member
- Posts: 5365
- Joined: Wed Jan 02, 2008 9:14
- Location: Colorado Springs
- Contact:
Re: Build thread
Lol I have that tool. I'm still freaked out. More so because my puller is worn on the end and I'm afraid of messing up the bearing inside and not being able to get it out completely. I'm going to swap it in a few minutes anyway. I decided I need to just go ahead and do it.
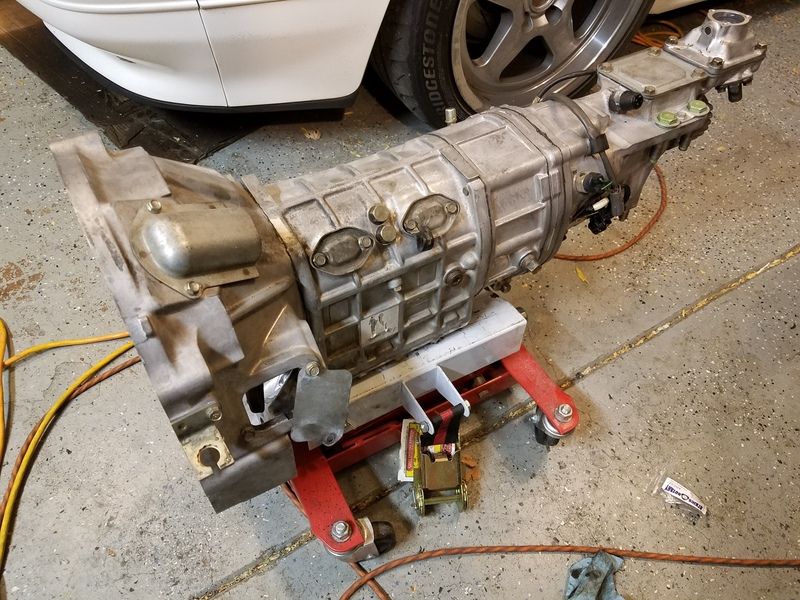
I got the USDM tranny ready to install. I drove around looking for 9/16-12 set screws to replace two sensors on the tranny that I don't use anymore, but it turns out that's a really odd size. I ordered a couple from Fastenal but they won't get here until Wednesday next week. And now I'm not even sure they'll work because I got a couple bolts in that thread pitch from ACE and they won't thread in. One of the sensors had broken wires so I cut them off and I'm using it as a plug. I might just try to find another bad sensor and do the same for the other hole instead of using the set screws.
I got the USDM tranny ready to install. I drove around looking for 9/16-12 set screws to replace two sensors on the tranny that I don't use anymore, but it turns out that's a really odd size. I ordered a couple from Fastenal but they won't get here until Wednesday next week. And now I'm not even sure they'll work because I got a couple bolts in that thread pitch from ACE and they won't thread in. One of the sensors had broken wires so I cut them off and I'm using it as a plug. I might just try to find another bad sensor and do the same for the other hole instead of using the set screws.
Last edited by speedjunkie on Sat Nov 26, 2016 9:14, edited 1 time in total.
-
speedjunkie
- Senior Member
- Posts: 5365
- Joined: Wed Jan 02, 2008 9:14
- Location: Colorado Springs
- Contact:
Re: Build thread
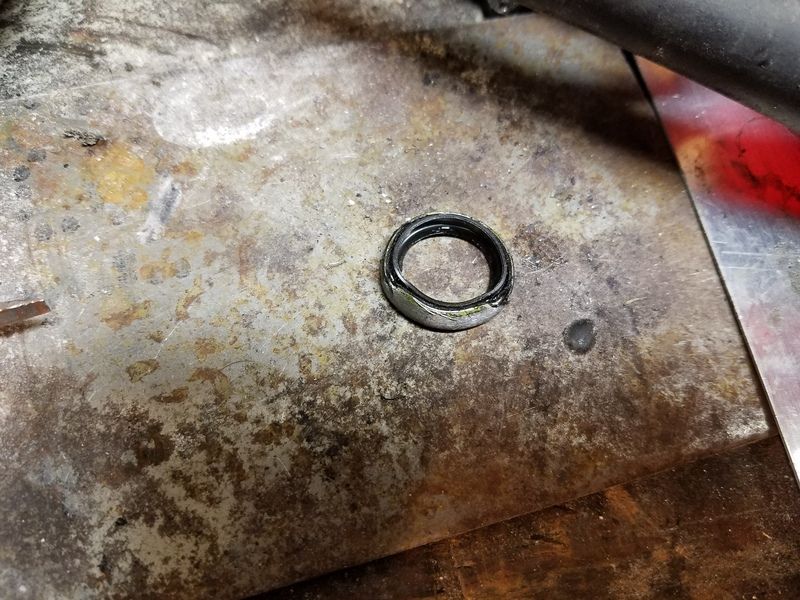
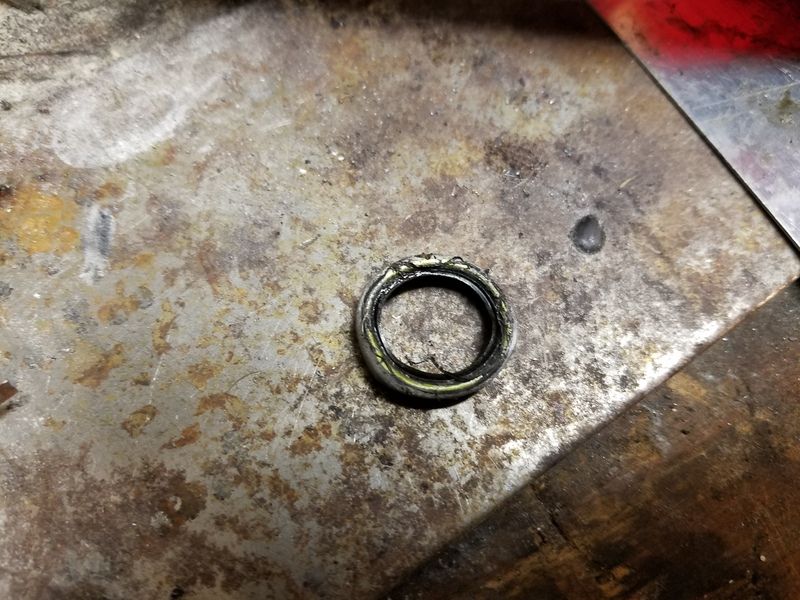
Well I THOUGHT I was going to install the tranny tonight. I started pulling the pilot bearing, or trying to, with my blind hole puller. It's crap so I rented one from Autozone and got it pulled eventually. As it turns out I was pushing the puller in too far and getting back to where the hole narrows down. Once I figured that out I was able to get it out. This pic isn't great but it kinda shows what I'm talking about.
Then I started installing the bearing and seal. In the past I always installed the bearing first and then the seal separately. I didn't know until tonight how great an idea that was lol. I tried installing them together at first and then decided to do them the way I used to. The bearing was still sticking out about 1mm when I started using the seal again. Bad idea. The Advance Auto on Pikes Peak has one so I'm gonna pick that up tomorrow morning.
I also measured the clutch disc and it came out to .185", and the used discs were .145" and .150". I've looked for installation instructions since none came with the overhaul kit, but haven't found anything yet. I think it's pretty straightforward aside from a couple small things but I'd like to get rid of the noise I get while the clutch pedal is pressed. I know you have to offset the discs but I'm not sure if you're supposed to install them facing a certain way, and they're numbered but I'm not sure which sequence they go in, so I installed the number 1 first and the number 2 second lol. Hopefully that's right.

Then I started installing the bearing and seal. In the past I always installed the bearing first and then the seal separately. I didn't know until tonight how great an idea that was lol. I tried installing them together at first and then decided to do them the way I used to. The bearing was still sticking out about 1mm when I started using the seal again. Bad idea. The Advance Auto on Pikes Peak has one so I'm gonna pick that up tomorrow morning.


I also measured the clutch disc and it came out to .185", and the used discs were .145" and .150". I've looked for installation instructions since none came with the overhaul kit, but haven't found anything yet. I think it's pretty straightforward aside from a couple small things but I'd like to get rid of the noise I get while the clutch pedal is pressed. I know you have to offset the discs but I'm not sure if you're supposed to install them facing a certain way, and they're numbered but I'm not sure which sequence they go in, so I installed the number 1 first and the number 2 second lol. Hopefully that's right.
-
speedjunkie
- Senior Member
- Posts: 5365
- Joined: Wed Jan 02, 2008 9:14
- Location: Colorado Springs
- Contact:
Re: Build thread
I picked up the pilot bearing seal at Advance today and then of course I couldn't find my install tool. AGHHHH!!! I looked all over for it and I was about to go meet Geoff to borrow his when Zico found it in about 10 seconds haha. He looked in the one place I didn't. So I got that installed, installed the clutch again (measured the other friction disc too and it was the same, .185.5" to be exact for both of them), and got the tranny back under the car. That in itself was an ordeal. To get the other tranny out from under the car and this one back under, I just jacked the passenger side up the rest of the way and was barely able to roll it out and back in while it was on the tranny jack. When I put it back under the car and downjacked the car, the PPF knocked it off the tranny jack and I had to pull it all back out and that time I strapped it onto the jack. Ugh.
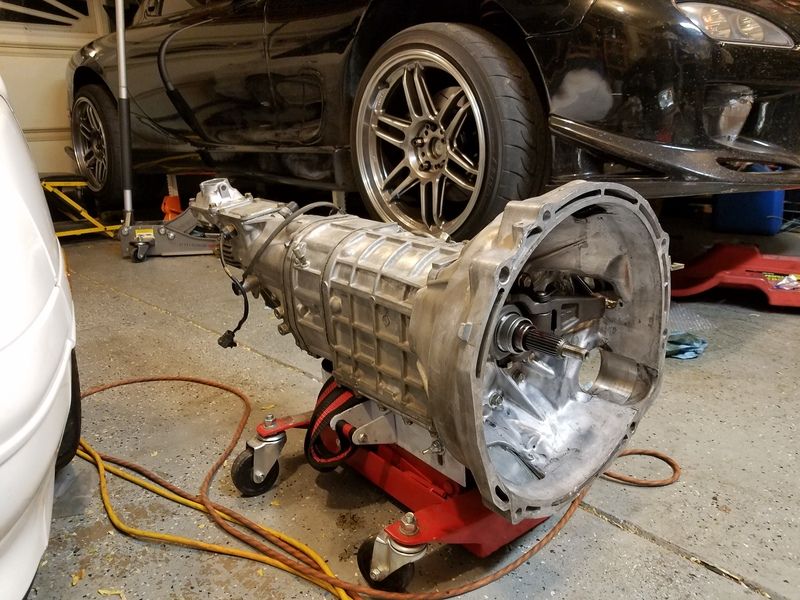
I started installing the tranny and had some issues getting it to pop in all the way. I was tightening the bolts on the bottom and it looked alright, then I saw that the top was still apart about 3/4". YIKES. I eventually got all that in though too. And then it was a PITA to snap the throwout bearing into the ACT Monoloc, but it eventually snapped in. As I was bolting the diff brace to the bottom of the car, one of the bolts stripped in the hole. I tapped the hole and cleaned up the bolt with a die, and after that it just slopped around in the hole and wouldn't tighten down at all. I even tried a completely different bolt and that didn't work either. Fuuuuuuuuuu
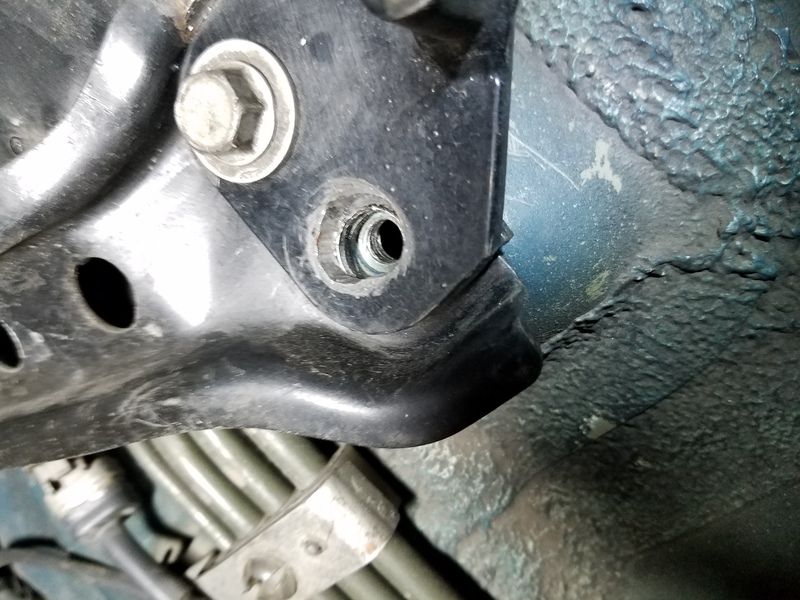
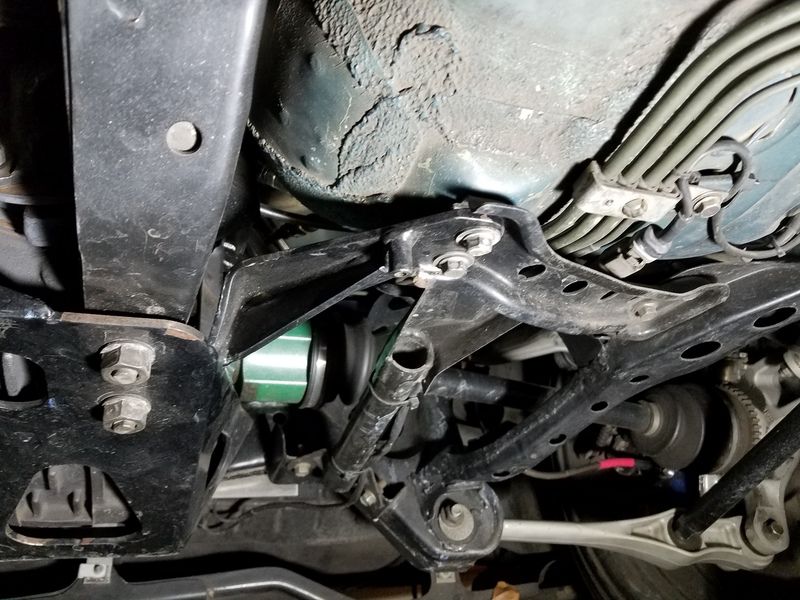
Here you can see it on the upper left side of the pic.
In this pic you can see how much I had to open the hole on the diff brace a few years ago when I installed it, and also the bad threads.
One up side is the tranny brace fits pretty well, even though I still shimmed the diff brace.
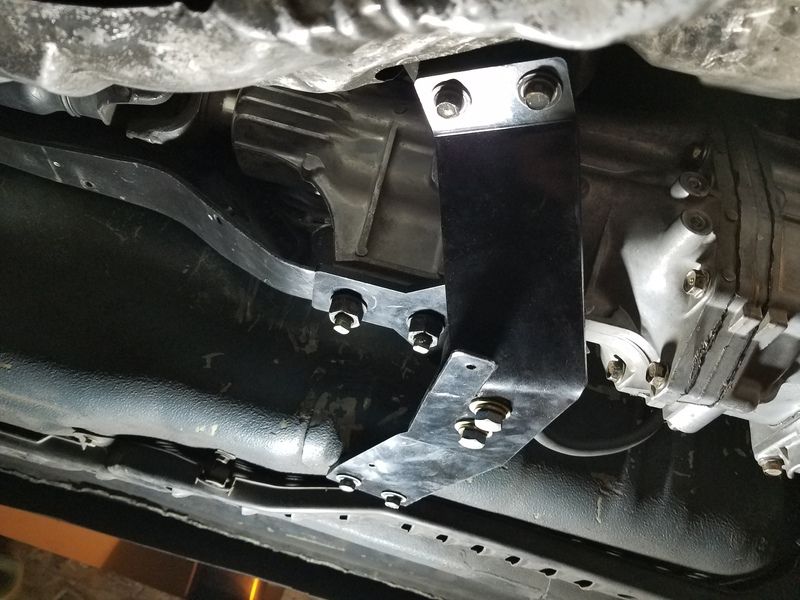
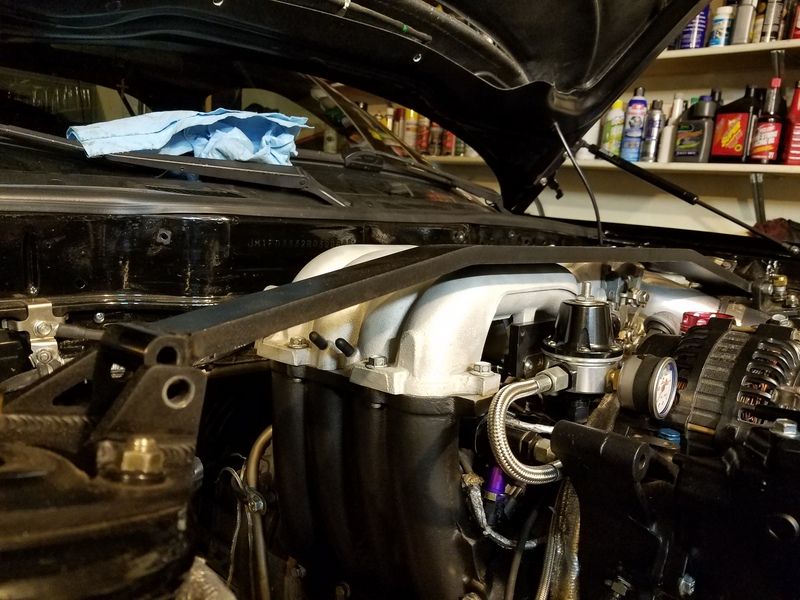
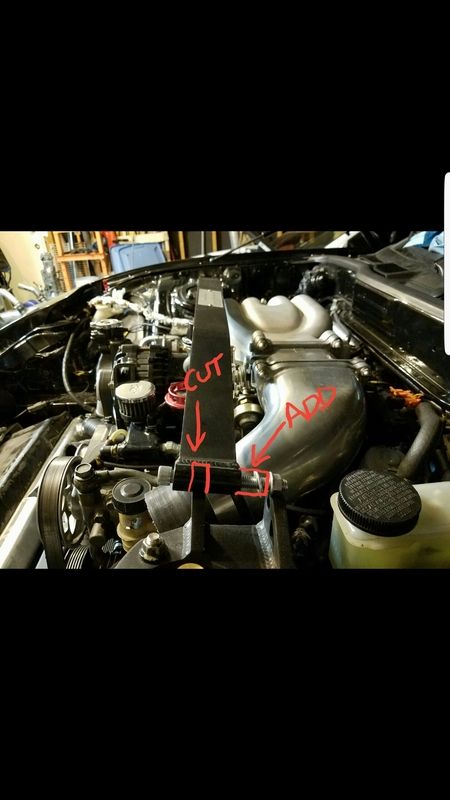
Unfortunately, the strut bar isn't even close to fitting.
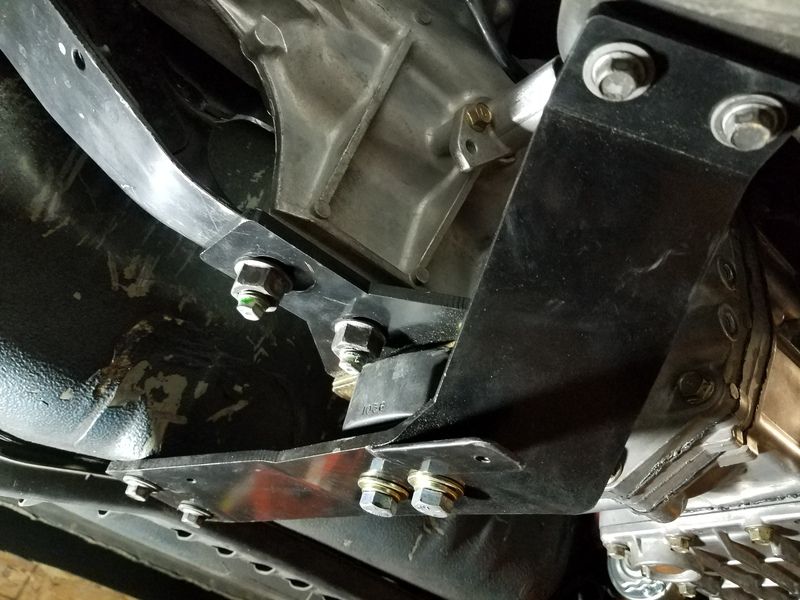
I'm thinking about having it modified to fit like this. Cut out the part up front and add to the rear part. Or just cut the mounting spacer off and shift it back, and then add another one to the front. And just use longer bolts.
As I was finishing bolting the bracing to the bottom of the car, I found another bolt and tried it in the stripped hole, and only by the grace of God, it worked! I didn't tighten it down as tight as the others just in case, but it's still pretty tight. So I'm super happy about that.
I got the turbo gasket today and swapped that, so the turbo is ready to install also. That will be tomorrow night I suppose, along with filling the engine and tranny with oils. I have to wait with coolant because I still don't have the thermostat.


I started installing the tranny and had some issues getting it to pop in all the way. I was tightening the bolts on the bottom and it looked alright, then I saw that the top was still apart about 3/4". YIKES. I eventually got all that in though too. And then it was a PITA to snap the throwout bearing into the ACT Monoloc, but it eventually snapped in. As I was bolting the diff brace to the bottom of the car, one of the bolts stripped in the hole. I tapped the hole and cleaned up the bolt with a die, and after that it just slopped around in the hole and wouldn't tighten down at all. I even tried a completely different bolt and that didn't work either. Fuuuuuuuuuu
Here you can see it on the upper left side of the pic.

In this pic you can see how much I had to open the hole on the diff brace a few years ago when I installed it, and also the bad threads.

One up side is the tranny brace fits pretty well, even though I still shimmed the diff brace.


Unfortunately, the strut bar isn't even close to fitting.

I'm thinking about having it modified to fit like this. Cut out the part up front and add to the rear part. Or just cut the mounting spacer off and shift it back, and then add another one to the front. And just use longer bolts.

As I was finishing bolting the bracing to the bottom of the car, I found another bolt and tried it in the stripped hole, and only by the grace of God, it worked! I didn't tighten it down as tight as the others just in case, but it's still pretty tight. So I'm super happy about that.

I got the turbo gasket today and swapped that, so the turbo is ready to install also. That will be tomorrow night I suppose, along with filling the engine and tranny with oils. I have to wait with coolant because I still don't have the thermostat.
-
speedjunkie
- Senior Member
- Posts: 5365
- Joined: Wed Jan 02, 2008 9:14
- Location: Colorado Springs
- Contact:
Re: Build thread
I got the thermostat yesterday and swapped that out and installed the turbo. I got finished with everything but installing the exhaust. I filled the engine with oil and coolant, and the tranny with gear oil, although I didn't have enough coolant or gear oil so I had to get more today. I also picked up some more titanium exhaust wrap today and wrapped the downpipe and rear exhaust pipe and finished the coolant and gear oil. Before getting any further on the transmission I remembered that I wanted to make sure the throwout bearing was fully engaged, so I pressed the clutch pedal...straight to the floor. I checked and it definitely wasn't fully engaged even though I had used to pry bar to check it before. I was so pissed off I was about to pull the whole tranny back out and take the Monoloc out completely, but I decided to give it one more try. I removed the starter and slave cylinder and put the pry bar against the bearing, holding with my right hand, then scooted back and put my left foot on the subframe and pulled with all my strength and heard it snap into place. I tried the pedal again and it definitely worked. I think all that happened for a reason, because while I was under there for some reason I decided to check some bolts to make sure they were tight. I looked at the bolt at the bottom of the driver's front coilover and it was so loose it had about 1mm of play back and forth. OOPS! So I tightened it and the one on the other side even though it wasn't near as bad.
Tomorrow I'm going to start the car and check for leaks, bleed the coolant system, and check all the other bolts under the car to make sure they're tight. I still need to install the shifter but I might do that tonight yet.
Tomorrow I'm going to start the car and check for leaks, bleed the coolant system, and check all the other bolts under the car to make sure they're tight. I still need to install the shifter but I might do that tonight yet.
-
speedjunkie
- Senior Member
- Posts: 5365
- Joined: Wed Jan 02, 2008 9:14
- Location: Colorado Springs
- Contact:
Re: Build thread
I ran the car today to bleed the coolant and let it sit the rest of the day to cool down and get a true coolant level, and then topped it off. I ran the car again tonight to check for leaks and noticed the transmission looks like the pan isn't sealed good enough and is seeping gear oil. I wiped it off and if there is more there tomorrow I'm going to goop some RTV over that part and hope it works lol. I'm not trying to mess with that right now. If that works I'll just keep an eye on it over time. If it is seeping out, it's very slow. I think it was only a small drop on the bottom of the tranny, but I'll check the floor tomorrow too. I also noticed the flanges where the midpipe and catback meet has a bit of an exhaust leak, very small. I noticed that on the gaskets when I removed everything though. I think the midpipe flange just needs to be machined because they're pretty thin and it probably warped a bit.
I thought again that I was going to have to pull the tranny and swap it. Before I started the car the first time and before I finished installing the center console over the shifter, I ran through the gears and it was pretty stiff, and I had a hard time getting it into reverse. But I put the shift knob on and once the car was running I went through it again and it wasn't as bad, although reverse is still tricky to get into. We'll see what happens.
I plan to take it for a drive tomorrow night when I get off work, assuming I don't have issues with the tranny oil seeping.
Who is online
Users browsing this forum: No registered users and 168 guests