Build thread
-
speedjunkie

- Senior Member
- Posts: 5359
- Joined: Wed Jan 02, 2008 9:14
- Location: Colorado Springs
- Contact:
Re: Build thread
Do you mean so I can fit the seats, or what? lol
-
RX-7 Chris
- Posts: 7800
- Joined: Tue Oct 02, 2007 9:14
- Location: Colorado Springs
- Contact:
Re: Build thread
speedjunkie wrote:Do you mean so I can fit the seats, or what? lol
Yes, so you can fit the seats.
1984 RX-7 GSL-SE [size=84]My restomod project[/SIZE]
1964 Ford Galaxie 500XL flat black w/ white interior, 2 dr fastback, 390 thunderbird, C6 auto, 2500 rpm high stall converter, shift kit, AC, Holley 750 cfm
[size=100]RIP 1983 RX-7[/SIZE]
My Car Blog
-
speedjunkie
- Senior Member
- Posts: 5359
- Joined: Wed Jan 02, 2008 9:14
- Location: Colorado Springs
- Contact:
Re: Build thread
Well that would probably help. Although I fit the seat in the driver's side tonight, and it's actually not far off. I'd need to trim the sides just a tad because you have to slam the door, and then it pushes the seat upwards, but trimming the sides should work. The halo still touches the door frame, depending on how far back the seat is and if it's straight up or not. I scooted it forward and leaned it back and it just barely rubbed. With a smaller halo, or no halo at all, I think this seat might work. I also put my helmet on and I have just enough room, and that's with the seat straight up. When it's leaned back I have a little more. The only thing is I won't be able to use the roll bar with these seats, but that's alright. I thought about not installing it anyway. Actually, it'll be a huge PITA to mount this or probably any other seat, to bolt it in. There is barely any space to put bolts in the side. And it's also a PITA to get in and out of the car with this seat lol, but maybe it wouldn't be so bad being bolted in. I might still look into some Recaro seats instead. I don't know.
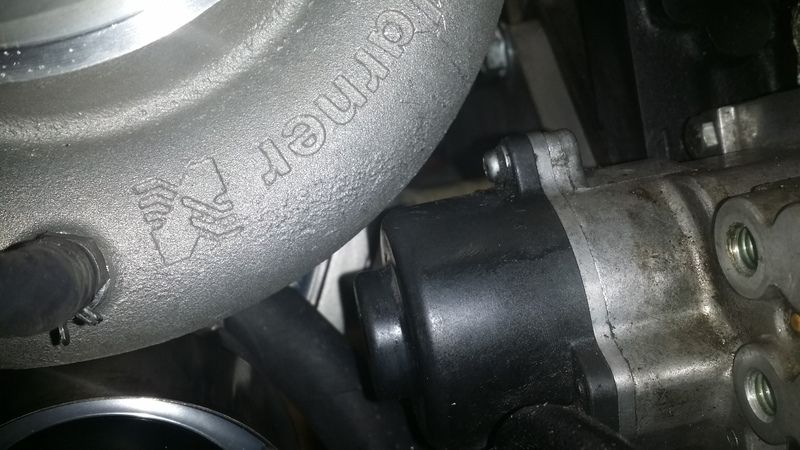
I've been ordering parts like a mad man. Tonight I got the oil drain I was going to use. It won't work. If it weren't for the actuator bracket it would be absolutely perfect. Or even if the manifold was different and didn't have the turbine housing clocked the way it is, with the bracket putting the actuator directly under the turbo, it would work then too. Well, back to the drawing board.
I've also decided for sure to use a 3.5" downpipe. Someone on 7club said his turbo spooled 600RPM faster with the larger downpipe. And with a full 3.5" exhaust he had boost creep, but I'll just be using that size for the downpipe, so hopefully I won't have that problem. It'll be a little noisier, but the RB dual tip and resonator should calm that down for the most part.
I've been ordering parts like a mad man. Tonight I got the oil drain I was going to use. It won't work. If it weren't for the actuator bracket it would be absolutely perfect. Or even if the manifold was different and didn't have the turbine housing clocked the way it is, with the bracket putting the actuator directly under the turbo, it would work then too. Well, back to the drawing board.


I've also decided for sure to use a 3.5" downpipe. Someone on 7club said his turbo spooled 600RPM faster with the larger downpipe. And with a full 3.5" exhaust he had boost creep, but I'll just be using that size for the downpipe, so hopefully I won't have that problem. It'll be a little noisier, but the RB dual tip and resonator should calm that down for the most part.
-
speedjunkie
- Senior Member
- Posts: 5359
- Joined: Wed Jan 02, 2008 9:14
- Location: Colorado Springs
- Contact:
Re: Build thread
I've been thinking about the surge tank setup in the fuel tank and I can't believe I didn't think of this before. I don't even need the surge tank itself. I'll hook the pumps into the same Hydramat, then daisy chain a couple smaller ones together if need be, running into the big hydramat. I would imagine that would work alright. And hopefully I can get a larger inner diameter secondary fuel rail milled so I can go back to the rails being fed together instead of separately. I'm much more comfortable with that.
-
speedjunkie
- Senior Member
- Posts: 5359
- Joined: Wed Jan 02, 2008 9:14
- Location: Colorado Springs
- Contact:
Re: Build thread
I did a few things on the car last night, and just a few things today. Yesterday I got another screw cover for the windshield cowl from Ray Crowe. He sent me one for free a week or two ago but it was broken during shipment, so I told him I'd try to fix it and if it didn't work I'd buy one from him. He sent me another one and I got it yesterday. I love that guy, he's so awesome.
I also got the EGT sensor bungs yesterday, and the fittings to make the coolant lines. I couldn't get the EGT bungs out of my old manifold. They turned out part of the way and just seized. I put anti-seize on them every time, but as it turns out it's only good to 1600 degrees and I see 2000 degrees occasionally lol. Oops.
I looked into getting some enclosed tip diesel sensors but I didn't feel like pulling the current ones out and one of the guys at The Sensor Connection where I get these said the ones I have are heavy duty and should last a long time, and he also told me what symptoms I would see if they failed. Very nice guy with great information.
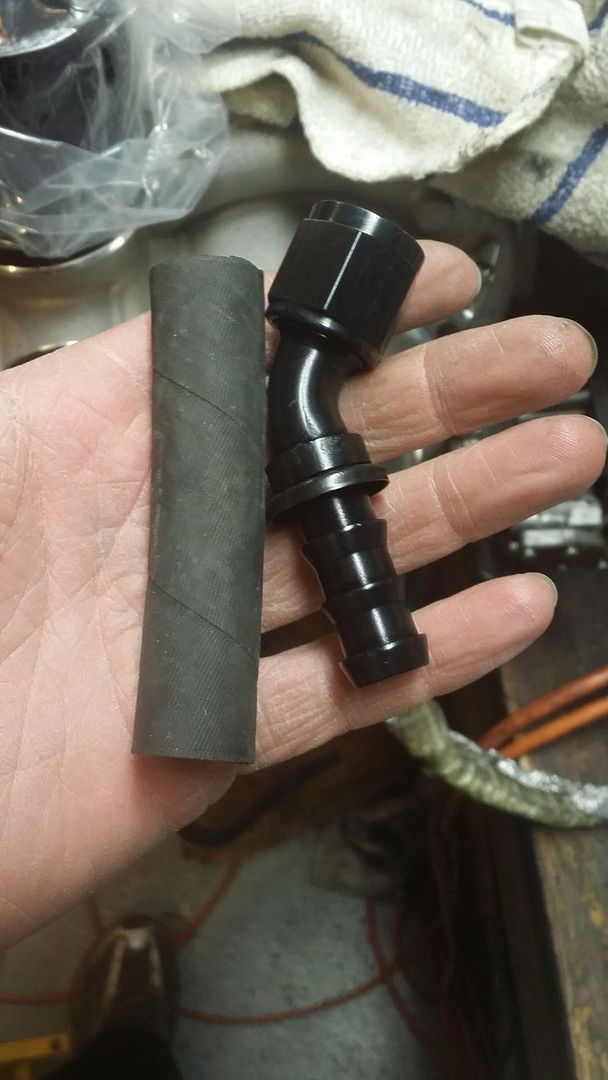
Here are how the lines turned out. I used Push Lok again. Screw that, it's a nightmare getting the hose on lol. I didn't use a clamp on them this time because they say it shortens the life, apparently.
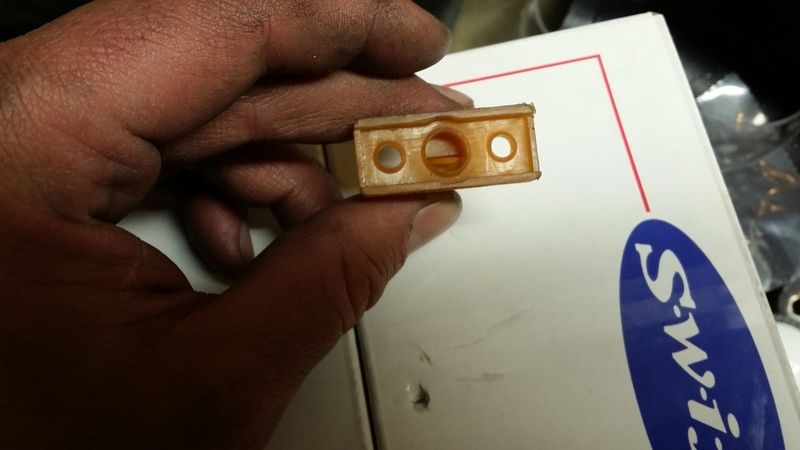
I prepared the pieces to connect the fuel pump to the Hydramat, but I think I'd rather use AN fittings instead of barbs. I put this together today and it came out pretty well. I didn't take any pics today so I don't have any pics of the finished product. Unfortunately I'm not sure if this exact setup will work on my pumps because the bottoms are a bit different. But I'm going to see if it will fit, and I wanted to see if I could even assemble it in the first place.
I removed the mesh and then the plastic structure under the mesh.
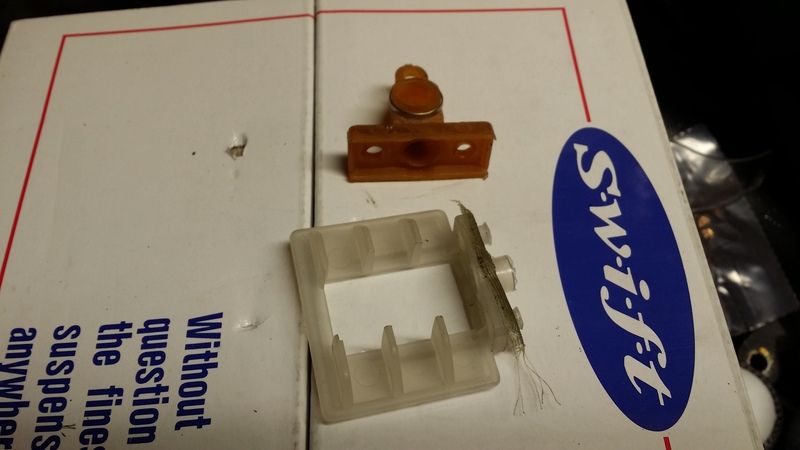
Little did I know I could have just punched it out as a whole assembly haha.
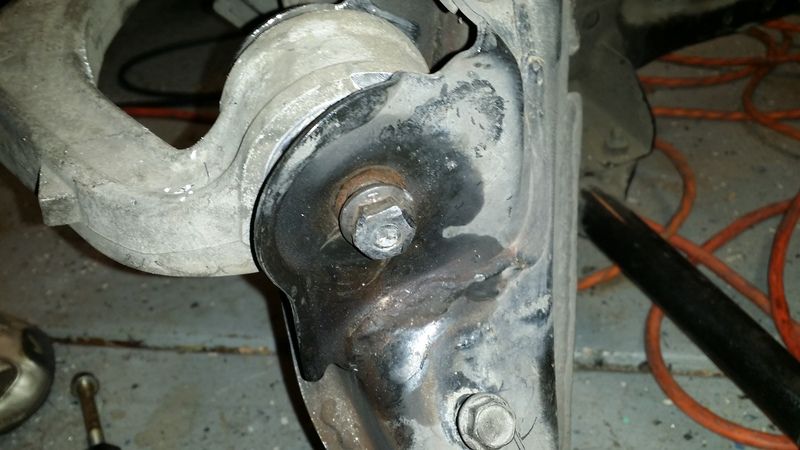
I didn't do a whole lot today. I cleaned up tools and messes around the car so I could get around easily on the creeper. Zico helped me pull the axles tonight, so I was hopeful I'd be able to figure out how to get the rusted bolt/bushing apart so I could get the arm out without dropping the subframe. No luck. So I removed the fuel filter bracket tonight and tomorrow I'll remove the diff and then the subframe and start wailing on the seized bolt and bushing sleeve. Hopefully it comes out without damaging anything. I might already have to get a new bushing, and I already plan to get a new sleeve if possible. The subframe has a little surface rust in some places where the paint or whatever coating chipped away, so I might see if I can get it it cleaned up and powder coated or something. Or maybe I'll just paint it.
Oh yeah, and the CNC guy that Brad put me in touch with has fallen through. I sent him the files for the wheel several days ago and I text him on Friday and he said he got them but forgot to get back with me. Then he said he didn't have the equipment in house to do it and that it would take several hours and cost $800-1200 per face. HAHAHAHA yeah alright. So basically you want me to let you be a middle man since you have no equipment to do the work, and then you want to charge me through the nose, and this whole time I could have been finding someone that CAN do it while you wasted my time not telling me. Get. Bent. So I'm still on the hunt.
I also got the EGT sensor bungs yesterday, and the fittings to make the coolant lines. I couldn't get the EGT bungs out of my old manifold. They turned out part of the way and just seized. I put anti-seize on them every time, but as it turns out it's only good to 1600 degrees and I see 2000 degrees occasionally lol. Oops.

I looked into getting some enclosed tip diesel sensors but I didn't feel like pulling the current ones out and one of the guys at The Sensor Connection where I get these said the ones I have are heavy duty and should last a long time, and he also told me what symptoms I would see if they failed. Very nice guy with great information.
Here are how the lines turned out. I used Push Lok again. Screw that, it's a nightmare getting the hose on lol. I didn't use a clamp on them this time because they say it shortens the life, apparently.

I prepared the pieces to connect the fuel pump to the Hydramat, but I think I'd rather use AN fittings instead of barbs. I put this together today and it came out pretty well. I didn't take any pics today so I don't have any pics of the finished product. Unfortunately I'm not sure if this exact setup will work on my pumps because the bottoms are a bit different. But I'm going to see if it will fit, and I wanted to see if I could even assemble it in the first place.

I removed the mesh and then the plastic structure under the mesh.

Little did I know I could have just punched it out as a whole assembly haha.

I didn't do a whole lot today. I cleaned up tools and messes around the car so I could get around easily on the creeper. Zico helped me pull the axles tonight, so I was hopeful I'd be able to figure out how to get the rusted bolt/bushing apart so I could get the arm out without dropping the subframe. No luck. So I removed the fuel filter bracket tonight and tomorrow I'll remove the diff and then the subframe and start wailing on the seized bolt and bushing sleeve. Hopefully it comes out without damaging anything. I might already have to get a new bushing, and I already plan to get a new sleeve if possible. The subframe has a little surface rust in some places where the paint or whatever coating chipped away, so I might see if I can get it it cleaned up and powder coated or something. Or maybe I'll just paint it.
Oh yeah, and the CNC guy that Brad put me in touch with has fallen through. I sent him the files for the wheel several days ago and I text him on Friday and he said he got them but forgot to get back with me. Then he said he didn't have the equipment in house to do it and that it would take several hours and cost $800-1200 per face. HAHAHAHA yeah alright. So basically you want me to let you be a middle man since you have no equipment to do the work, and then you want to charge me through the nose, and this whole time I could have been finding someone that CAN do it while you wasted my time not telling me. Get. Bent. So I'm still on the hunt.
-
speedjunkie
- Senior Member
- Posts: 5359
- Joined: Wed Jan 02, 2008 9:14
- Location: Colorado Springs
- Contact:
Re: Build thread
Well it looks like my fuel surge idea has been shot down already. Luckily I haven't bought any parts yet haha.
The Hydramat filters out premix. I could run the OMP by itself, but I'm leery about it failing already, and I've even thought about leaving it off altogether, especially if I can't fit the new turbo setup with it in place. ARRRRGGGGHHHH!
The Hydramat filters out premix. I could run the OMP by itself, but I'm leery about it failing already, and I've even thought about leaving it off altogether, especially if I can't fit the new turbo setup with it in place. ARRRRGGGGHHHH!

Re: Build thread
Have you checked with spec wheels in commerce city about machining your wheels? Might be worth a shot.
-
speedjunkie
- Senior Member
- Posts: 5359
- Joined: Wed Jan 02, 2008 9:14
- Location: Colorado Springs
- Contact:
Re: Build thread
Shadowden wrote:Have you checked with spec wheels in commerce city about machining your wheels? Might be worth a shot.
I have not. I hadn't even heard of them. I'll give them a call, thanks!
I swapped out the OMP HTE-R XL for an OMP HTE-R 400 today. It actually fits with zero modification, but it's super tight on me haha. They said the seat will wear in and fit better though. The leg bolsters are skinny enough to fit between the door panel and tranny tunnel cover, and depending on where the seat is the shoulder bolster just barely touches the door panel, or it just barely has enough room. But the halo is slimmer and doesn't even come close to hitting. When I took these pics I had already pulled the tunnel cover out so I could lean on the tunnel to get out of the seat haha. Also keep in mind it's not bolted down, and I think that's going to be the most difficult part when trying to get it on the floor.


I got the diff and subframe pulled out tonight, and I started wailing on the bushing bolt, but it STILL won't break loose. I'm going to try to saw the bolt just inside the arms so I can at least pull the control arm out and hopefully salvage the bushing and the subframe for the most part. But I'm on the hunt for a subframe, control arm, and a full set of bushings just in case. I guess I'll be using anti-seize on these bolts from now on too. I still need to take the axles somewhere to get the hubs off too. I'm getting really sick of this.

-
speedjunkie
- Senior Member
- Posts: 5359
- Joined: Wed Jan 02, 2008 9:14
- Location: Colorado Springs
- Contact:
Re: Build thread
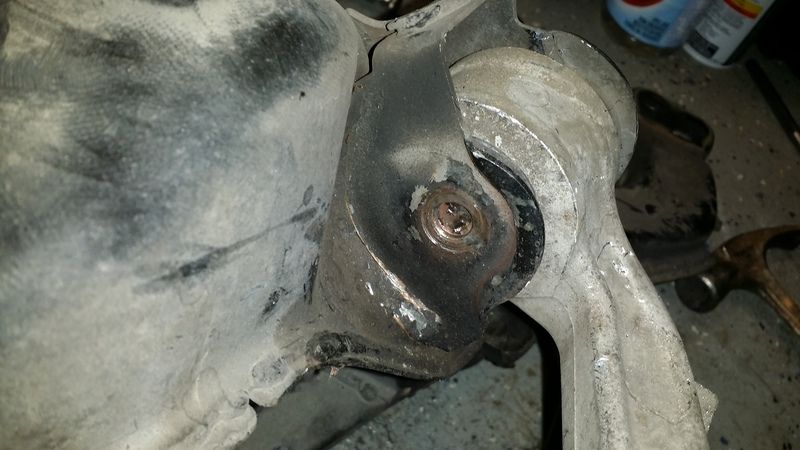
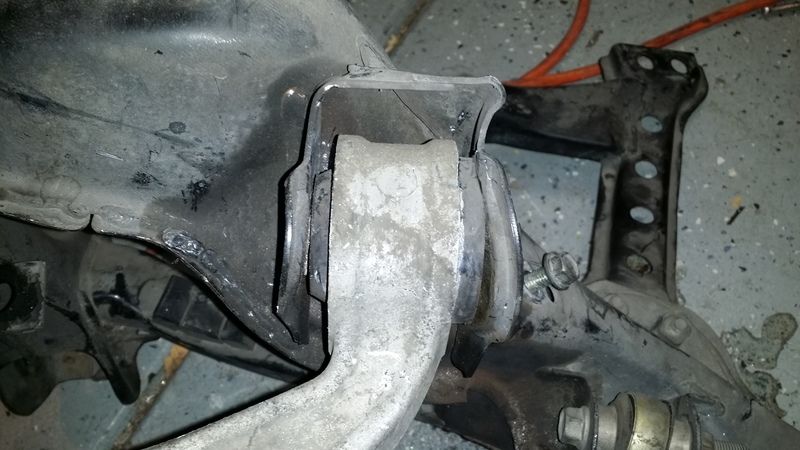
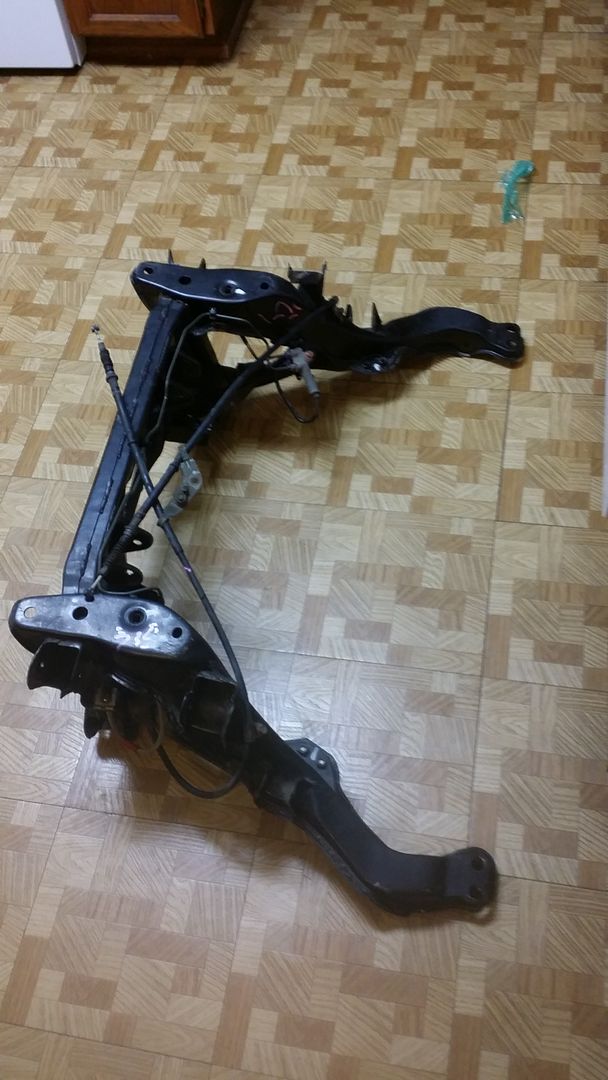
Well I definitely need a replacement subframe now haha. I brought home a sawzall from work and went to town. I got the bolt head off, but unfortunately I couldn't get to the other side of the bushing to saw it off so I started trying to saw through the bushing (by that point I figured it was fried anyway, I hadn't previously considered the heat from sawing) and I started cutting into the control arm. I WILL get it disassembled because I'm that pissed off, but I need a new subframe regardless because I just started beating on the bolt after that and it pretty much ruined the mount. I'm not sure it can be bent back to shape. I've found a couple replacements but the sellers won't get back to me about them.
So as a result I need a 94+ subframe, at least one upper control arm and a bushing, but I'm going to get all the control arms and replace all the bushings.
I keep forgetting to mention I bought this sunroof visor the other day too. I think it looks horrible on the car, but it will bring in the air from the sunroof and maybe I won't need AC after all. I'd still like to get it working though either way.
http://s1358.photobucket.com/user/lauje ... 0Deflector
Re: Build thread
I've definitely had my share of seized bolts, so I feel your frustration. Stripped threads piss me off more though. I'm surprised you didn't grind the nut off and then use a bfh to entice it out.
From looking at your pictures, your subframe does not appear too damaged. Those mounts are made of thin metal, so you can just bend it back. The welds aren't that supportive either. Some folks actually add gussets to that area for strength. Your control arm looks structurally fine as well... just cosmetic damage. Bottomline, I'd save your money on replacement parts and spend it on quality delrin or polyurethane bushings.
I'd sell you my rear subframe + kaaz rear + chromoly axles, but I haven't had the time to install my spare subframe and Ford 8.8 rear. I come to find I easily lose interest on my car nowadays due to the frustrations. Anyway, good luck and keep up the progress.
-
speedjunkie
- Senior Member
- Posts: 5359
- Joined: Wed Jan 02, 2008 9:14
- Location: Colorado Springs
- Contact:
Re: Build thread
I just typed out a long response and lost everything when I tried to copy it. So this will be short lol. I bought the suspension arms I need from a buddy in Cali today and I'm talking to a guy in Maryland about his subframe, but I think I can get a better deal getting the whole subframe assembly and selling off the parts I don't need. My subframe is more damaged than the pics show, and I can't get the arm out of there yet anyway.
The nut only seized on there after I beat the shit out of it lol.
Do you have any pics of the gussets the people did? I'm curious how they did it.
I've had SuperPro bushings since about 06, or whenever it was I swapped them out. I like them so I'm getting them again. And I'm thinking about swapping back to stock toe links and trailing arms. I'm not sure the aftermarket ones do much.
Re: Build thread
speedjunkie wrote:Do you have any pics of the gussets the people did? I'm curious how they did it.
Good luck on finding pictures. It's mainly considered a trade secret. If you're really interested, try calling Speedfab in Florida. They gusset the stock mounting tabs/points of all the rear FD subframes they convert to a Ford 8.8. Since they build some ridiculous 1000+hp FD's...they're all about reinforcing the FD to handle the power.
-
speedjunkie
- Senior Member
- Posts: 5359
- Joined: Wed Jan 02, 2008 9:14
- Location: Colorado Springs
- Contact:
Re: Build thread
I doubt I really need to add gussets so I'll probably pass. This car has been alive 22 years now and this is the first time I've ever had a problem and it's not even from normal wear and tear.
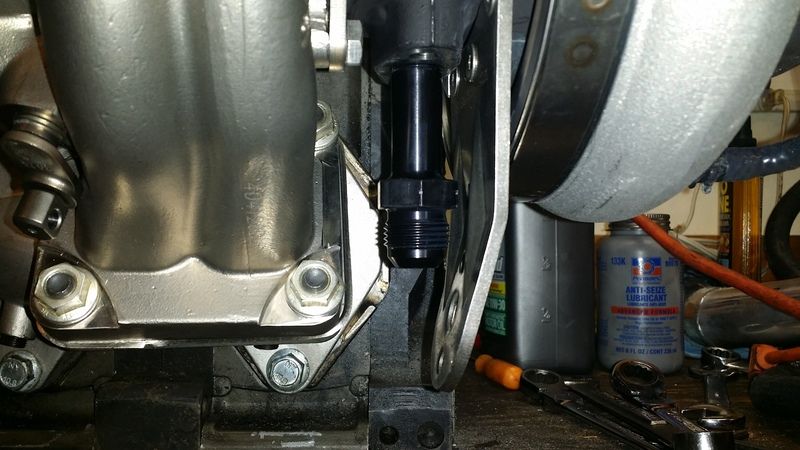
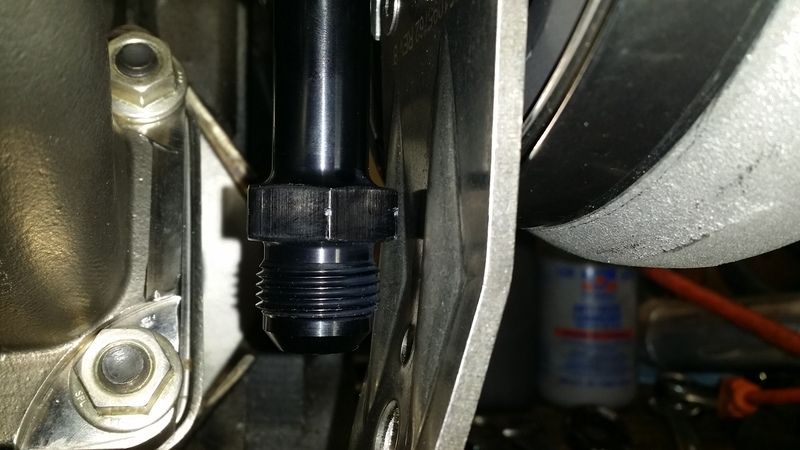
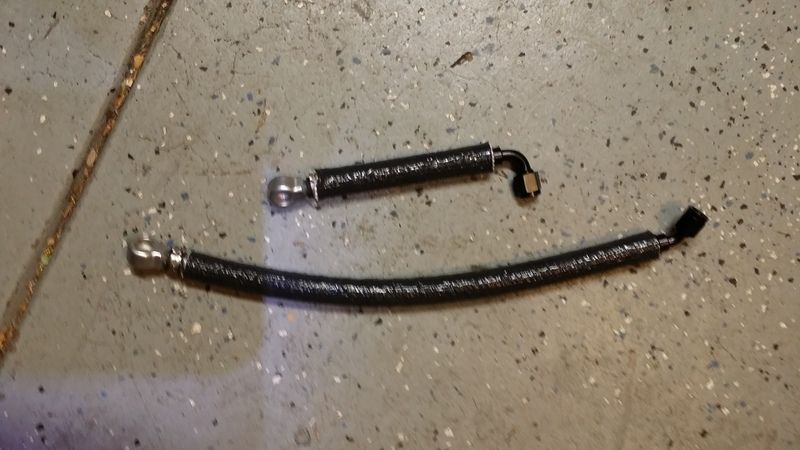
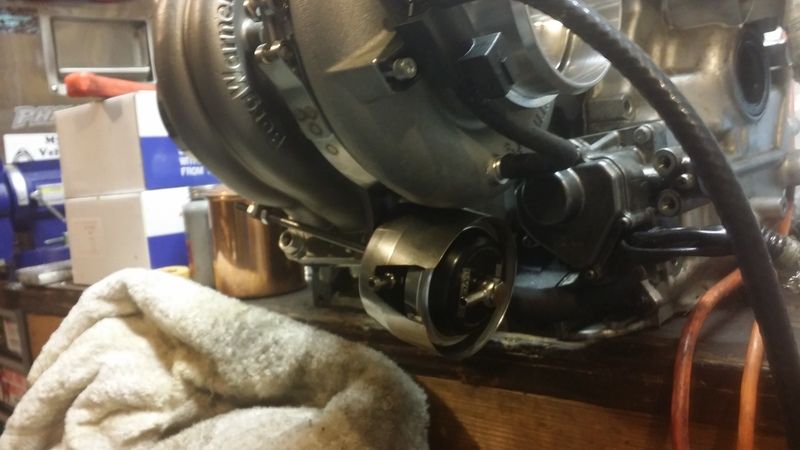
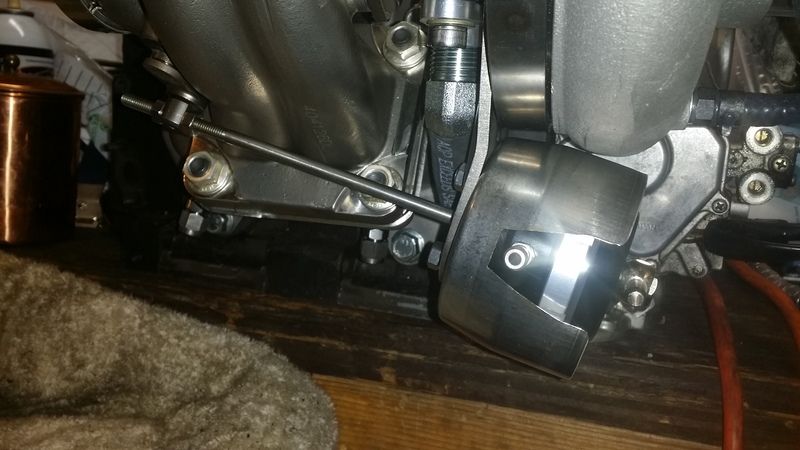
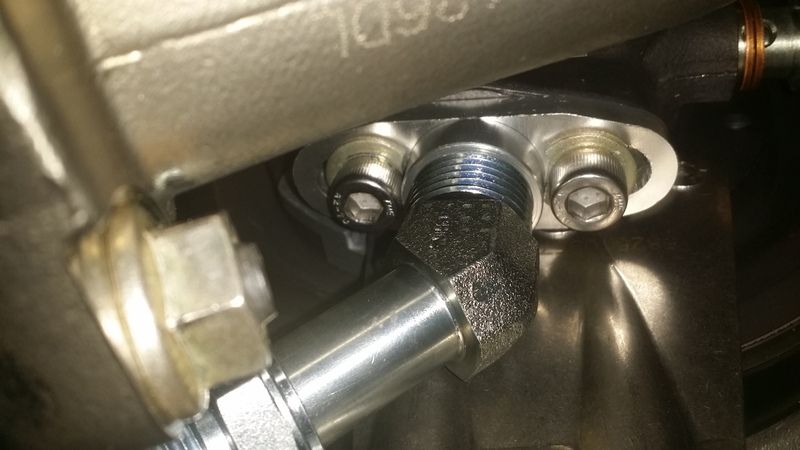
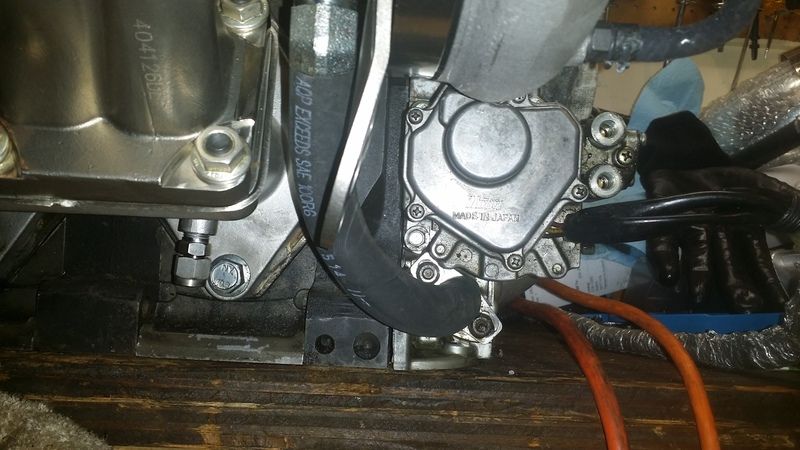
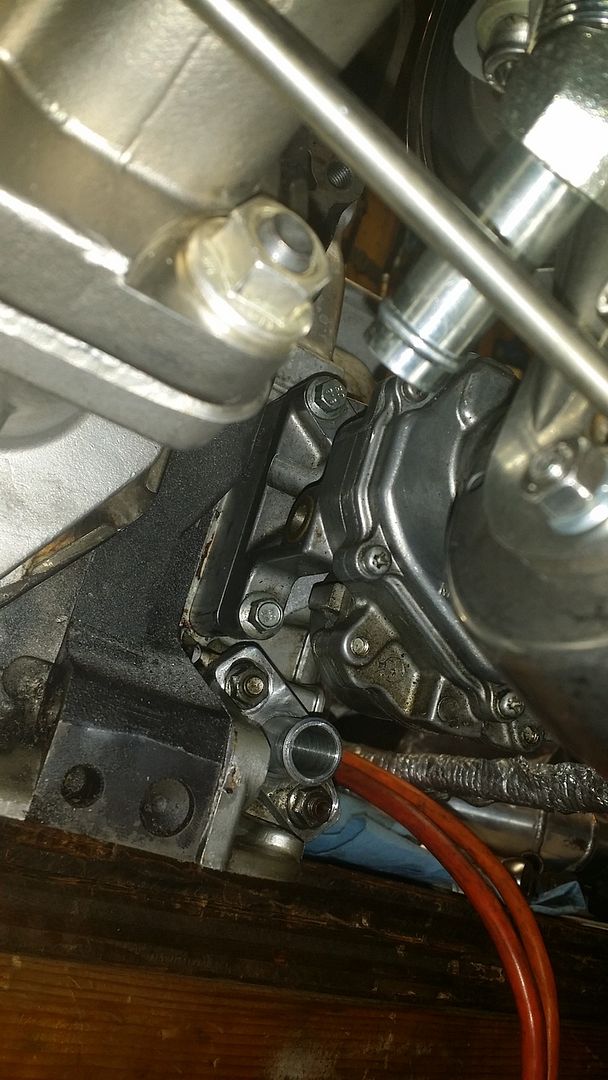
I didn't get a whole lot done today but I plan to do a lot tomorrow. I picked up a front cover from Jason Kaiser and mocked up an oil drain line for the turbo. I tried a couple different types. I'm not sure I'm going to be able to use the AN fitting on the end of the drain tube because the hose is too short so it doesn't have enough flex to be able to disconnect it. I cut a length of hose and put it on and it worked really well, but it's still going to be a pain to disconnect. I'm getting Jason Turton's -10 aluminum hard line tomorrow, I'm going to try to make a line out of that because I could disconnect it easier. I think the only problem I'll run into is being able to bend the line without kinking it so it fits in the tight space, since the diameter is so wide.
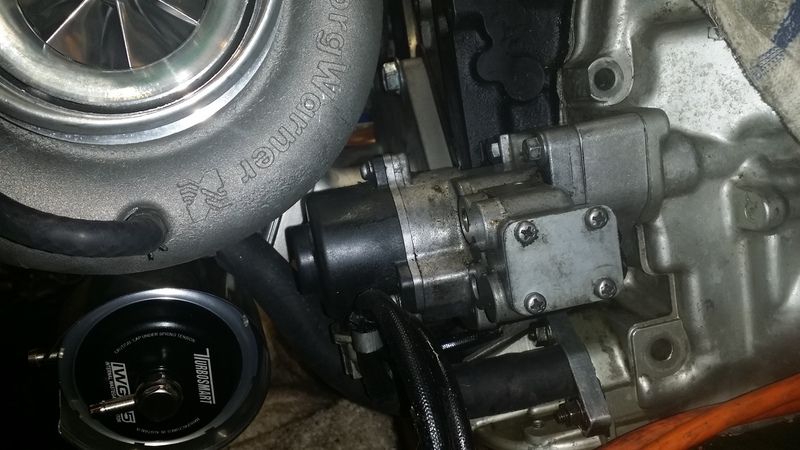
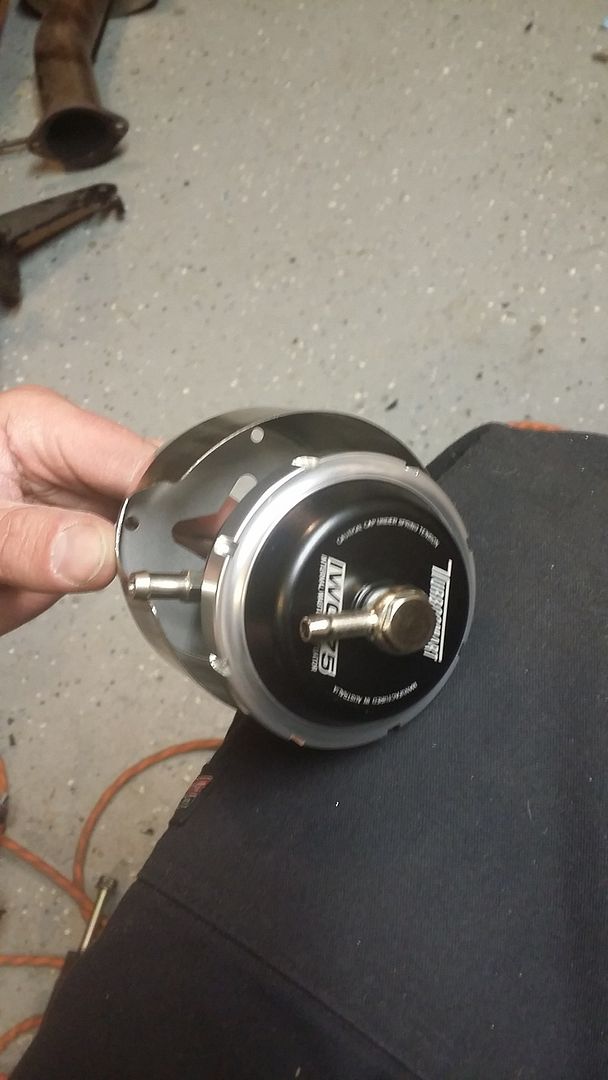
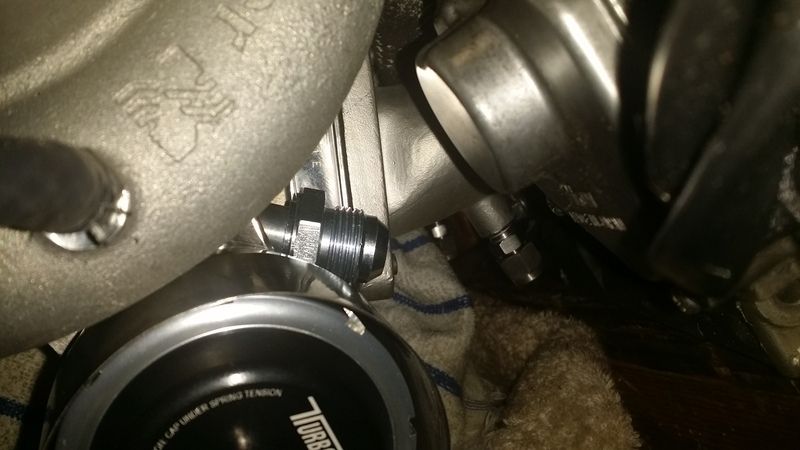
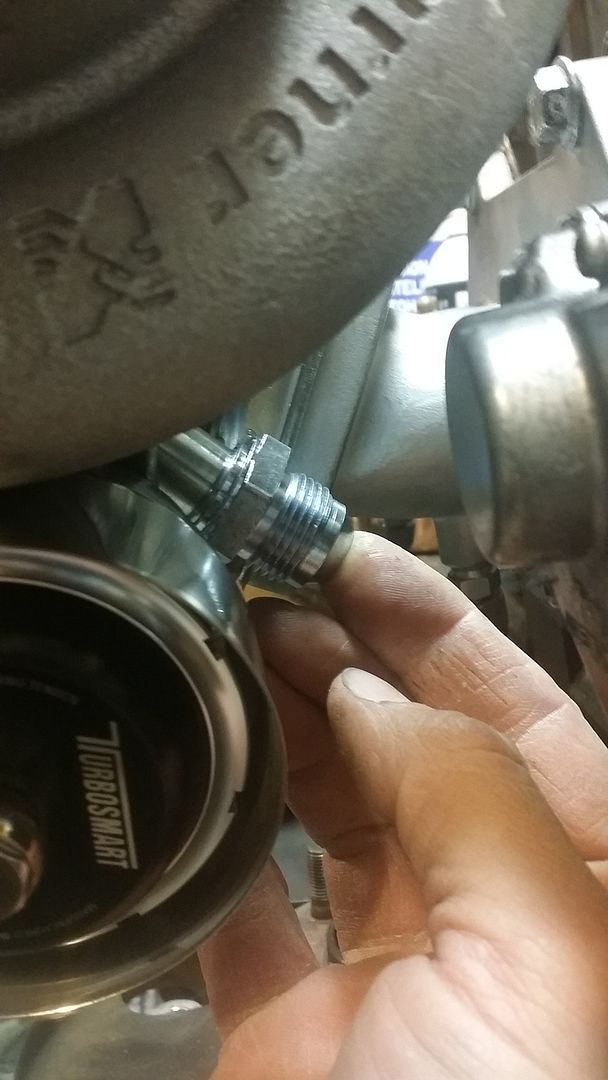
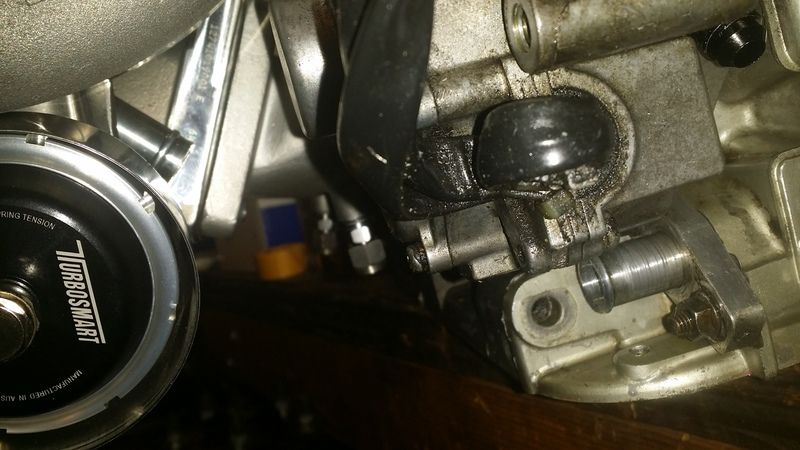
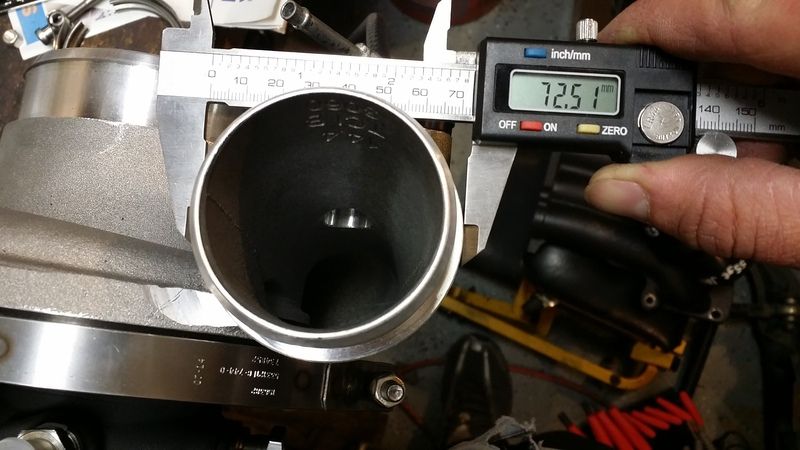
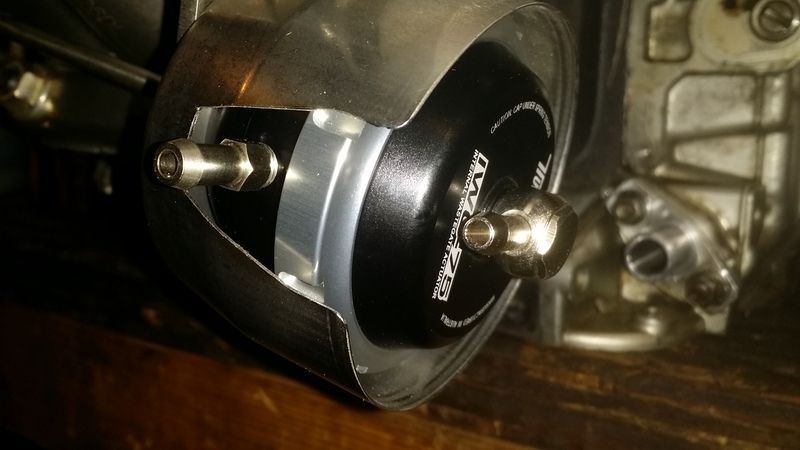
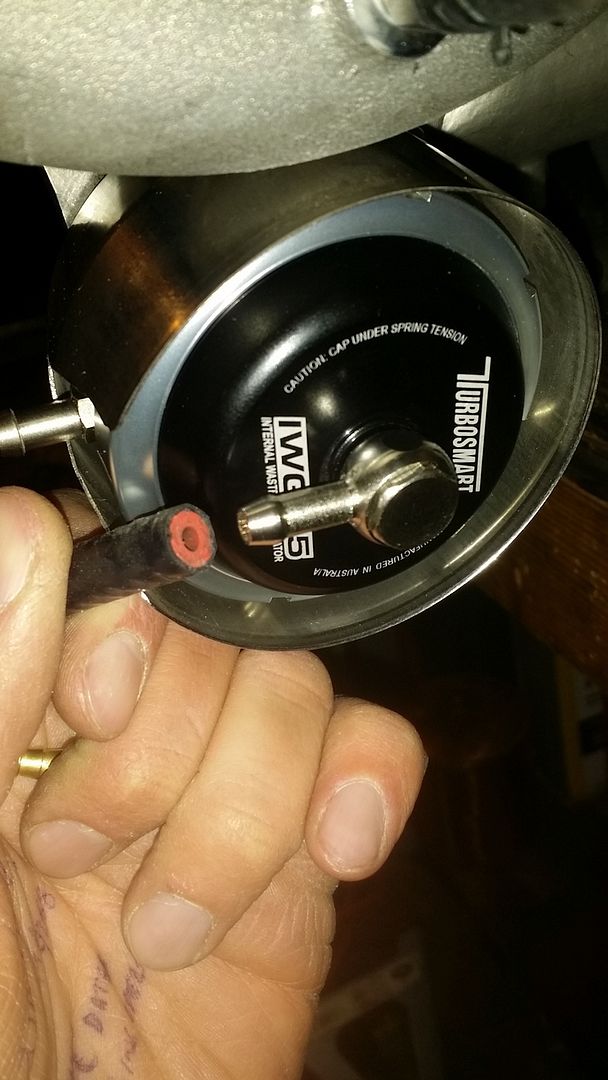
I've gotten a few parts over the last few days. I got the Turbosmart wastegate actuator and heat shield (I had to modify the heat shield because it was blocking the second port on the actuator), the sunroof visor I bought from the guy in Japan (he also has the coin/card tray for in the top of the map pocket, but he wants $125 for it lol), and other random parts. I did some test fitting of the old style OMP for Andy too, it'll only fit with the heat shield removed. I got the vband inlet clamp and flange to put on the compressor housing, but it's about 3mm larger diameter than where it mounts to the housing. I had to modify the aluminum flange for the oil drain because the one I ordered was for the GT40/GT42 and it was too big, so I used a dremel and lengthened the mounting holes inward, and then used a grinder on a couple washers so I could fit them past where the fitting screws in. I also drilled out the inside of the 10AN fitting so I could slide it further up onto the 45 degree fitting to make more space, but it still wasn't enough. I'm saying all this because I have a bunch of pics and I don't feel like putting them throughout the post like usual, corresponding to the text, so I'm just dumping them all together at the bottom lol.

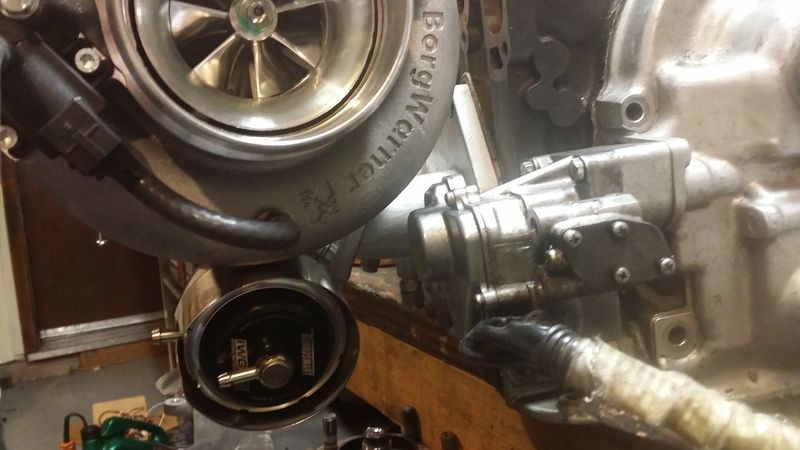


I didn't get a whole lot done today but I plan to do a lot tomorrow. I picked up a front cover from Jason Kaiser and mocked up an oil drain line for the turbo. I tried a couple different types. I'm not sure I'm going to be able to use the AN fitting on the end of the drain tube because the hose is too short so it doesn't have enough flex to be able to disconnect it. I cut a length of hose and put it on and it worked really well, but it's still going to be a pain to disconnect. I'm getting Jason Turton's -10 aluminum hard line tomorrow, I'm going to try to make a line out of that because I could disconnect it easier. I think the only problem I'll run into is being able to bend the line without kinking it so it fits in the tight space, since the diameter is so wide.
I've gotten a few parts over the last few days. I got the Turbosmart wastegate actuator and heat shield (I had to modify the heat shield because it was blocking the second port on the actuator), the sunroof visor I bought from the guy in Japan (he also has the coin/card tray for in the top of the map pocket, but he wants $125 for it lol), and other random parts. I did some test fitting of the old style OMP for Andy too, it'll only fit with the heat shield removed. I got the vband inlet clamp and flange to put on the compressor housing, but it's about 3mm larger diameter than where it mounts to the housing. I had to modify the aluminum flange for the oil drain because the one I ordered was for the GT40/GT42 and it was too big, so I used a dremel and lengthened the mounting holes inward, and then used a grinder on a couple washers so I could fit them past where the fitting screws in. I also drilled out the inside of the 10AN fitting so I could slide it further up onto the 45 degree fitting to make more space, but it still wasn't enough. I'm saying all this because I have a bunch of pics and I don't feel like putting them throughout the post like usual, corresponding to the text, so I'm just dumping them all together at the bottom lol.


-
speedjunkie
- Senior Member
- Posts: 5359
- Joined: Wed Jan 02, 2008 9:14
- Location: Colorado Springs
- Contact:
Re: Build thread
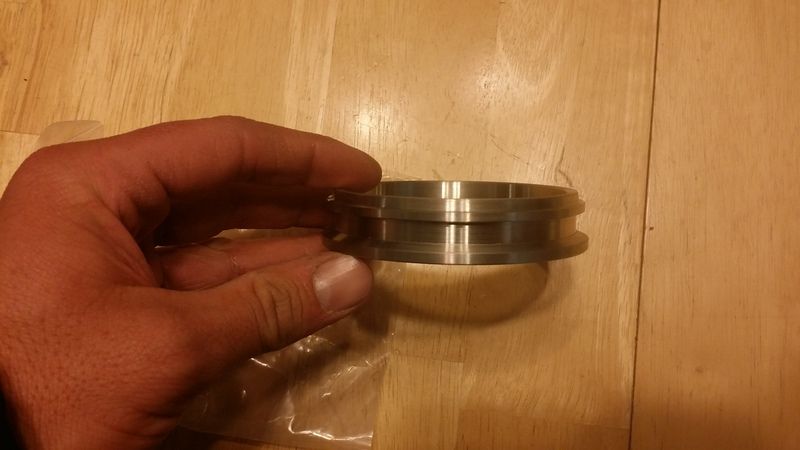
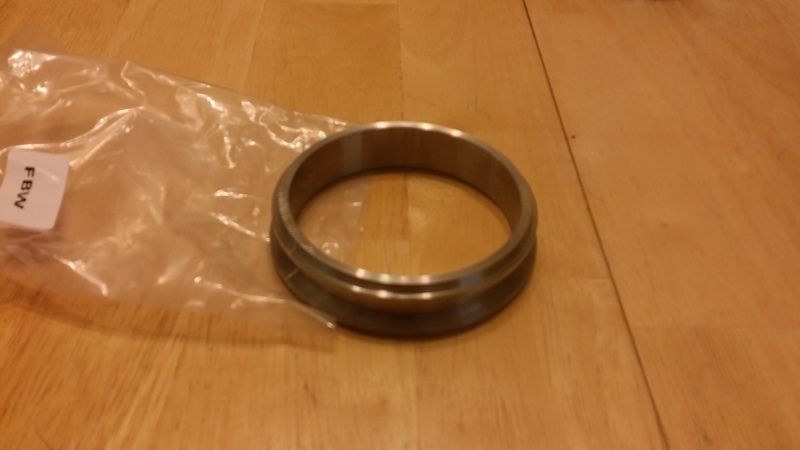
Ok so the Vband flange and clamp from Full Race isn't actually for the compressor outlet, which makes sense by what they named it because it's actually to use for the turbine housing coming off the manifold, instead of using a T4 flange or whatever. Vibrant sells flanges but I didn't see the clamp yet.
I borrowed the -10 hardline from Jason Turton (is borrowed the right word if I'm using some of it but returning most of it? lol) and I picked up the tube nut and sleeve from Whisler today. I stopped by Pep Boys on South Academy to look yesterday and they had the tube nut and sleeve for -6 and -8, but for -10 they only had the tube nut. SO DUMB. Anyway, I'm borrowing a bender from Bobby Crivin tomorrow and I'll see if I can make that work for an oil drain.
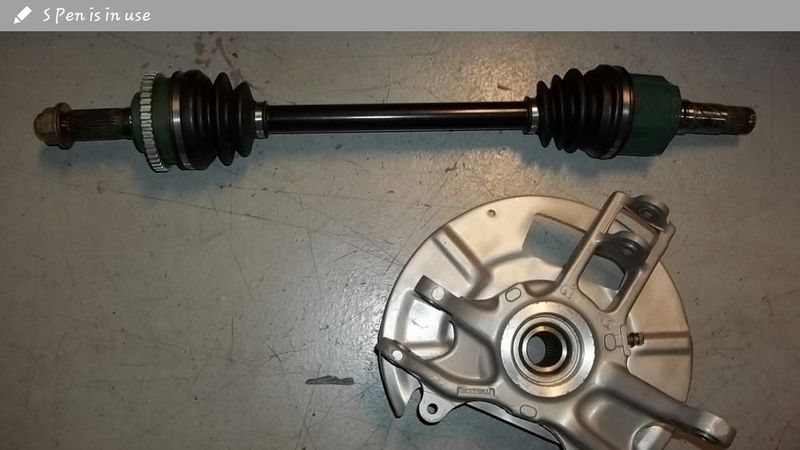
I tried pressing my axles/spindles out of the hubs on Sunday at the hobby shop on the Academy, but I broke the knuckle on one of them, so I bought a couple from a buddy on facebook and 7club, along with all the suspension arms. And I decided I'm done playing with this stuff for now so I found some axles from an older member on 7club that I've bought stuff from before, but he only has the right side pulled out right now and will be away on business for 2-3 weeks so he won't be able to send them until then. Normally I'd be freaking out but I have enough to work on so it's not as big a deal. He also has the knuckles and all the parts are in really good shape because the donor car was really low mileage, so I bought those knuckles too just in case haha, mainly because he had such a great deal on everything. Cheapest I'd seen so far, and the nicest pieces. Here are the ones he pulled off so far.
I ran into some issues getting the subframe but Andy helped me out. One guy on facebook had one for $200 but he said FedEx Freight wanted $400 to ship it. LOL yeah right. Then another guy on eBay had one for $250 plus $95 shipping, I offered him $200 (not including shipping) and he declined the offer and blocked me from bidding. Oooooo-kaaaaay. I messaged him but I don't think he responded yet. I was telling Andy about it and he offered to buy it and I paid him back so we did that. That got shipped yesterday so hopefully it won't take too long to get here and hopefully it'll be what was in the pics.
I bought almost all the bushings last night on J Auto. I bought their rebuildable pillow ball bushings, a full set of Super Pro bushings, and I'm trying to decide if I want to go with the OEM lower control arm bushings in the rear again or if I want to do the Mazdacomp bushings which are 40% stiffer. I've been pretty happy with the OEM bushings but I hear the competition ones are nice too. I'm not sure it'll make much difference either way.
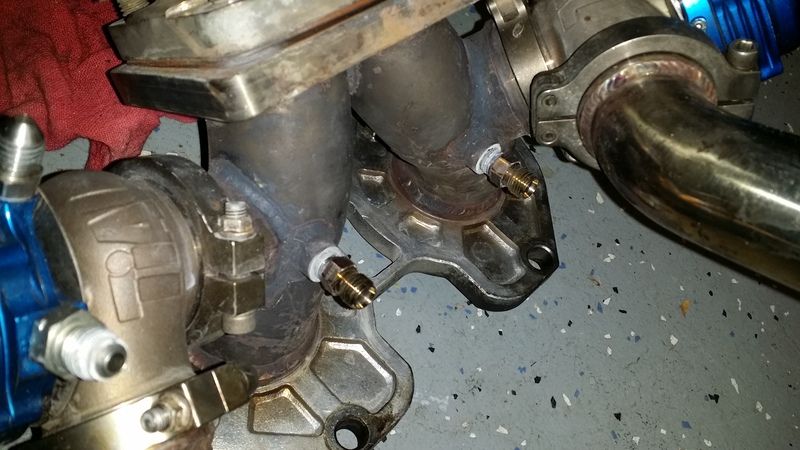
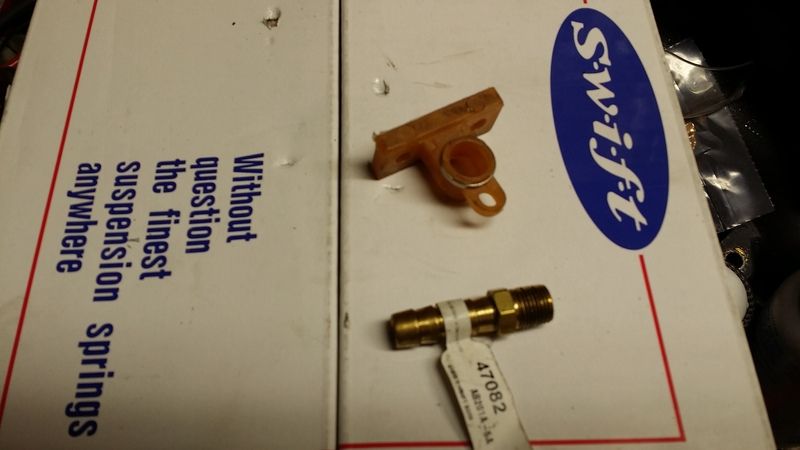
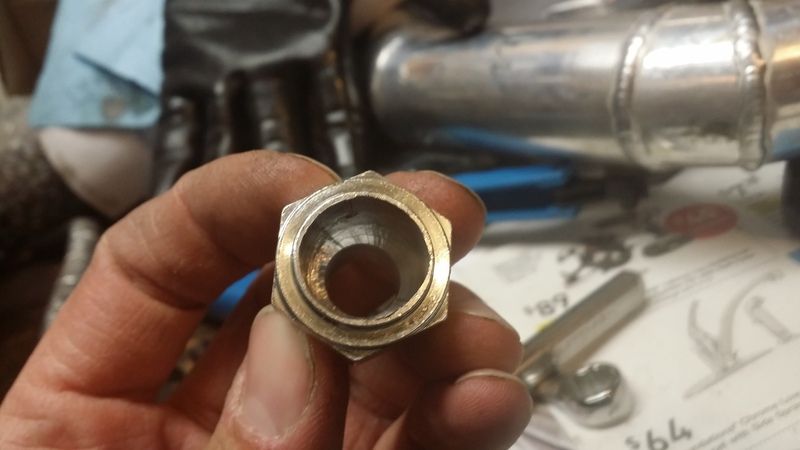
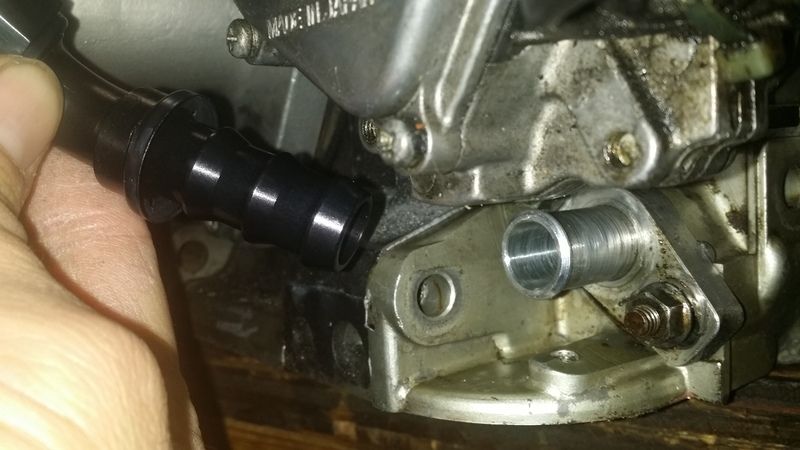
I need to see if I can find smaller nipple fittings to use with the vacuum line. I'm not sure how much luck I'll have with this though. If I could find something just a bit smaller, the size of the brass fitting, it would help a lot.

I got the 3" to 3.5" Vband flange from Treadstone tonight. It's really nice, but I'll have to have it milled down because it's too thick with the turbo for the clamp to close.
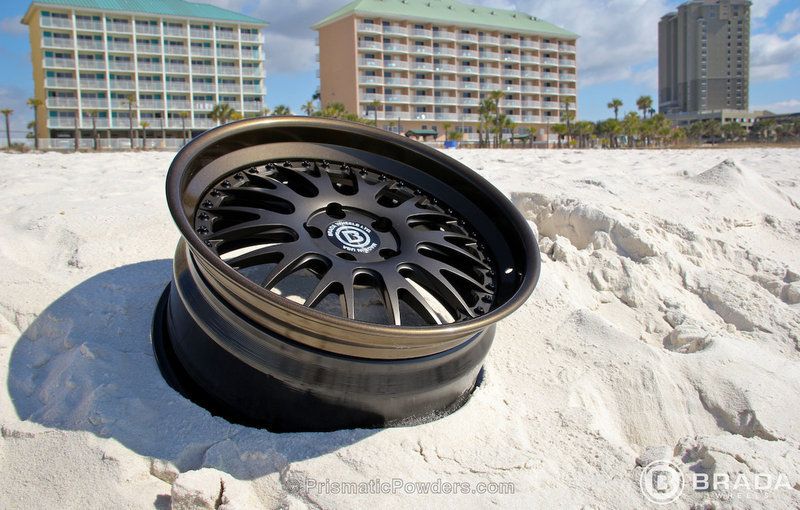
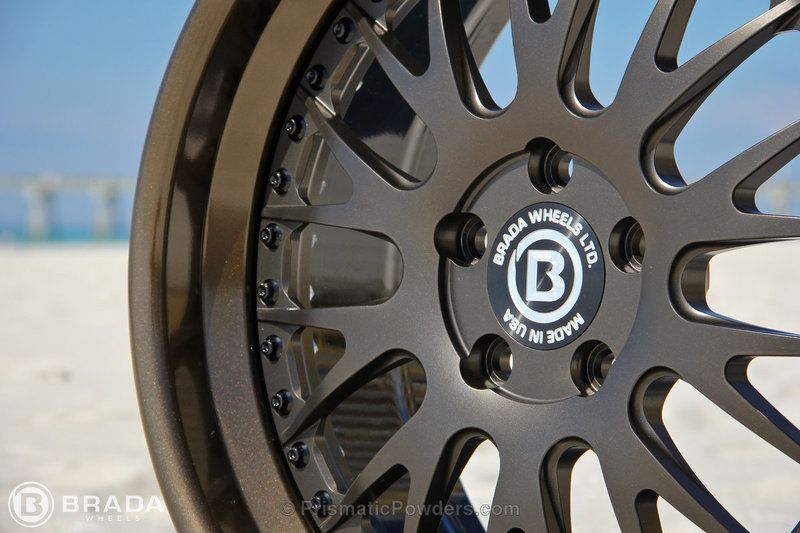
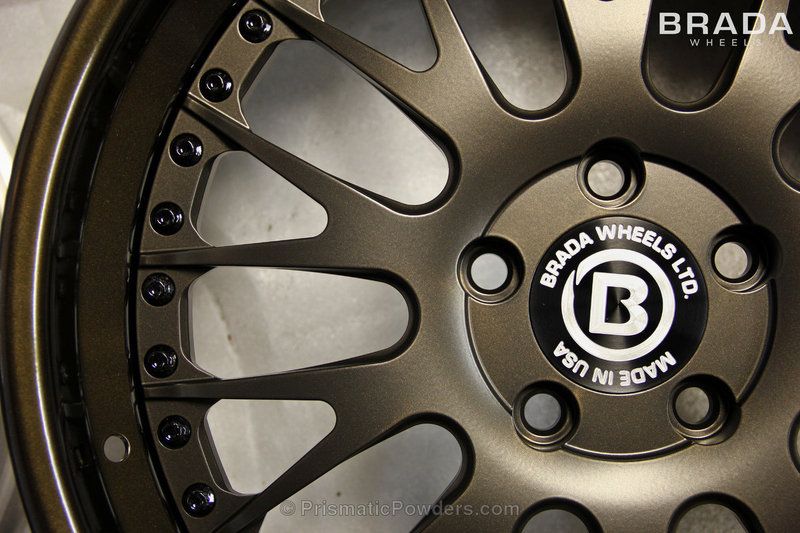
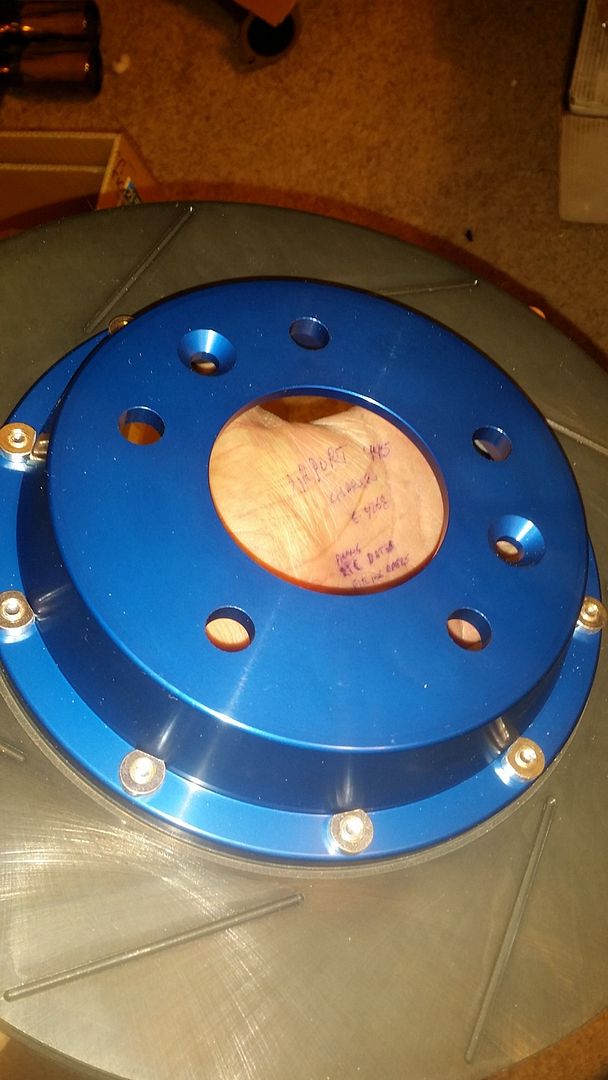
I think I finally picked a color for the calipers too. US Burnt Bronze.
http://www.prismaticpowders.com/gallery ... Ink-Black/
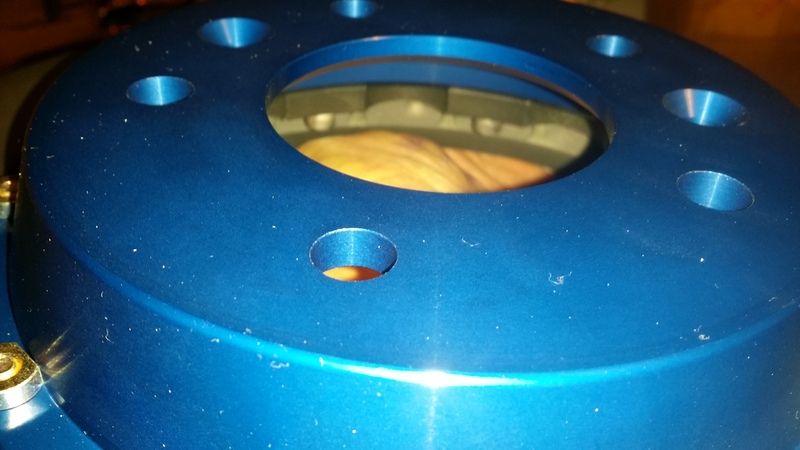
I like this color because I think it will go well with the blue rotor hats, it should be dark enough for the raw "mazda" lettering to be seen well, and in low light it will look black. I was thinking about doing the suspension arms in this color too but it might be too much. What do you guys think? I like the blue/gold combo Subaru uses, but I didn't want them as flashy as gold, so I think this is a good compromise. The face of this wheel is the color I'm looking at. And I put a pic of the rotor so you can see side by side.
I borrowed the -10 hardline from Jason Turton (is borrowed the right word if I'm using some of it but returning most of it? lol) and I picked up the tube nut and sleeve from Whisler today. I stopped by Pep Boys on South Academy to look yesterday and they had the tube nut and sleeve for -6 and -8, but for -10 they only had the tube nut. SO DUMB. Anyway, I'm borrowing a bender from Bobby Crivin tomorrow and I'll see if I can make that work for an oil drain.
I tried pressing my axles/spindles out of the hubs on Sunday at the hobby shop on the Academy, but I broke the knuckle on one of them, so I bought a couple from a buddy on facebook and 7club, along with all the suspension arms. And I decided I'm done playing with this stuff for now so I found some axles from an older member on 7club that I've bought stuff from before, but he only has the right side pulled out right now and will be away on business for 2-3 weeks so he won't be able to send them until then. Normally I'd be freaking out but I have enough to work on so it's not as big a deal. He also has the knuckles and all the parts are in really good shape because the donor car was really low mileage, so I bought those knuckles too just in case haha, mainly because he had such a great deal on everything. Cheapest I'd seen so far, and the nicest pieces. Here are the ones he pulled off so far.

I ran into some issues getting the subframe but Andy helped me out. One guy on facebook had one for $200 but he said FedEx Freight wanted $400 to ship it. LOL yeah right. Then another guy on eBay had one for $250 plus $95 shipping, I offered him $200 (not including shipping) and he declined the offer and blocked me from bidding. Oooooo-kaaaaay. I messaged him but I don't think he responded yet. I was telling Andy about it and he offered to buy it and I paid him back so we did that. That got shipped yesterday so hopefully it won't take too long to get here and hopefully it'll be what was in the pics.
I bought almost all the bushings last night on J Auto. I bought their rebuildable pillow ball bushings, a full set of Super Pro bushings, and I'm trying to decide if I want to go with the OEM lower control arm bushings in the rear again or if I want to do the Mazdacomp bushings which are 40% stiffer. I've been pretty happy with the OEM bushings but I hear the competition ones are nice too. I'm not sure it'll make much difference either way.
I need to see if I can find smaller nipple fittings to use with the vacuum line. I'm not sure how much luck I'll have with this though. If I could find something just a bit smaller, the size of the brass fitting, it would help a lot.


I got the 3" to 3.5" Vband flange from Treadstone tonight. It's really nice, but I'll have to have it milled down because it's too thick with the turbo for the clamp to close.


I think I finally picked a color for the calipers too. US Burnt Bronze.
http://www.prismaticpowders.com/gallery ... Ink-Black/
I like this color because I think it will go well with the blue rotor hats, it should be dark enough for the raw "mazda" lettering to be seen well, and in low light it will look black. I was thinking about doing the suspension arms in this color too but it might be too much. What do you guys think? I like the blue/gold combo Subaru uses, but I didn't want them as flashy as gold, so I think this is a good compromise. The face of this wheel is the color I'm looking at. And I put a pic of the rotor so you can see side by side.


-
speedjunkie
- Senior Member
- Posts: 5359
- Joined: Wed Jan 02, 2008 9:14
- Location: Colorado Springs
- Contact:
Re: Build thread
I got the subframe tonight. It's in pretty good shape. I haven't seen anything wrong with it yet. Now I'm trying to think of a way to mount the fuel filter panel to it without drilling holes into it.
I also bought some seals for the Rotary Extreme toe links and trailing arms. They are exactly like the original ones and didn't cost all that much. I got them from Baker Precision after seeing people mention them on 7club. http://www.bakerprecision.com/rodacc.htm Part number SE-010, I had to get 12 of them, it came out to almost $40 before shipping. I don't think that's too bad.
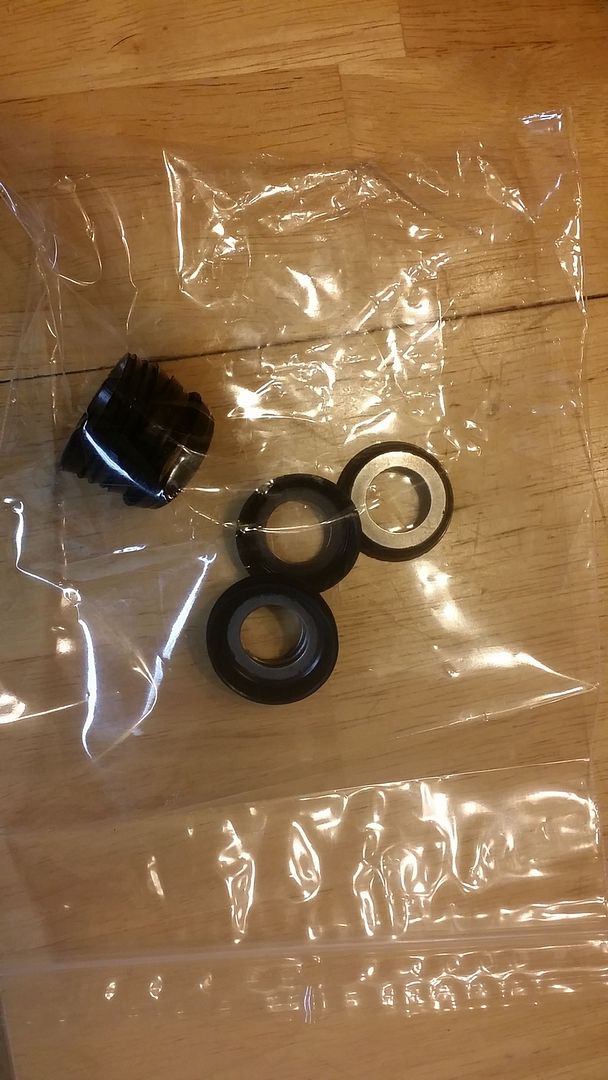

I also bought some seals for the Rotary Extreme toe links and trailing arms. They are exactly like the original ones and didn't cost all that much. I got them from Baker Precision after seeing people mention them on 7club. http://www.bakerprecision.com/rodacc.htm Part number SE-010, I had to get 12 of them, it came out to almost $40 before shipping. I don't think that's too bad.

Who is online
Users browsing this forum: speedjunkie and 163 guests